
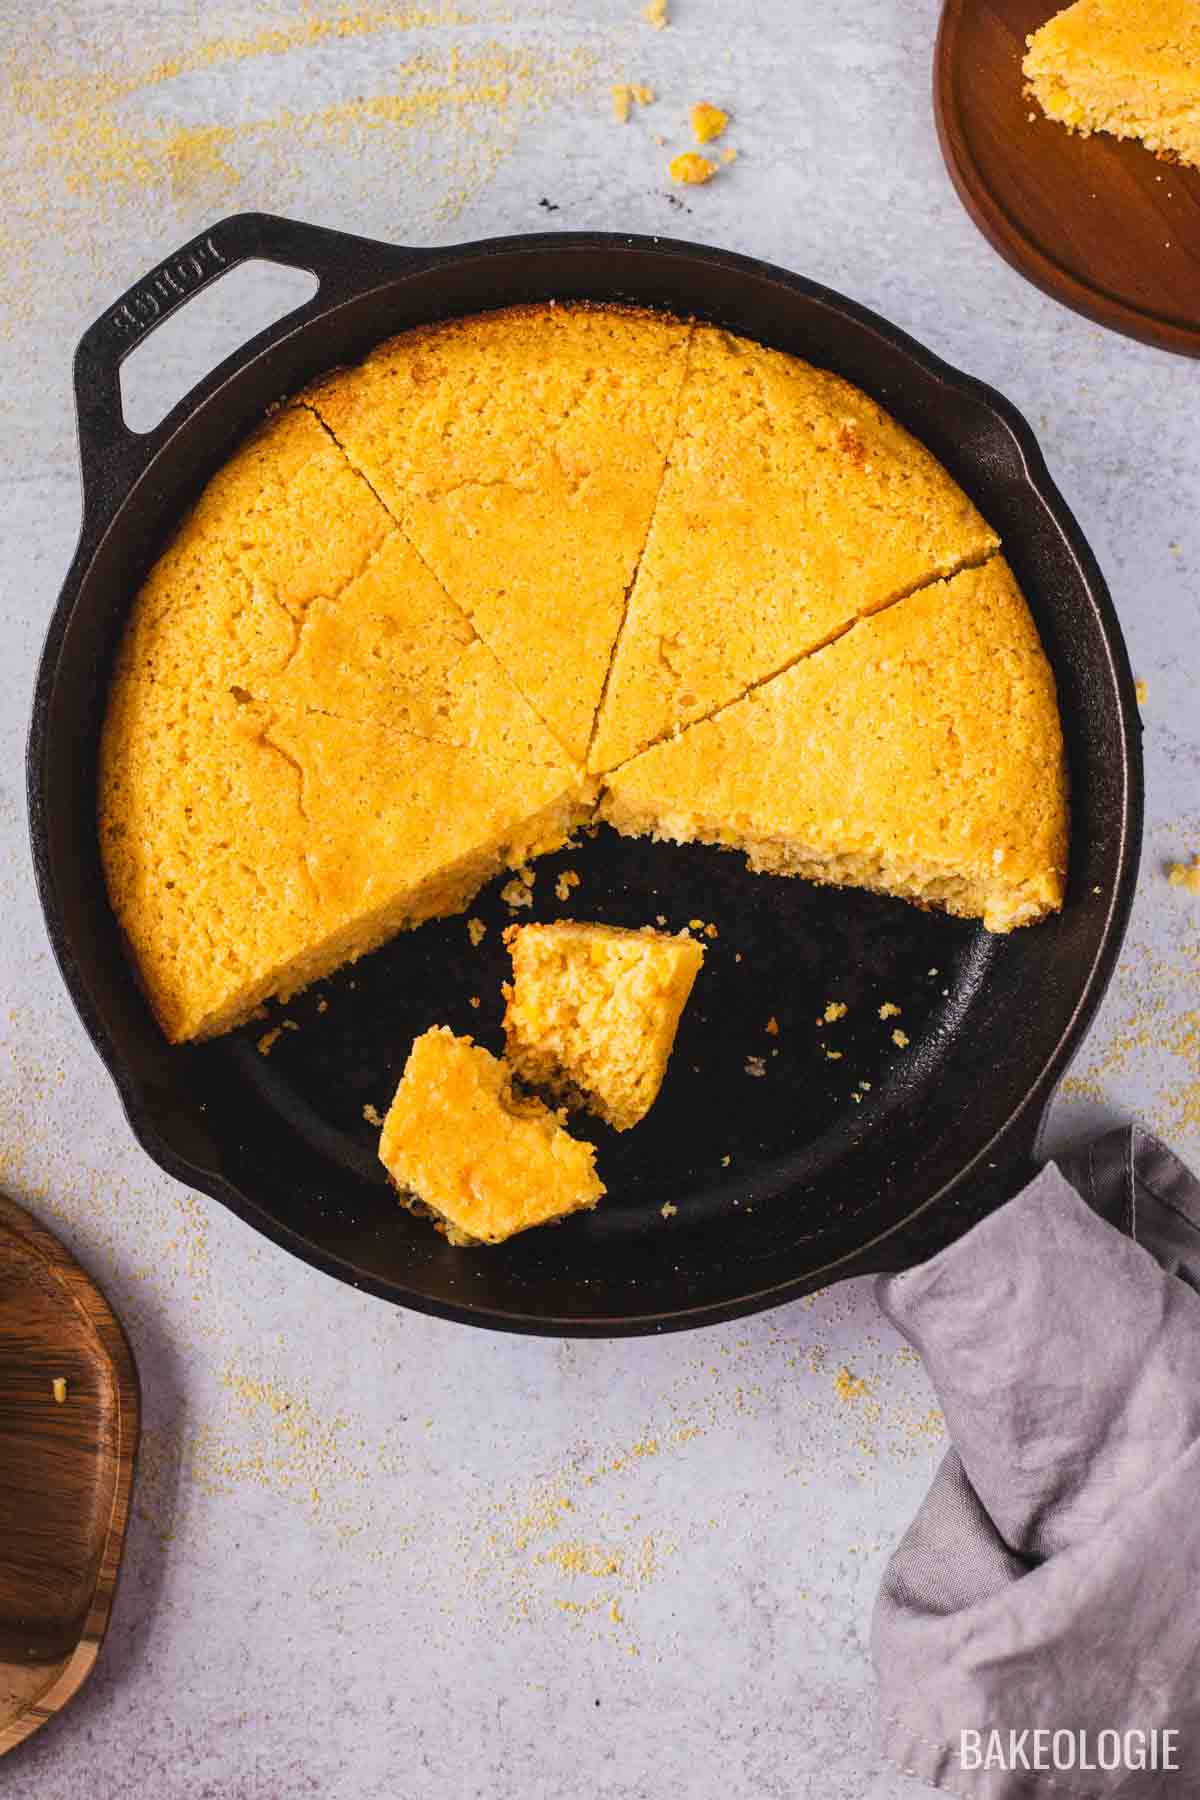
Nothing beats the satisfying crackle of a golden-brown crust as you cut into freshly baked cornbread straight from a cast iron skillet. That distinctive contrast between the crispy, caramelized edges and the tender, moist interior is what makes this buttermilk cornbread recipe for cast iron skillet a timeless classic. The moment you pull it from the oven, filling your kitchen with the comforting aroma of toasted corn and buttermilk, you’ll understand why generations have relied on this simple yet perfect pairing of ingredients and cookware.
Cast iron’s superior heat retention transforms ordinary cornbread into something extraordinary—creating that sought-after crunchy perimeter while keeping the center beautifully moist. When executed properly, this buttermilk cornbread recipe cast iron method delivers consistent results that elevate any meal from ordinary to memorable. Whether you’re serving it alongside a steaming bowl of chili on a cold winter night or bringing it to a summer barbecue, mastering this technique ensures you’ll never settle for dry, crumbly cornbread again.
Preheating Your Cast Iron Skillet Properly

The foundation of exceptional cast iron cornbread begins with how you prepare your skillet—this single step makes the difference between sticking disasters and that coveted crispy crust. Start by placing your seasoned cast iron skillet in a cold oven, then turn the oven to 425°F. This gradual heating prevents thermal shock that could damage older skillets while ensuring even temperature distribution.
After 15 minutes of preheating, carefully remove the skillet using heavy-duty oven mitts—remember that both the handle and body will be extremely hot. Immediately add one tablespoon of high-smoke-point oil like canola or vegetable oil (avoid olive oil which can burn), swirling to coat the entire surface including halfway up the sides. You’re aiming for that perfect shimmering stage where the oil flows like water but isn’t smoking.
Critical visual cue: When a drop of water flicked onto the surface dances and evaporates instantly, your skillet has reached the ideal temperature. Work quickly at this stage—returning the skillet to the oven for just 2 minutes ensures it’s screaming hot when the batter hits it, creating that essential initial sear that prevents sticking and builds flavor through the Maillard reaction.
Essential Ingredients for Authentic Southern-Style Cornbread
This buttermilk cornbread recipe cast iron variation stays true to Southern tradition while delivering consistent results. Measure these ingredients precisely for optimal texture—cornbread chemistry depends on the right balance of components.
Dry Ingredients:
– 1½ cups medium-grind cornmeal (stone-ground preferred for authentic texture)
– 1 cup all-purpose flour (provides necessary structure)
– 1 tbsp baking powder (for lift without excessive rise)
– ½ tsp baking soda (reacts with buttermilk for tenderness)
– 1 tsp fine sea salt (enhances flavor complexity)
Wet Ingredients:
– 1¼ cups full-fat buttermilk (room temperature—cold inhibits rise)
– 2 large eggs (room temperature for even incorporation)
– 3 tbsp melted butter (cooled slightly—adds richness without greasiness)
– 1 tbsp honey (optional for subtle sweetness)
Why these measurements matter: Traditional Southern cornbread uses minimal flour (sometimes none), creating that distinctive crumbly texture. The 1:1.5 flour-to-cornmeal ratio here strikes the perfect balance between structural integrity and authentic texture. Full-fat buttermilk provides the necessary acidity to activate the baking soda while contributing moisture that prevents dryness—a common cornbread pitfall.
Mixing Technique That Prevents Tough Cornbread
How you combine ingredients determines whether your cornbread will be tender or tough—follow this precise mixing sequence for guaranteed success. Start by whisking dry ingredients in a large bowl until no streaks remain, ensuring leavening agents are evenly distributed. Create a well in the center, then pour in your room-temperature wet ingredients all at once.
Critical step: Use a rubber spatula to fold the mixture with 10-12 deliberate strokes, stopping when just a few streaks of dry ingredients remain. Overmixing develops gluten in the flour, resulting in rubbery cornbread—a mistake even experienced bakers make. The batter should resemble thick pancake batter with visible lumps; these pockets of unmixed flour actually contribute to the desired crumbly texture.
Pro tip: Let the batter rest for 5 minutes before baking. This allows the cornmeal to hydrate fully, preventing that unpleasant raw, gritty texture in the finished product. During this rest period, return your greased skillet to the oven to maintain optimal temperature.
Baking Process for Crispy Edges and Moist Center
The high-heat baking method transforms your prepared batter into perfect cornbread—follow these precise timing guidelines. Immediately pour the rested batter into your scorching hot skillet (it should sizzle dramatically), using your spatula to spread it evenly to the edges. The initial sizzle creates instant crust formation while the interior bakes through.
Bake at 425°F for exactly 20-23 minutes—set a timer! Your cornbread is done when:
– The top develops deep golden-brown patches (not uniform golden)
– Edges pull cleanly away from the skillet sides
– Center springs back lightly when gently pressed
– Toothpick inserted in center shows moist crumbs (not wet batter)
Critical mistake to avoid: Opening the oven during the first 15 minutes causes temperature fluctuations that can collapse your cornbread. If needed, check doneness through the oven window. For extra-crispy bottoms, rotate the skillet 180 degrees halfway through baking to compensate for oven hot spots.
Serving Techniques That Preserve Texture
Cutting too soon destroys your carefully crafted texture—follow this cooling protocol for perfect slices. Let the cornbread rest in the skillet for exactly 10 minutes; this allows the structure to set without continuing to cook. Use a sharp serrated knife dipped in hot water to cut clean wedges without crushing the delicate crumb.
Optimal serving temperature: Cornbread tastes best between 140-160°F—warm but not hot enough to melt butter instantly. Serve with salted butter first, allowing it to melt into the surface before adding honey or other toppings. For gatherings, keep extra cornbread warm in a 200°F oven on a wire rack (not in the skillet) to maintain crust integrity.
Storage solution: Wrap completely cooled leftovers in clean kitchen towels before placing in paper bags—this wicks moisture while preventing sogginess. Never refrigerate cornbread, as this accelerates staling. For longer storage, freeze individual portions wrapped tightly in plastic, then foil.
Expert Adjustments for Different Palates and Diets
Customize this buttermilk cornbread recipe cast iron method without compromising texture. For sweeter Northern-style cornbread, add 2-3 tablespoons of sugar to the dry ingredients. If making dairy-free, substitute buttermilk with 1¼ cups unsweetened almond milk plus 1 tbsp apple cider vinegar (let sit 5 minutes before using), and replace butter with coconut oil.
Flavor variations that work:
– Add ½ cup fresh corn kernels and 1 diced jalapeño for Southwest flair
– Mix in 1 cup shredded sharp cheddar and 2 tbsp chopped chives
– Fold in ½ cup crumbled cooked bacon and 2 tbsp chopped fresh rosemary
Critical note: When adding mix-ins, reduce the base liquid by 2 tablespoons to maintain proper batter consistency. Always pat ingredients dry with paper towels to prevent excess moisture from weighing down your batter.
Troubleshooting Soggy, Dry, or Crumbly Cornbread
Solve common problems with these specific fixes based on decades of cast iron cornbread experience. If your cornbread sticks despite proper seasoning, your skillet wasn’t hot enough before adding batter—next time, let the greased skillet return to the oven for 3 full minutes before pouring.
For crumbly cornbread that won’t hold together:
– Increase flour to 1¼ cups while reducing cornmeal to 1¼ cups
– Add one extra egg yolk for binding without making it cakey
– Ensure buttermilk is full-fat (low-fat versions lack necessary moisture)
If the center remains raw while edges burn:
– Lower oven temperature to 400°F and extend baking time by 5 minutes
– Place skillet on a lower oven rack position
– Tent loosely with foil after first 15 minutes of baking
Pro diagnostic tip: Press your fingertip gently on the cornbread surface—if it leaves an indentation that doesn’t spring back, it needs 2-3 more minutes. Overbaked cornbread cannot be rescued, but properly timed baking yields perfect results every time.
Cast Iron Maintenance After Cornbread Baking
Proper cleaning preserves your skillet’s seasoning while preventing cornmeal residue buildup. While still warm (not hot), pour ½ cup coarse salt into the skillet and scrub with a folded paper towel or chainmail scrubber—this absorbs grease while gently cleaning without damaging seasoning.
Rinse with hot water only (never soap), then return to burner over medium heat for 3 minutes until completely dry. While still warm, rub a thin layer of vegetable shortening into the entire surface using a paper towel. Store with a paper towel inside to absorb moisture—never stack other pans inside your cornbread skillet.
Critical mistake: Never soak cast iron or put it in the dishwasher. Properly maintained, your skillet will improve with each use, developing that coveted non-stick surface that makes perfect cornbread easier to achieve over time. After 3-4 successful cornbread bakes, your skillet will have developed specialized seasoning that enhances flavor with each use.


