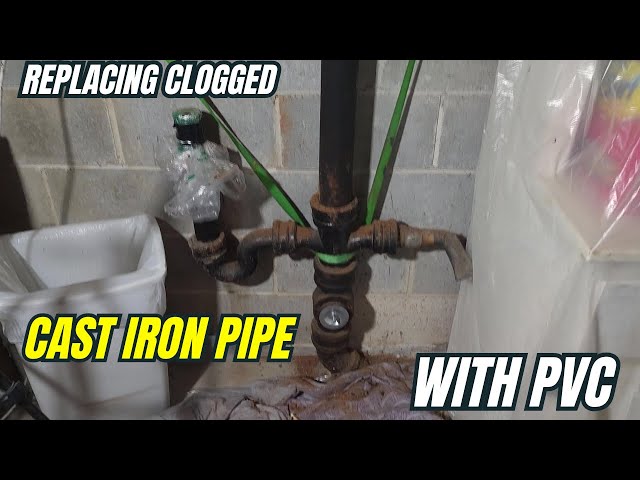
Cast iron plumbing systems were the standard in homes built before the 1980s, and many remain in service today despite their age. When your basement floods from a leaking drain pipe or you notice slow drainage throughout your home, cast iron pipe failure could be the culprit. These aging systems develop problems as corrosion eats through pipe walls, joints separate from ground shifting, and tree roots infiltrate compromised sections. Understanding how to identify and address these issues before they cause major water damage can save homeowners thousands in emergency repairs. This guide explains practical approaches to maintaining and repairing cast iron plumbing without necessarily replacing your entire system.
Why Cast Iron Pipes Fail After Decades of Service
Cast iron drain pipes typically last 75-100 years before requiring significant attention, but many factors accelerate deterioration. Internal corrosion occurs as wastewater chemicals react with the pipe’s interior surface, gradually thinning walls until leaks develop. External soil conditions also play a role—acidic soils eat away at the pipe exterior, while shifting ground stresses joints and causes separation. You’ll notice early warning signs like foul odors from escaping sewer gas, slow drains in multiple fixtures, or visible rust stains on exposed pipes in basements.
How to Diagnose Cast Iron Pipe Damage Severity
Listen for gurgling sounds in drains when fixtures are used elsewhere in the house—this often indicates restricted flow from internal corrosion buildup. Check for moisture around pipe joints and supports, as even small seeps can cause significant water damage over time. Inspect exposed sections for rust flakes, pinhole leaks, or visible cracks that compromise structural integrity. For pipes behind walls, professional video inspection provides the clearest assessment of internal condition without destructive exploration.
When Temporary Fixes Become Necessary Emergency Measures
If water is actively leaking into your living space, immediate action prevents further damage. Wrap the leak site with rubber repair tape, securing it tightly with stainless steel hose clamps on both sides of the damaged section. For larger cracks, apply epoxy putty according to manufacturer instructions after thoroughly drying the area. These solutions provide only temporary relief—typically lasting weeks to months—until proper repair can be scheduled. Never ignore even minor leaks, as constant moisture accelerates deterioration of surrounding structural materials.
Effective Repair Methods for Different Cast Iron Failure Types

Fixing Joint Separations with Mechanical Couplings
Separated hub-and-spigot joints represent one of the most common cast iron plumbing issues. Instead of replacing entire pipe sections, professional plumbers often install mechanical couplings that bridge the gap without extensive excavation. These stainless steel clamps with rubber seals compress around both pipe ends, creating a watertight connection that accommodates minor movement. The repair requires only enough access to clean pipe surfaces thoroughly and position the coupling correctly—typically achievable through small access panels rather than major wall demolition.
Step-by-Step: Installing a Pipe Repair Clamp
- Shut off water supply and clear standing water from the affected section
- Clean pipe surfaces on both sides of the separation with wire brush
- Dry areas completely using towels and shop vacuum
- Position rubber sleeve over separation point
- Slide stainless steel clamp halves into place
- Tighten bolts evenly in crisscross pattern until snug
- Test by running water through system and checking for leaks
Pro tip: Apply plumber’s tape to threads before tightening to prevent seizing and simplify future maintenance.
Sealing Corroded Sections with Epoxy Lining Technology
When internal corrosion creates multiple pinhole leaks along a pipe run, traditional replacement requires extensive demolition. Modern trenchless solutions like epoxy lining restore functionality by creating a new pipe within your existing system. Professionals clean the interior surface, then pull an epoxy-saturated felt liner through the compromised section. Inflation devices press the liner against pipe walls, where it cures into a durable, seamless barrier that stops leaks and prevents further corrosion.
Time estimate: Epoxy lining typically takes 6-8 hours for a standard residential repair, with minimal disruption compared to full replacement. The process avoids major excavation while extending your plumbing system’s life by decades.
When Full Pipe Replacement Becomes Necessary
Identifying Beyond-Repair Cast Iron Conditions
Complete pipe replacement becomes unavoidable when sections have deteriorated to the point of structural failure. Check for these critical warning signs: pipes that crumble when touched, multiple leaks within a short section, severe bellies or sags that trap waste, or root infiltration that has compromised more than 50% of the pipe circumference. Attempting patch repairs on severely degraded systems wastes money and creates false security—these pipes will continue failing at other weak points.
Choosing Replacement Materials for Modern Performance
When replacing cast iron sections, PVC and ABS plastic pipes offer cost-effective, durable alternatives that won’t corrode. Schedule 40 PVC withstands standard drain pressures while providing smooth interior surfaces that resist clogs. For vertical stacks, ABS black pipe provides superior sound dampening compared to PVC. Professional installations maintain proper slope (¼” per foot) and include cleanout access points every 100 feet or at significant direction changes to facilitate future maintenance.
Preventative Maintenance to Extend Cast Iron System Life
Implementing Regular Drain Cleaning Protocols
Preventative maintenance significantly extends aging cast iron plumbing’s service life. Monthly use of enzyme-based drain cleaners breaks down organic buildup without damaging pipes—avoid harsh chemical cleaners that accelerate corrosion. Install strainers in all sinks and tubs to catch hair and debris before they enter the system. For main lines, schedule professional hydro-jetting every 2-3 years to remove accumulated scale and prevent root intrusion.
Monitoring System Performance with Early Warning Checks
Create a simple monthly inspection routine: run water in all fixtures while listening for unusual sounds, check visible pipes for new moisture or corrosion, and note any changes in drainage speed. Keep records of when issues occur to identify patterns—slow drainage after garbage disposal use might indicate partial blockage needing attention. Early detection of minor problems prevents catastrophic failures that cause extensive property damage.
Cost Considerations for Cast Iron Plumbing Repairs
Comparing Repair vs Replacement Financial Impact
Temporary fixes cost $150-$500 but address symptoms rather than underlying problems. Mechanical coupling repairs range from $500-$1,200 per joint depending on accessibility. Epoxy lining averages $80-$250 per foot but avoids demolition costs associated with full replacement ($150-$250 per foot including wall repair). The most cost-effective approach balances immediate needs with long-term system health—addressing multiple minor issues proactively often proves cheaper than waiting for major failure.
Finding Qualified Professionals for Cast Iron Work
Verify contractors specialize in older plumbing systems—not all plumbers have experience with cast iron repair techniques. Ask specifically about trenchless repair capabilities and request before-and-after photos of similar projects. Ensure they carry proper licensing and insurance, and get detailed written estimates comparing multiple repair options rather than accepting the first solution presented.
Final Note: Cast iron plumbing requires specialized knowledge for proper repair—never attempt major fixes without professional assessment. Address minor issues promptly before they escalate into emergency situations, and maintain regular inspections to catch problems early. When repairs become necessary, modern techniques often provide effective solutions without complete system replacement, preserving your home’s structure while restoring reliable drainage performance. Always consult licensed plumbing professionals who can evaluate your specific system condition and recommend appropriate solutions based on actual inspection findings.