
Nothing ruins a polished look faster than wrinkled clothing, yet ironing often feels like a time-sucking chore that steals precious minutes from your morning routine. The average person wastes 90 minutes weekly battling creases, but mastering the fastest way to iron clothes transforms this dreaded task into a 30-minute efficiency win. By implementing strategic preparation, optimized techniques, and professional shortcuts, you’ll achieve crisp results without sacrificing your valuable time. This guide reveals exactly how to cut your ironing time in half while improving results—no special equipment required, just smarter methods that work with what you already own.
Create Your High-Speed Ironing Station Setup
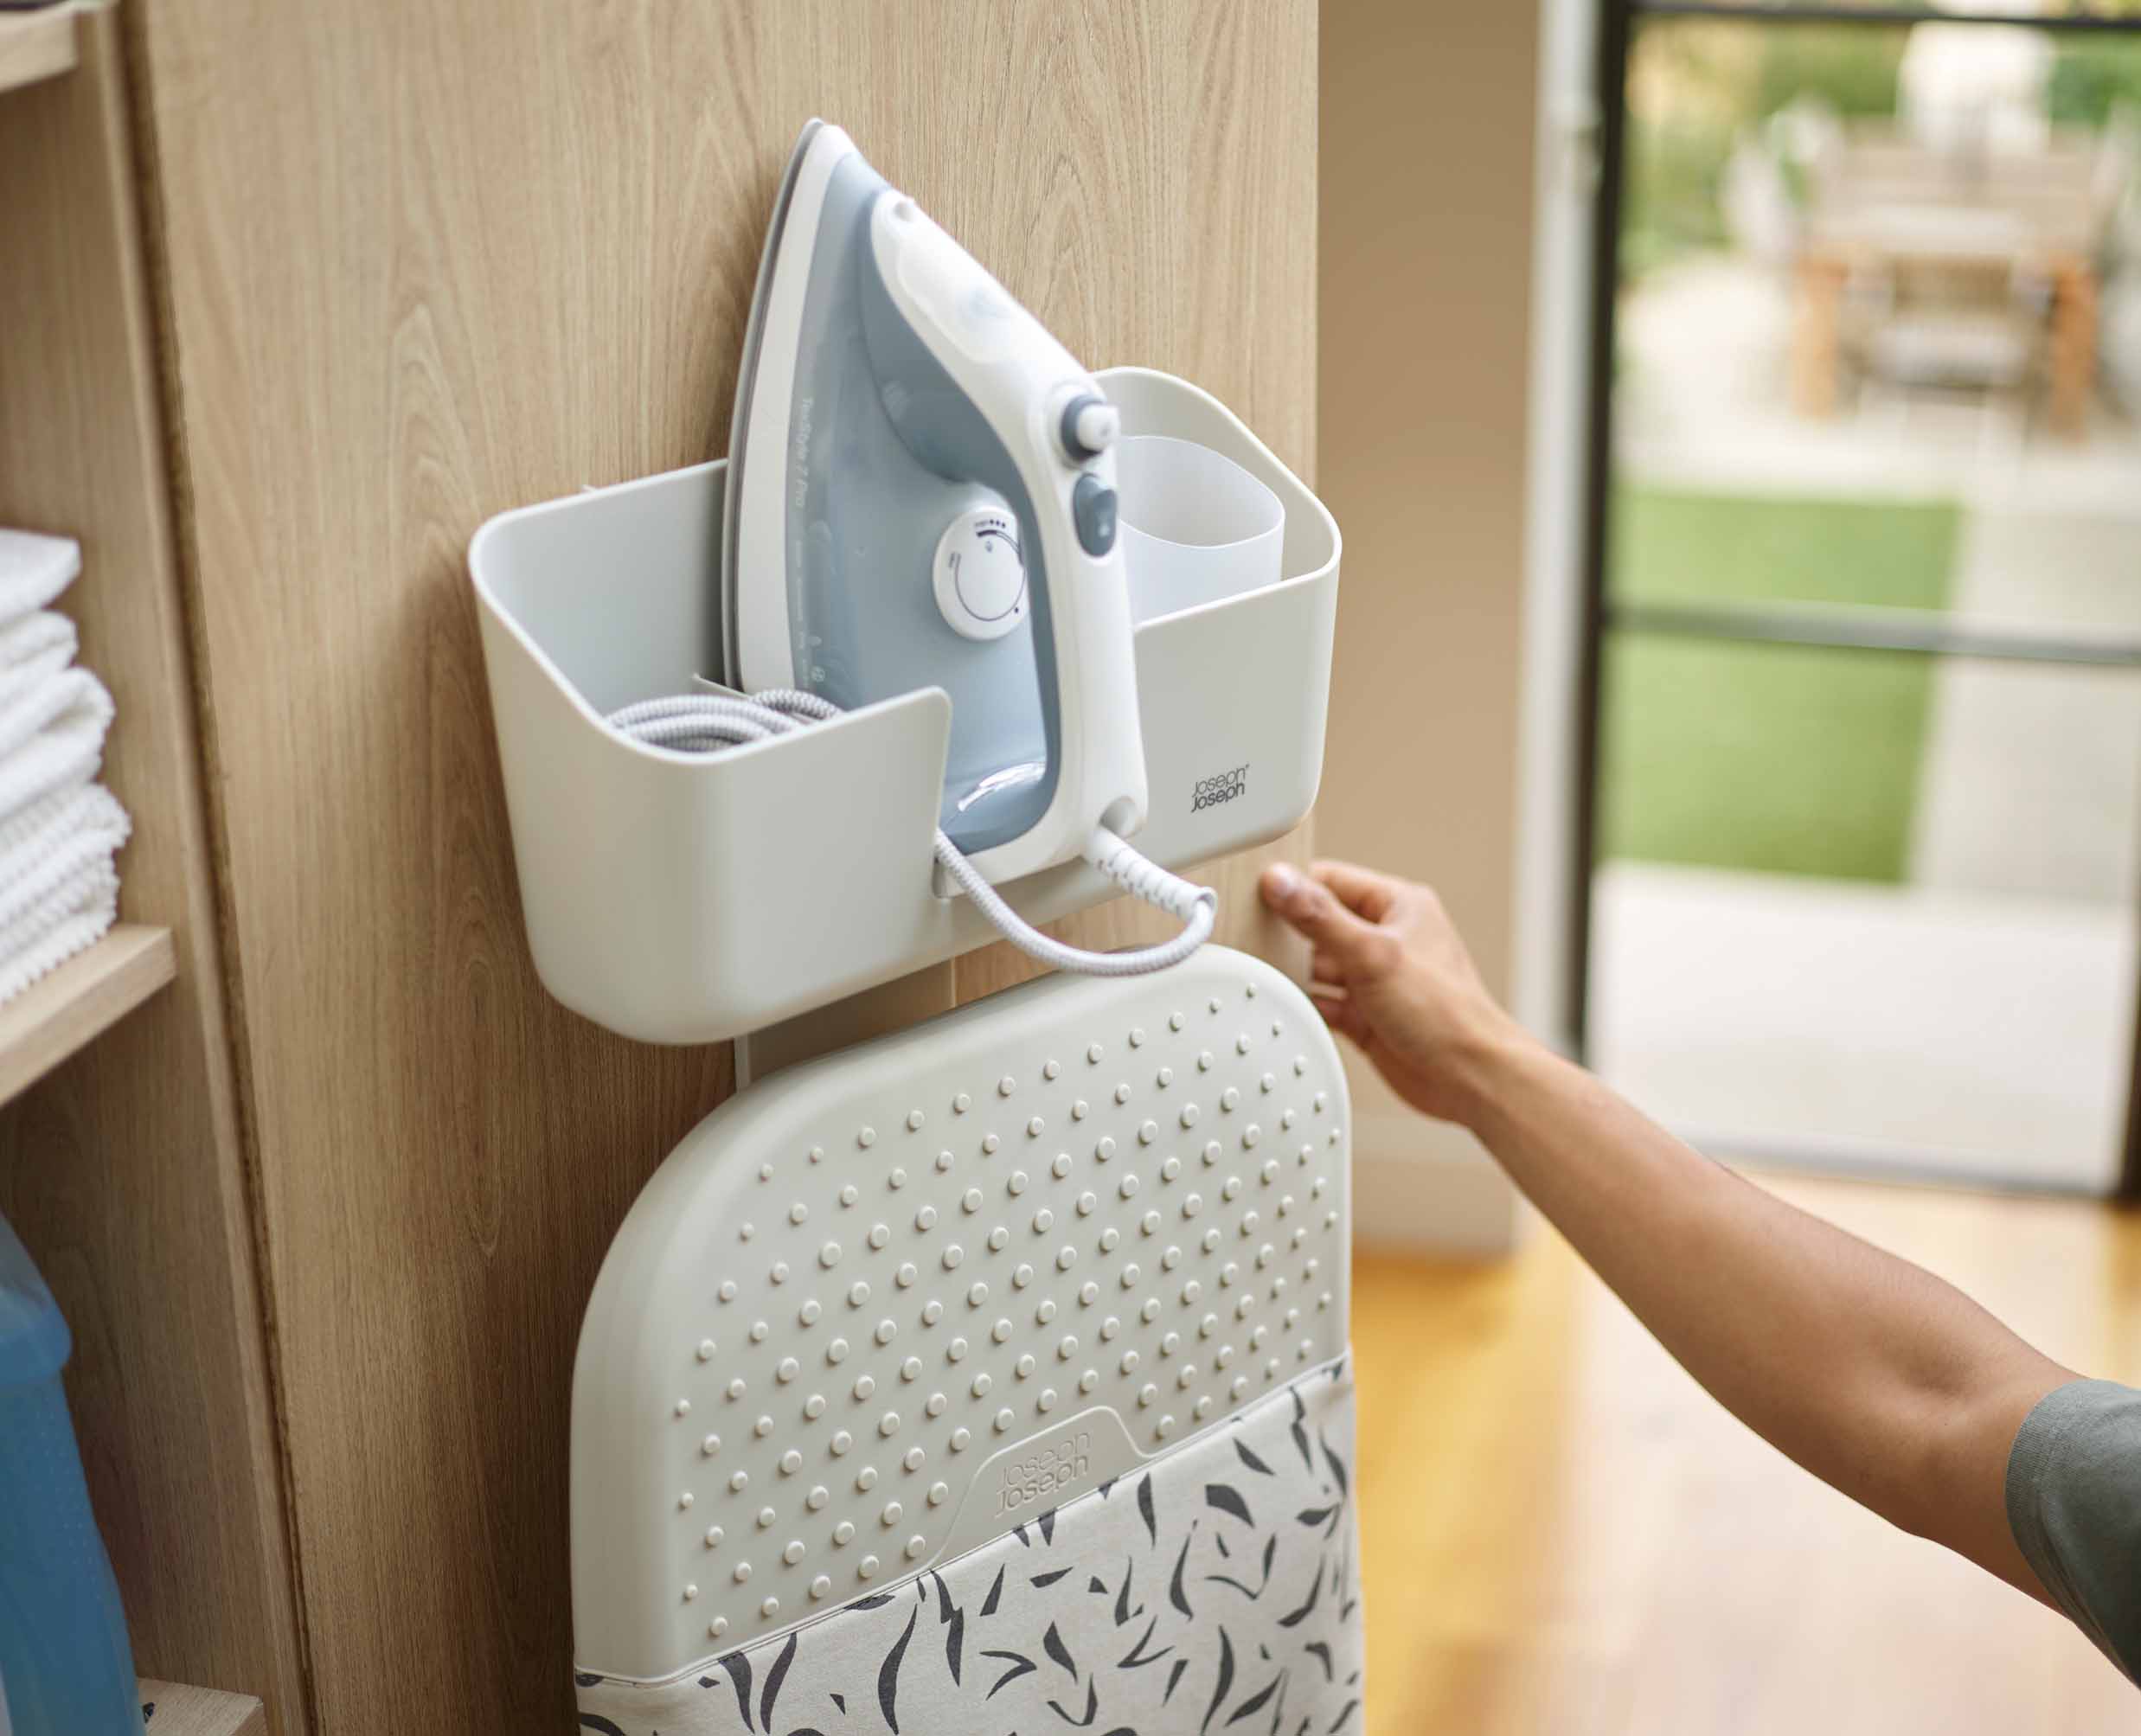
Your ironing station’s organization directly impacts your speed and efficiency. A poorly arranged workspace forces constant reaching and repositioning, adding unnecessary minutes to each session. Position your ironing board near a sturdy electrical outlet in an area with natural light or bright overhead lighting—poor visibility causes missed wrinkles that require re-ironing. Adjust the board height so your elbow sits at a 90-degree angle when resting on the board; this ergonomic position prevents shoulder strain that slows you down as you fatigue.
Keep all essential tools within immediate reach: your iron, distilled water bottle, spray bottle filled with water, clean cotton pressing cloths, and a small bowl of ice cubes for emergency wrinkle treatment. Store these items in a caddy that hooks onto your ironing board for grab-and-go convenience. Before starting, ensure your iron’s soleplate is spotless—mineral deposits and fabric fibers create drag that requires multiple passes over the same area. Wipe the warm soleplate with a damp microfiber cloth to maintain smooth gliding action.
Plug in your iron while gathering clothes to maximize warm-up time. Modern irons reach optimal temperature in 30-60 seconds, so use this time to sort and prepare garments. Keep a folded towel nearby to place hot irons on during brief pauses—this prevents accidental burns and maintains workflow momentum without waiting for the iron to cool.
Sort Clothes by Fabric Type for Rapid Temperature Cycling

Sorting garments before you begin saves more time than any single technique. Ironing in temperature order—from coolest to hottest fabrics—eliminates constant dial adjustments that disrupt your rhythm. Group items into three categories: synthetics (polyester, nylon, spandex), medium-heat fabrics (wool, silk, rayon), and high-heat materials (cotton, linen, denim). Within each group, arrange garments by size—smallest to largest—so you build speed as you progress.
Check each garment’s care label during sorting; 78% of ironing mistakes stem from incorrect heat settings. Synthetics melt at high temperatures, creating permanent shine or holes that require professional repair. Place delicate items needing pressing cloths in a separate sub-group to grab your protective layer efficiently. For mixed-fabric garments (like polyester-cotton blends), sort by the most delicate component to prevent damage.
Prepare a damp cloth for synthetics—they respond better to light moisture than direct steam which can cause water spots. For cotton and linen items, lightly mist them with your spray bottle before ironing; the moisture activates the fibers’ memory, allowing wrinkles to release in a single pass rather than multiple dry attempts. This pre-moistening step reduces ironing time by up to 40% for natural fibers.
Execute the One-Pass Ironing Technique
Professional pressers achieve perfect results through strategic movement, not excessive pressure. The fastest way to iron clothes uses the iron’s weight and heat rather than arm strength. Position garments smoothly on the board without tension—wrinkles reform when fabric stretches during ironing. Start each section at the top and work downward in long, fluid strokes away from your body, overlapping each pass by 50% to ensure complete coverage.
For dress shirts, follow this exact sequence: collar points first (inside then outside), shoulder seams, sleeves from shoulder to cuff, placket, then front panels. Iron each sleeve completely before moving to the body—this prevents re-wrinkling previously pressed areas. When pressing pants, focus on one leg at a time: waistband, pocket, outer seam, inner seam, then crease. Fold immediately after ironing to lock in the sharp line.
Apply steam strategically—only where needed. Most wrinkles release with 2-3 seconds of steam followed by a single gliding pass. Excessive steam leaves fabrics damp, requiring additional drying time. For stubborn creases, use the ice cube method: place a cube directly on the wrinkle, then press with a hot iron—the instant steam penetrates deep into fibers for instant release.
Optimize Heat Settings for Maximum Fabric Response
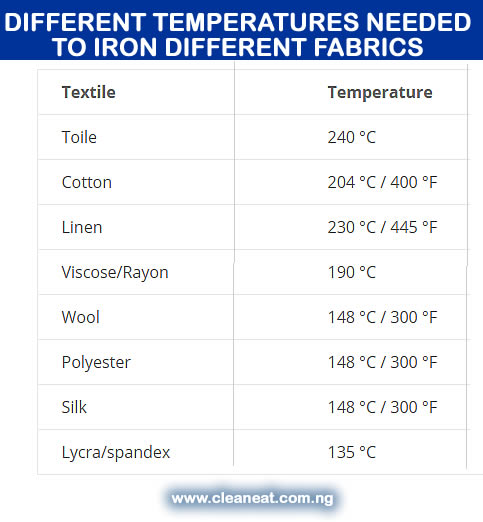
Understanding fabric science unlocks dramatic time savings. Synthetic fabrics (polyester, nylon) require low heat (275-300°F) because their polymer chains melt easily. Iron these quickly with light pressure and minimal steam—usually just 1-2 passes per section. Use the “synthetic” setting on your iron or temperature dial position 1; higher heat creates permanent shine that’s impossible to remove.
Medium-heat fabrics (wool, silk) respond best to 300-375°F. These protein fibers relax efficiently at this range without scorching. Always use a pressing cloth to prevent shine, and iron on the wrong side when possible. Wool particularly benefits from light moisture—spray the garment lightly before ironing for instant wrinkle release in half the time.
Cotton and linen thrive at high heat (375-450°F). These cellulose fibers require maximum temperature to relax stubborn wrinkles. Use the steam burst function liberally on thick seams and collars. For crisp dress shirts, slightly dampen the fabric before ironing—this activates the fibers’ natural memory, allowing wrinkles to release in a single pass. Heavy denim and canvas may need two passes on high heat, but proper moisture application usually eliminates this need.
Implement the Speed Ironing Sequence
Follow this exact garment order for maximum efficiency: small items (handkerchiefs, ties), dress shirts, blouses, pants, skirts, then dresses and jackets. Ironing small pieces first warms up your iron while building your rhythm. Shirts come next while your iron reaches optimal temperature for cottons and linens. Save bulky items for last when your iron maintains consistent heat.
Within each garment type, iron details before main panels. For shirts: collar points → stand → shoulders → sleeves → cuffs → placket → front panels → back yoke. This sequence ensures pressed areas stay undisturbed as you work. When ironing pants, press one complete leg (waistband → pocket → outer seam → inner seam → crease) before touching the second leg—this prevents accidental re-wrinkling.
Hang or fold each garment immediately after ironing. Designate one side of your workspace for “to iron” and the other for “finished” items. This visual system prevents you from accidentally re-ironing completed pieces—a surprisingly common time-waster.
Eliminate Costly Ironing Mistakes
Several habits silently add minutes to your ironing time. Ironing completely dry cotton or linen requires 3-4 passes to relax fibers, while lightly dampened fabric releases wrinkles in one go. Keep a spray bottle filled with water (add 1 teaspoon of white vinegar per cup to prevent mineral spots) for instant moisture application.
Neglecting to empty your iron’s water tank after use causes mineral buildup that restricts steam flow. This forces you to make additional passes to achieve results, adding 25% more time per session. Always empty the tank and leave the iron upright to dry completely after use.
Ironing over buttons creates snags and requires careful navigation around each one. Before starting, fasten all buttons and zippers to create smooth surfaces. For stubborn button wrinkles, place a folded towel under the placket to elevate buttons away from the board surface.
Starting with incorrect heat settings wastes more time than checking labels. When in doubt, begin with lower heat and gradually increase—you can always apply more heat, but melted synthetics are permanently damaged.
Apply Professional Speed Techniques
Master these pro shortcuts to slash ironing time: The “dryer rescue” method works for mildly wrinkled items. Toss garments in the dryer with a damp towel for 5 minutes on medium heat, then transfer immediately to the ironing board. The combination of moisture and heat relaxes wrinkles, requiring only a quick cool-down press.
For cotton dress shirts that need minimal ironing, use the ice cube technique: Place 2-3 cubes in the dryer with the shirt for 3 minutes, then iron while slightly damp. The instant steam release eliminates 80% of wrinkles with minimal effort.
Iron multiple thin layers simultaneously—two cotton handkerchiefs or silk scarves can be pressed together safely. Stack identical fabrics only to prevent color transfer or heat damage.
When pressed for time, focus on visible areas: collars, cuffs, and front panels. Nobody sees the back of your shirt, so give it a single quick pass rather than perfecting every square inch. This targeted approach cuts ironing time by 60% while maintaining professional appearance.
Maintain Your Iron for Peak Performance
A well-maintained iron performs faster and lasts longer. After each use, empty the water reservoir to prevent mineral buildup that restricts steam flow. Run a cleaning cycle monthly using equal parts white vinegar and water—this dissolves deposits that would otherwise slow your progress.
Clean the soleplate weekly with a baking soda paste (3 parts baking soda to 1 part water). Apply with a soft cloth while the iron is warm but not hot, then wipe clean. This maintains smooth gliding action that requires fewer passes per garment.
Store your iron upright with the cord loosely wrapped. Tightly wound cords cause kinks that lead to electrical failures. Check the power cord regularly for damage—frayed cords reduce heating efficiency and create safety hazards.
Replace worn steam vents every 18 months. Clogged vents deliver inconsistent steam, forcing you to compensate with multiple passes. Most modern irons have removable vent plates that clean easily with a toothpick.
Final Note: The fastest way to iron clothes combines strategic preparation with scientific fabric knowledge. By setting up an optimized station, sorting garments by heat requirement, executing the one-pass technique, and following the professional sequence, you’ll cut ironing time by 50% while achieving better results. Eliminate time-wasting habits like ironing dry fabrics or neglecting maintenance, and implement pro shortcuts like the ice cube method for instant wrinkle release. With consistent iron care ensuring peak performance, these efficiency strategies transform ironing from a dreaded chore into a streamlined routine that fits seamlessly into your busy life. Start implementing these methods today and reclaim those precious minutes for what truly matters.


