
There’s nothing quite like the sizzle of a thick-cut steak hitting a scorching hot cast iron skillet—the aroma fills your kitchen with that unmistakable steakhouse fragrance. While many believe you need a fancy grill to achieve restaurant-quality results, your cast iron pan delivers superior searing power and precise temperature control right on your stovetop. Mastering this technique means you can create a perfectly caramelized crust with a juicy, tender interior any day of the week, regardless of weather conditions.
The magic happens because cast iron retains heat exceptionally well, creating that essential Maillard reaction—the chemical process responsible for the rich, complex flavors and deep brown crust you crave. Unlike stainless steel or nonstick pans, cast iron continues cooking your steak even after you remove it from the heat source, ensuring even doneness throughout. This guide reveals the exact steps professional chefs use to transform ordinary steaks into extraordinary meals using nothing more than your trusty cast iron skillet.
Choosing the Right Cut for Cast Iron Cooking
Why Ribeye Reigns Supreme for Skillet Cooking
When selecting steak for cast iron cooking, ribeye emerges as the undisputed champion. Its abundant marbling—those delicate white fat veins running through the meat—melts during high-heat searing, basting the steak from within and creating unparalleled juiciness. The fat cap surrounding the ribeye also renders beautifully in the skillet, adding layers of flavor while protecting the meat from drying out. For optimal cast iron results, choose a ribeye between 1.5 to 2 inches thick; this dimension allows sufficient time for crust development before the interior reaches your desired temperature.
Proper Steak Preparation Before Cooking
Take your steak out of the refrigerator at least 30 minutes before cooking to bring it closer to room temperature. This critical step prevents the exterior from overcooking while waiting for the center to reach proper doneness. While your steak rests, thoroughly pat both sides dry with paper towels—any surface moisture creates steam instead of the sear you want. For best results, use multiple paper towels and apply firm pressure until no more moisture transfers to the paper.
Season simply but generously with kosher salt (about one teaspoon per pound) on all sides. The salt draws out moisture that then dissolves and gets reabsorbed, enhancing both flavor and texture. Add freshly cracked black pepper just before cooking to prevent burning, though some chefs prefer adding pepper after cooking for optimal flavor preservation. Avoid marinades for premium cuts—they interfere with proper crust formation and can actually toughen the meat’s texture.
Perfectly Preheating Your Cast Iron Skillet

Achieving the Ideal Skillet Temperature
Your cast iron skillet must reach proper temperature before adding oil or steak—this is non-negotiable for perfect searing. Place your empty skillet over medium-high heat for 3-5 minutes until it’s genuinely hot. Test readiness by sprinkling a few drops of water onto the surface; they should dance and evaporate almost instantly rather than sizzling slowly. An improperly heated skillet causes steak to stick and prevents proper crust formation.
Selecting and Applying the Right Oil
Once your skillet reaches temperature, add 1-2 tablespoons of high-smoke-point oil like avocado, grapeseed, or refined vegetable oil. Avoid olive oil—it smokes and burns at the high temperatures required for proper searing. Swirl the oil to coat the entire cooking surface, watching for it to shimmer and flow like water. This visual cue indicates the oil has reached its smoking point and is ready for the steak. Never add cold steak to a cold pan—this is the fastest route to uneven cooking and sticking.
Mastering the Searing Process
The Critical First Flip
Place your seasoned steak gently into the hot skillet, listening for that essential loud sizzle that confirms proper heat transfer. Resist the urge to move or peek for at least two minutes—this undisturbed contact allows the crust to form properly. If the steak sticks when you try to lift it, it hasn’t developed sufficient crust; give it another 30-60 seconds before attempting to flip. Properly seared steak will release naturally from the pan when ready.
Determining Perfect Doneness
Cook for 2-3 minutes per side for medium-rare, adjusting based on thickness and desired doneness. Use an instant-read thermometer for precision: 120°F for rare, 130°F for medium-rare, 140°F for medium. Insert the thermometer sideways into the thickest part, avoiding fat pockets for an accurate reading. For steaks thicker than 1.5 inches, finish cooking in a 400°F oven after developing crust on both sides—typically 4-6 additional minutes for medium-rare. Remember that carryover cooking will raise the internal temperature 5-10 degrees during resting.
Elevating Flavor with Butter Basting
Creating the Perfect Butter Sauce
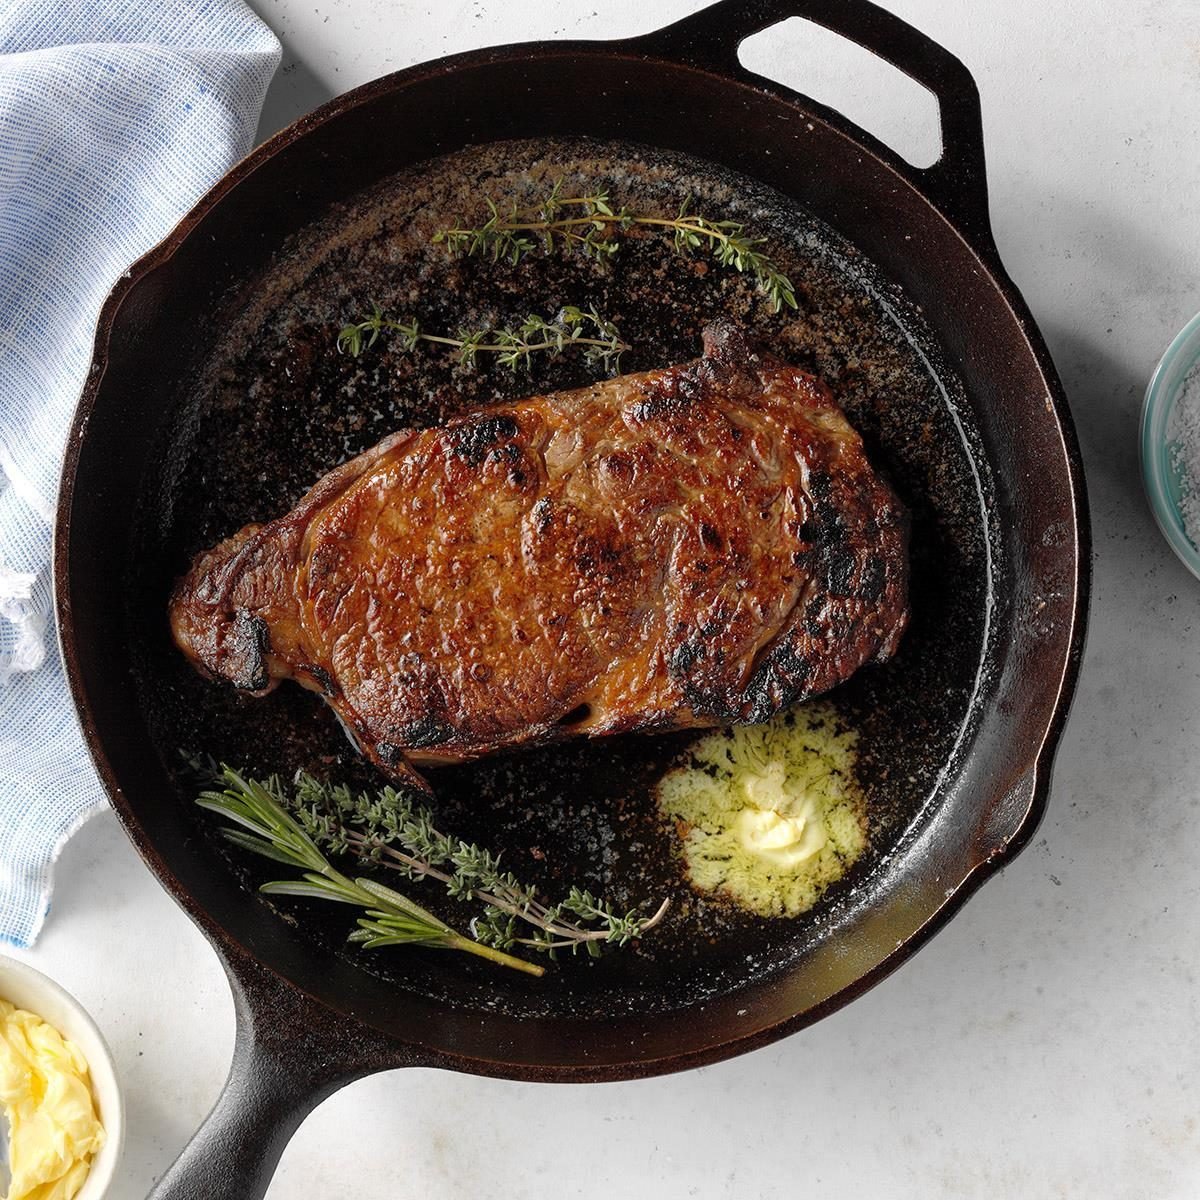
Once both sides have developed a crust, reduce heat to medium and add 2 tablespoons of unsalted butter to the skillet. As the butter melts and foams, tilt the pan and continuously spoon the bubbling butter over the steak’s surface. This basting technique infuses the meat with rich, nutty flavors while creating that glossy restaurant-quality finish. Continue basting for 1-2 minutes, watching carefully to prevent butter from burning.
Incorporating Aromatics for Complexity
Enhance your butter with smashed garlic cloves and fresh thyme or rosemary sprigs during the final minute of cooking. The garlic sweetens as it cooks, releasing mellow flavors that penetrate the steak’s crust, while the herbs contribute earthy notes that complement beef’s natural richness. For thicker cuts, consider transferring the entire skillet to a 400°F oven for the final few minutes of cooking while continuing to baste, ensuring even doneness without compromising crust quality.
The Essential Resting Period
Why You Must Wait Before Cutting
Resting your steak for 5-10 minutes (depending on thickness) allows the muscle fibers to relax and reabsorb juices that have been forced toward the center during cooking. Cutting too soon releases these precious fluids onto your cutting board rather than keeping them within the meat. During this time, loosely tent the steak with foil to maintain warmth without trapping steam that could soften your beautiful crust.
Proper Slicing Technique for Maximum Tenderness
When ready to serve, slice against the grain using a sharp knife—this shortens the muscle fibers, making each bite significantly more tender. For ribeye steaks, identify the direction of the muscle fibers and cut perpendicular to them. Serve immediately with any accumulated resting juices spooned over the top for maximum flavor impact. Pair with simple sides like roasted potatoes or grilled asparagus to let your perfectly cooked steak remain the star of the meal.
Avoiding Common Cast Iron Steak Mistakes
Preventing Sticking and Tearing
The most frequent error home cooks make is moving the steak too soon. Allow at least two minutes of undisturbed contact time before attempting to flip—properly seared steak will release naturally from the pan. If your steak sticks, it hasn’t developed sufficient crust; give it more time rather than forcing it. Another common mistake is using a fork to flip the steak, which pierces the meat and releases precious juices—always use tongs for flipping.
Temperature Troubleshooting Guide
If your steak is browning too quickly while remaining raw inside, your skillet is too hot—reduce to medium heat. If the steak isn’t developing a crust after three minutes, your skillet isn’t hot enough—increase heat slightly and allow more preheating time next attempt. Never overcrowd the skillet—cook one steak at a time to maintain proper temperature. For multiple steaks, use two skillets or cook in batches, keeping finished steaks warm in a low oven.
Proper Cast Iron Skillet Maintenance
Cleaning Without Compromising Seasoning
While still warm (but not scorching hot), add a small amount of hot water to your skillet and use a stiff brush or chainmail scrubber to remove food particles. Avoid soap, which can strip seasoning over time, though a small amount won’t harm a well-seasoned pan if necessary for stubborn residue. Never soak your cast iron—it promotes rust formation.
Rebuilding and Maintaining Your Skillet’s Seasoning
After cleaning, dry your skillet completely on the stovetop over low heat for 1-2 minutes. While still warm, apply a thin layer of oil with a paper towel, coating the entire cooking surface. Store in a dry place with the lid off to prevent moisture buildup. Regular use actually improves your skillet’s non-stick properties over time—each cooking session builds additional seasoning layers that enhance performance and flavor.
Cooking steak in a cast iron skillet transforms a simple weeknight dinner into a culinary experience rivaling expensive steakhouses. By selecting quality cuts, properly preparing your skillet, mastering the sear, and allowing adequate resting time, you’ll consistently achieve that perfect combination of caramelized crust and juicy interior. The skills you develop with this fundamental technique transfer to countless other dishes, making your cast iron skillet one of the most versatile tools in your kitchen arsenal. With practice, you’ll develop an intuitive feel for timing and temperature that ensures steak perfection every time.


