You spot rust bleeding down your wrought iron fence after a hard rain. A section sags where a picket snapped off in last week’s storm. Suddenly, your elegant boundary looks neglected and unsafe. Iron fence repair isn’t just about aesthetics—it’s critical for structural integrity and property value preservation. Without proper maintenance, minor corrosion can escalate into costly replacements within months. This guide cuts through the confusion to deliver actionable solutions for the most common iron fence failures. You’ll learn exactly how to diagnose damage types, execute permanent fixes, and implement preventative measures that keep your fence looking sharp for decades—not just until the next storm hits.
Most homeowners attempt quick fixes like slapping on paint over rust, only to watch the problem worsen. The real issue? Iron fence repair requires addressing the root cause, not just surface symptoms. Whether you’re dealing with flaking paint, wobbly posts, or snapped pickets, this guide provides field-tested protocols used by professional metalworkers. We’ll cover time-sensitive interventions that stop corrosion in its tracks and structural repairs that restore rigidity. By the end, you’ll know precisely when to grab your tools and when to call specialists—saving you hundreds in unnecessary replacement costs.
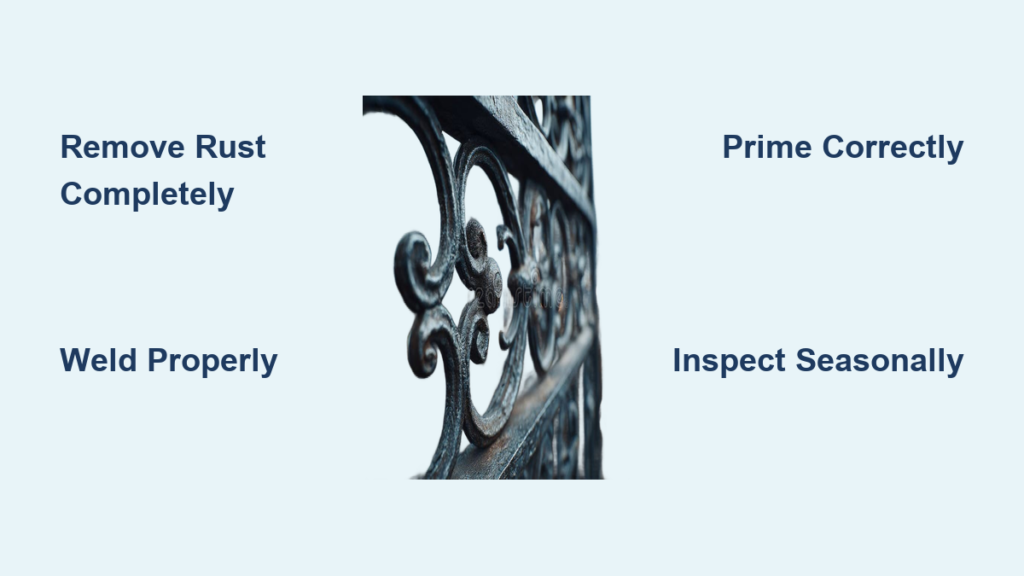
Diagnosing Your Iron Fence Damage Type
Before grabbing tools, identify exactly what’s failing. Misdiagnosis leads to wasted effort and accelerated deterioration. Iron fences fail in four distinct patterns, each demanding unique solutions. Your repair strategy hinges on this critical first assessment.
Why Rust Spreads Faster Than You Think
Rust isn’t just surface discoloration—it’s an active corrosion process eating through metal. When you see orange flakes, the damage has already penetrated 2-3x deeper than visible. Humidity accelerates this exponentially; a single damp week can cause more damage than six dry months. Check for these danger signs: bubbling paint (trapped moisture underneath), pitting (small craters in metal), and “cancerous” rust spreading from joints. If rust penetrates more than 30% of the rail’s thickness, replacement—not repair—is necessary. Never sand rust off then immediately paint; trapped moisture will blister new coatings within weeks.
Spotting Structural Weakness in Rails and Posts
Sagging sections or wobbly posts indicate serious structural compromise. Press firmly on suspect areas—excessive flex means internal corrosion. Focus on these high-risk zones: ground-level post bases (hidden moisture traps), weld joints (common failure points), and horizontal rails (bear most wind load). Use a magnet test: if it doesn’t stick firmly, metal has corroded below critical strength. For posts, dig 6 inches around the base—soft, crumbly concrete or rotten wood sleeves mean immediate reinforcement is required. Ignoring these signs risks total section collapse during high winds.
Essential Tools for Permanent Iron Fence Repair

Skipping proper tools guarantees temporary fixes. Professional metalworkers use specialized equipment that ensures repairs last decades, not seasons. Invest in these non-negotiable items before starting any iron fence repair project.
Safety Gear That Prevents Catastrophic Injuries
Welding and grinding demand serious protection. Skip the cheap hardware store goggles—use auto-darkening welding helmets (shade #10 minimum) that protect against UV burns. Leather welding gloves (not cotton) prevent molten metal burns that cause permanent nerve damage. Respirators with P100 filters are mandatory for rust removal—inhaling iron oxide causes “siderosis,” a permanent lung condition. Secure the work area with orange safety tape; flying metal shards travel 20+ feet at lethal speeds. One shortcut with safety gear risks your eyesight or respiratory health permanently.
Must-Have Repair Kit Components
Your basic iron fence repair kit requires three precision tools: A 4.5-inch angle grinder with cut-off and flap discs (for rust removal and cutting), a 140-amp DC welder (AC current won’t penetrate rusted metal), and a wire brush attachment for drills. For paint prep, use naval jelly (phosphoric acid-based) not vinegar—it passivates rust chemically. Keep epoxy metal primer in your kit; oil-based primers fail on rust-treated surfaces. Never use cold-mix steel fillers—they crack under temperature swings. Pro tip: Store tools in a silica-gel dry box; moisture ruins welding electrodes within hours.
Executing Rust Removal That Actually Works
Most DIY rust removal fails because it stops at surface cleaning. True corrosion elimination requires attacking the problem at molecular level. This three-stage process stops rust permanently.
Mechanical Rust Elimination Protocol
Start with coarse 36-grit flap discs on your angle grinder—never sandpaper. Grind until bare, shiny metal appears, not just “mostly clean” surfaces. Focus 70% effort on edges where rust hides; use right-angle grinder attachments for tight joints. Immediately after grinding, wipe with acetone (not water) to remove metal dust. Check progress with a bright LED light held parallel to the surface—any remaining pits will cast shadows. If pits exceed 1/16 inch depth, weld new metal patches before proceeding. Skipping this depth check causes premature re-corrosion.
Chemical Treatment for Hidden Corrosion
After mechanical cleaning, apply naval jelly with a chip brush—thickly coat all surfaces and let sit 20 minutes. Watch for bubbling; that’s the acid converting rust to inert phosphate crystals. Rinse with baking soda solution (1 cup per gallon water) to neutralize acid—plain water leaves active residue. Never skip the neutralization step; residual acid eats through new paint in weeks. For pitted areas, use rust converter spray after neutralizing—it penetrates deeper than gels. Final test: wipe with white cloth; no orange stains means success. If stains appear, repeat the process—partial treatment guarantees failure.
Welding Broken Components Without Weakening the Fence
Amateur welds often create new failure points. Proper iron fence repair welding requires technique adjustments for aged, rust-contaminated metal.
When to Weld Yourself vs. Call a Pro
Attempt welding only on pickets or thin rails under 1/2 inch thick with minimal rust. If the metal feels spongy when pressed, or if structural posts/rails are damaged, hire a certified metal fabricator. They use TIG welding for precision on thin sections—MIG welders used by DIYers burn holes in aged iron. Critical rule: Never weld over rust. It creates porous, weak joints that fracture under stress. If rust penetrates more than 1/8 inch, cut out the entire section and splice in new metal. Your weld strength equals the weakest point; compromised base metal dooms even perfect welds.
Avoiding the #1 Welding Mistake That Causes Cracks
Preheating is non-negotiable for iron fence repair. Cold metal cracks when welded due to thermal shock. Heat the area to 250°F with a propane torch before striking an arc—use temp sticks to verify. Weld in short 1-inch beads with 30-second cooling intervals. Long continuous welds warp thin metal. Keep your electrode at 15 degrees from vertical; steeper angles trap slag. After welding, immediately cover with a welding blanket for 2 hours to slow cooling—rapid cooling creates brittle crystalline structures. Skip these steps, and your “repair” will crack within months from temperature cycling.
Painting for Maximum Rust Prevention

Painting over improperly prepped metal guarantees peeling within a year. True protection requires a three-coat system engineered for iron.
Primer Selection That Bonds to Treated Metal
Epoxy metal primer is the only acceptable base. Oil-based primers delaminate from phosphated surfaces. Apply within 2 hours of rust treatment—delaying allows flash rusting. Use a 3/8-inch nap roller for textured iron; brushes miss valleys. Critical: Thin the primer 10% with manufacturer-approved solvent—full-strength primer won’t penetrate microscopic pores. Two thin coats beat one thick coat; sand lightly with 220-grit between coats. If you see “fish-eyes” (craters), the surface has oil contamination—clean with acetone and restart.
Topcoat Application for Weatherproofing
Use 100% acrylic enamel topcoats—not “metal paints” from big-box stores. They contain UV inhibitors that prevent chalky degradation. Apply when metal temperature is 55-90°F; colder temps cause poor adhesion, hotter temps create blisters. Maintain a 6-inch wet edge while rolling to prevent lap marks. For ornate sections, use an HVLP sprayer set at 25 PSI—airless sprayers atomize too coarsely for ironwork. Second coat within 72 hours while the primer is still “tacky.” Never skip the second coat; single coats wear through at stress points within 18 months.
Preventing Future Damage With Proactive Maintenance
The smartest iron fence repair is the one you never need. Implement these quarterly habits to stop 90% of failures before they start.
Seasonal Inspection Checklist That Catches Problems Early
Every spring and fall, perform this 10-minute check: Run gloved hands along all rails feeling for soft spots. Tap pickets with a screwdriver—hollow sounds indicate internal rust. Check post bases for soil erosion (exposes metal to moisture). Inspect weld joints for hairline cracks. Most crucial: Examine where metal contacts wood (like gate hinges)—dissimilar metals cause galvanic corrosion. Address moisture traps immediately: Clear vegetation 12 inches from fence line, and regrade soil to slope away from posts. Catching issues at the “surface rust” stage saves 70% repair costs.
Long-Term Protection Upgrades Worth the Investment
Replace standard wood post sleeves with concrete-filled metal collars—they eliminate ground-level rust points. Install sacrificial zinc anodes at fence corners; they corrode before your iron does. For coastal areas, switch to marine-grade epoxy primers with zinc phosphate. Most impactful: Apply clear acrylic sealer every 3 years over painted surfaces—it blocks UV degradation that breaks down paint binders. These upgrades cost 15% more upfront but double your fence’s lifespan. Remember: Iron fence repair isn’t a chore—it’s preserving an investment that enhances your home’s value daily.
Final Note: Consistent maintenance transforms iron fence repair from a recurring headache into a one-time investment. By addressing rust at the molecular level, using correct welding protocols, and implementing seasonal checks, your fence will withstand decades of weather extremes. Start with one damaged section using these methods—you’ll immediately see the difference between temporary patches and permanent solutions. For complex structural issues, always consult a certified metal fabricator; their expertise ensures safety and longevity. Your elegant iron boundary isn’t just functional—it’s a statement of pride that deserves professional-grade care.