

Your cast iron skillet has seen better days—maybe it’s rusted, sticky, or just lost that smooth non-stick surface you love. You’ve heard coconut oil might be the solution, but you’re not sure where to start. Seasoning cast iron with coconut oil offers a natural, food-safe alternative to traditional methods, creating a durable non-stick surface without chemical additives. This guide reveals exactly how to properly use coconut oil to season cast iron, why it works better than some conventional oils for certain cooking applications, and how to maintain that perfect patina for years to come. By the end, you’ll know the specific temperature ranges, application techniques, and maintenance routines that transform your rusty heirloom into a kitchen workhorse.
Why Coconut Oil Works Exceptionally Well for Cast Iron Seasoning
Coconut oil’s high saturated fat content makes it uniquely suited for cast iron seasoning compared to many vegetable oils. When heated to its smoke point (around 350°F for unrefined coconut oil), the oil undergoes polymerization—chemically bonding with the iron to create that essential non-stick layer. Unlike flaxseed oil which can become brittle over time, coconut oil creates a more flexible seasoning that withstands temperature fluctuations and regular use.
How Coconut Oil Compares to Traditional Seasoning Oils
Many home cooks swear by vegetable shortening or grapeseed oil, but coconut oil offers distinct advantages:
- Longer shelf life – Resists rancidity better than polyunsaturated oils
- Higher smoke point than butter or olive oil (though slightly lower than avocado oil)
- Natural antimicrobial properties that help prevent rust during storage
- Food-safe composition with no chemical additives found in some commercial seasonings
Addressing Common Coconut Oil Seasoning Myths
“I’ve heard coconut oil leaves a sticky residue on cast iron—is this true?”
This typically happens only when too much oil is applied or the pan isn’t heated to a high enough temperature during seasoning. The key is applying an extremely thin layer—so thin you can barely see it—and heating it past its smoke point to complete the polymerization process. When done correctly, coconut oil creates a smooth, hard surface indistinguishable from traditional seasoning.
Essential Preparation Steps Before Seasoning with Coconut Oil
Skipping proper preparation guarantees seasoning failure, regardless of which oil you use. Your cast iron must be completely clean and dry before applying any oil—any residual food particles or moisture will prevent proper bonding.
Complete Cleaning Process for Neglected Cast Iron
For pans with rust or stubborn residue:
- Scrub with steel wool or a chainmail scrubber under hot water
- For severe rust, create a paste of coarse salt and water for extra abrasive power
- Rinse thoroughly and immediately dry with a towel
- Place on stove burner for 2-3 minutes to evaporate all moisture
- Let cool slightly before oil application
Pro Tip: Never use soap on cast iron you’re planning to reseason—it removes existing seasoning and can leave residues that interfere with new seasoning.
Correct Coconut Oil Application Technique for Perfect Results

The difference between a flawless seasoning job and a sticky mess comes down to application precision. Most failures occur because people use too much oil.
Step-by-Step Oil Application Process
- Melt 1 teaspoon of unrefined coconut oil in a small bowl (refined has a higher smoke point but lacks beneficial compounds)
- Dip a clean paper towel or lint-free cloth into the oil
- Wipe a microscopic amount onto the entire surface—inside, outside, and handle
- Immediately take a second dry cloth and wipe off all visible oil (this is critical)
- The surface should look almost dry with just a faint sheen
Warning: If you see pooling oil or obvious wet spots, you’ve applied too much. Wipe again until the surface appears nearly dry.
Optimal Baking Temperature and Time for Coconut Oil Seasoning
Your oven’s temperature accuracy makes or breaks the seasoning process. Most home ovens fluctuate significantly, so an oven thermometer is essential.
Perfect Oven Seasoning Method
- Place oven rack in center position
- Preheat oven to 375°F (slightly above coconut oil’s smoke point)
- Invert cast iron on rack with another pan below to catch drips
- Bake for 1 hour
- Turn off oven and let cool completely inside (about 2 hours)
Time-Saving Shortcut: For maintenance seasoning on an already well-seasoned pan, skip the oven—heat the oiled pan on your stovetop until smoking, then wipe clean and let cool.
Troubleshooting Common Baking Issues
“Why does my coconut oil seasoning feel sticky after cooling?”
This indicates incomplete polymerization. Return the pan to the oven for another 30 minutes at the same temperature. Sticky seasoning always means either too much oil was applied or the temperature wasn’t high enough to complete the chemical reaction.
Recognizing Properly Cured Coconut Oil Seasoning

After seasoning, your cast iron should exhibit specific visual and tactile characteristics that confirm successful polymerization.
Visual and Physical Indicators of Success
- Color: Deep, even brown-black (not patchy)
- Surface: Smooth to the touch with no visible oil residue
- Sound: A light tap produces a solid “clink” rather than a dull thud
- Water Test: Water beads up initially before slowly absorbing
Expert Note: Don’t expect mirror-like perfection after one seasoning cycle. Most cast iron requires 3-5 applications to build a truly robust non-stick surface.
First Cooking Session to Set Your New Coconut Oil Seasoning
The initial cooking after seasoning locks in the polymerized layer and begins building your pan’s cooking patina.
Ideal First Meal to Prepare
Cook high-fat foods that naturally reinforce the seasoning:
– Bacon (the rendered fat fills microscopic pores)
– Fried eggs (tests non-stick properties)
– Simple fried potatoes (gentle abrasion that won’t damage new seasoning)
Critical Mistake to Avoid: Never cook acidic foods like tomatoes during the first few uses—they can strip away new seasoning before it fully sets.
Maintenance Routine for Coconut Oil Seasoned Cast Iron
Proper care between cooking sessions preserves your hard-earned seasoning and extends time between full reseasoning.
Daily Cleaning Protocol
- While pan is still warm (not hot), wipe out food residue with paper towels
- For stuck bits, use hot water and a stiff brush—no soap
- Heat on burner until all moisture evaporates
- Apply microscopic oil layer only if storing long-term
When to Apply Maintenance Seasoning
Reapply a thin coconut oil layer after cleaning if:
– You notice food sticking more than usual
– The surface looks gray rather than black
– You’ve cooked acidic foods
– The pan feels rough rather than smooth
Common Coconut Oil Seasoning Problems and Fixes
Even with perfect technique, issues sometimes arise. Knowing how to diagnose and correct them saves your cookware.
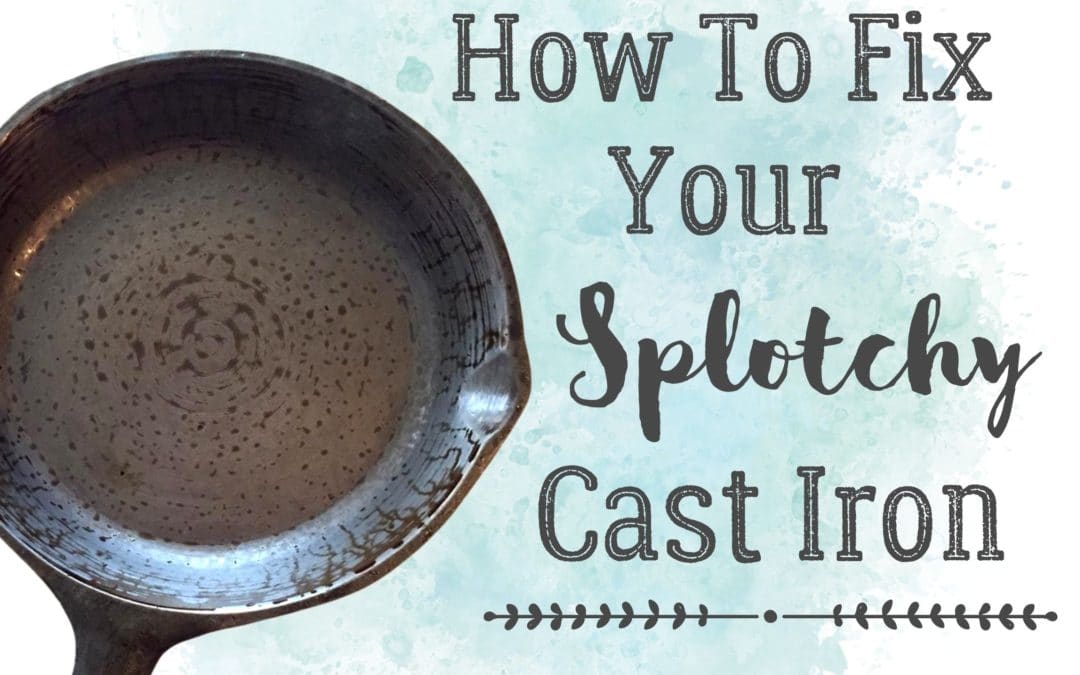
Fixing Patchy or Uneven Seasoning
This occurs when oil application was inconsistent or temperature fluctuated during baking. Solution:
– Lightly scrub affected areas with salt
– Apply new microscopic oil layer
– Bake at 375°F for 45 minutes
– Repeat if necessary
Eliminating Metallic Taste After Seasoning
New seasoning sometimes imparts a metallic flavor during first uses. Fix:
– Cook fatty foods for 3-4 consecutive uses
– Avoid acidic ingredients until taste disappears
– Never store food in cast iron
Long-Term Benefits of Coconut Oil Seasoning Compared to Alternatives
While all proper seasoning methods create functional non-stick surfaces, coconut oil offers unique long-term advantages.
Health and Performance Advantages
- No trans fats unlike partially hydrogenated shortenings
- Stable at high heat without breaking down into harmful compounds
- Adds subtle flavor enhancement to certain dishes (disappears after several uses)
- Easier initial seasoning for beginners compared to flaxseed oil
Pro Tip: Coconut oil seasoning develops a slightly darker patina than other oils—this is normal and indicates proper polymerization.
When Coconut Oil Isn’t the Best Choice for Your Cast Iron
Despite its advantages, coconut oil isn’t ideal for every situation or cookware type.
Situations Calling for Alternative Oils
- High-heat searing above 400°F: Use avocado oil (smoke point 520°F)
- Thin or damaged cast iron: Start with vegetable shortening for better initial adhesion
- Allergy concerns: Opt for refined avocado or grapeseed oil
- Humid climates: Consider a slightly higher smoke point oil to combat moisture issues
Final Verification and Troubleshooting Checklist
Before declaring your seasoning job complete, run through this verification process:
- Visual inspection – Uniform dark color with no shiny oil spots
- Touch test – Smooth surface without sticky or tacky areas
- Water test – Beads form temporarily before absorbing
- Cooking test – Eggs release easily with minimal oil
If any test fails, identify which step needs correction using this decision tree:
– Sticky surface → Too much oil or insufficient heat → Re-bake
– Patchy appearance → Uneven application → Spot-treat problem areas
– Poor non-stick performance → Not enough seasoning layers → Add 1-2 more coats
Final Note: Properly executed coconut oil seasoning creates a resilient, natural non-stick surface that improves with each use. The key lies in meticulous oil application—remember, less is more—and precise temperature control during the baking process. While your first attempt might not yield perfection, each seasoning cycle builds upon the last, creating a cooking surface uniquely adapted to your kitchen habits. For best results, repeat the full seasoning process 3-5 times initially, then maintain with quick stovetop touch-ups after cleaning. Within weeks, your cast iron will develop that coveted smooth, black patina that makes cooking a genuine pleasure.


