
Installing a cast iron wood stove brings decades of reliable warmth to your home when executed correctly, but improper cast iron wood stove installation causes most home fires involving these appliances. These premium heating systems deliver unmatched heat retention that continues radiating warmth long after flames diminish, yet their substantial weight and thermal characteristics demand precise installation protocols. Unlike sheet metal alternatives that warp under extreme heat, properly installed cast iron stoves maintain structural integrity for generations—but only when clearances, floor protection, and chimney connections meet exact specifications. This guide reveals the critical steps professional installers follow to ensure your cast iron wood stove installation operates safely and efficiently from the first fire to the last.
Most homeowners underestimate the complexity of proper cast iron wood stove installation, focusing on stove selection while neglecting essential placement considerations and clearance requirements. The National Fire Protection Association reports that improper installation—not manufacturing defects—causes the overwhelming majority of stove-related home fires. Whether you’re replacing an older unit or installing your first wood heating system, understanding the specific requirements for cast iron construction will prevent costly mistakes and ensure your investment delivers safe, efficient heating for decades to come.
Why Cast Iron Wood Stoves Outperform Other Materials for Long-Term Heating
Cast iron wood stoves deliver superior heat retention that continues warming your space hours after the fire dies, making them the premium choice for homeowners seeking consistent comfort. The substantial thermal mass absorbs heat slowly during combustion but releases it gradually as temperatures drop, eliminating the uncomfortable temperature swings associated with lighter-gauge steel alternatives. This thermal buffering effect creates a more stable indoor environment where you won’t experience the rapid cooling that forces you to constantly reload sheet metal stoves throughout the night.
How Cast Iron’s Thermal Properties Create Better Heating Comfort
Unlike sheet metal stoves that heat quickly but cool just as rapidly, cast iron’s slow heat absorption translates to extended warmth after flames diminish. When properly installed with correct clearances, a cast iron stove maintains surface temperatures that provide consistent radiant heat without creating dangerous hot spots near combustible materials. The material’s structural stability prevents warping that compromises door seals in thinner constructions, ensuring proper draft control remains intact throughout the stove’s decades-long service life.
Critical Handling Precautions for Cast Iron Stove Installation
Cast iron’s brittleness demands special handling during your cast iron wood stove installation—never subject your stove to thermal shock by adding cold water to hot surfaces or building excessively large fires that create extreme temperature gradients. Before installation, meticulously inspect all components for pre-existing cracks or fractures that could compromise safety during operation. Remember: while cast iron won’t warp like sheet metal, it can crack if mishandled, making careful lifting techniques essential when positioning your stove in its final location.
Cast Iron vs Steel vs Sheet Metal: Choosing Your Installation Foundation
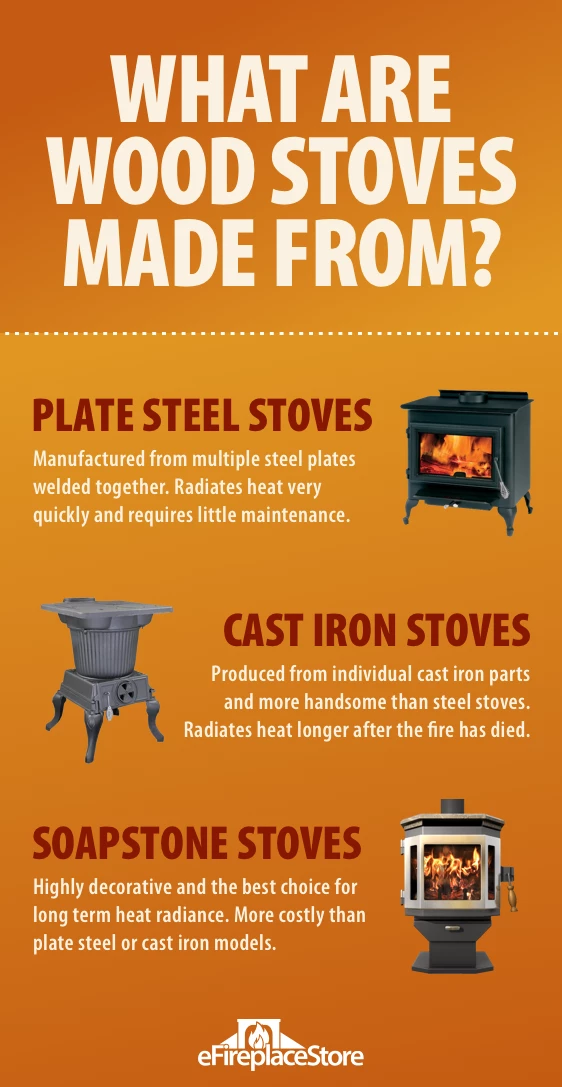
Understanding material differences prevents costly mistakes when planning your cast iron wood stove installation, as each construction type demands specific clearances and protection strategies. Your material choice directly impacts required clearances, floor protection needs, and even chimney connection requirements that determine whether your installation meets safety codes.
Sheet Metal Stove Limitations You Must Consider
Sheet metal stoves (typically 24-gauge or thinner) heat rapidly but cool just as quickly, making them suitable only for intermittent use in cabins or as emergency backups. Their thin walls are susceptible to burn-through in the firebox area, requiring frequent inspection for weak spots. During installation, maintain maximum clearances as sheet metal radiates more intense surface heat than cast iron, and never shorten the legs that provide critical air circulation beneath the unit.
Welded Steel Stove Installation Requirements
Welded steel stoves (using 1/4-inch or thicker plate) offer middle-ground durability with slower warm-up but longer service life than sheet metal. Premium models incorporate firebrick lining that protects structural steel while improving combustion efficiency. When installing welded steel units, remember they still require substantial clearances similar to cast iron despite their lower cost—don’t assume thicker steel means reduced protection requirements.
How to Accurately Size Your Cast Iron Wood Stove for Maximum Heating Efficiency
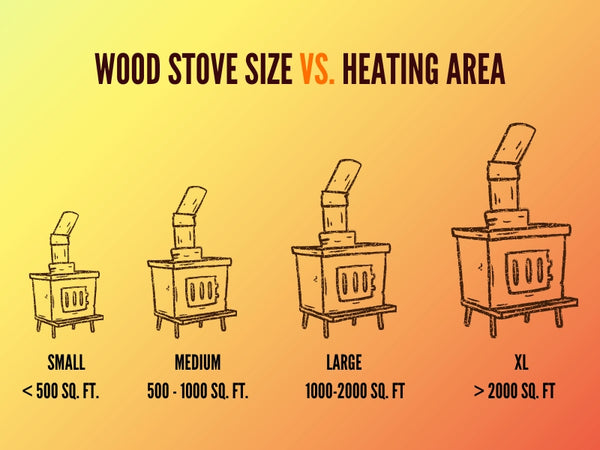
Manufacturer ratings often mislead homeowners during cast iron wood stove installation, as cubic feet or room count specifications rarely reflect your specific heating needs. Instead, base your sizing decision on three practical factors that directly impact installation success:
- Available space for proper clearances around the stove
- Chimney proximity (stove should be within 8-10 feet of chimney inlet)
- Your typical firewood size and quality
A properly sized cast iron stove operates efficiently between 40-60% of its maximum capacity—never run your stove at full burn continuously, as this creates excessive heat that overwhelms clearance requirements and increases creosote buildup. An oversized stove can be operated at reduced capacity through draft control adjustment, but an undersized unit will struggle to heat your space regardless of fire management.
Strategic Placement Techniques That Prevent Installation Disasters
Your cast iron wood stove installation success depends more on placement than any other factor, with chimney proximity determining your entire setup configuration. Position your stove as close as possible to the chimney inlet—never exceeding 10 feet of stovepipe with no more than two 90-degree elbows in the run. Each additional elbow or foot of pipe reduces draft performance by up to 25%, creating dangerous creosote accumulation conditions that violate installation codes.
Optimal Room Positioning for Maximum Heat Distribution
Place your stove near the center of your primary living area when possible, allowing natural convection to distribute heat evenly throughout the space. Alternatively, position the stove where rising heat enters your central heating system’s cold-air return ducts, enabling forced-air distribution of stove-generated warmth throughout your entire home. Always maintain required clearances from furniture and traffic patterns—never install your stove where people might accidentally contact hot surfaces during normal movement through the space.
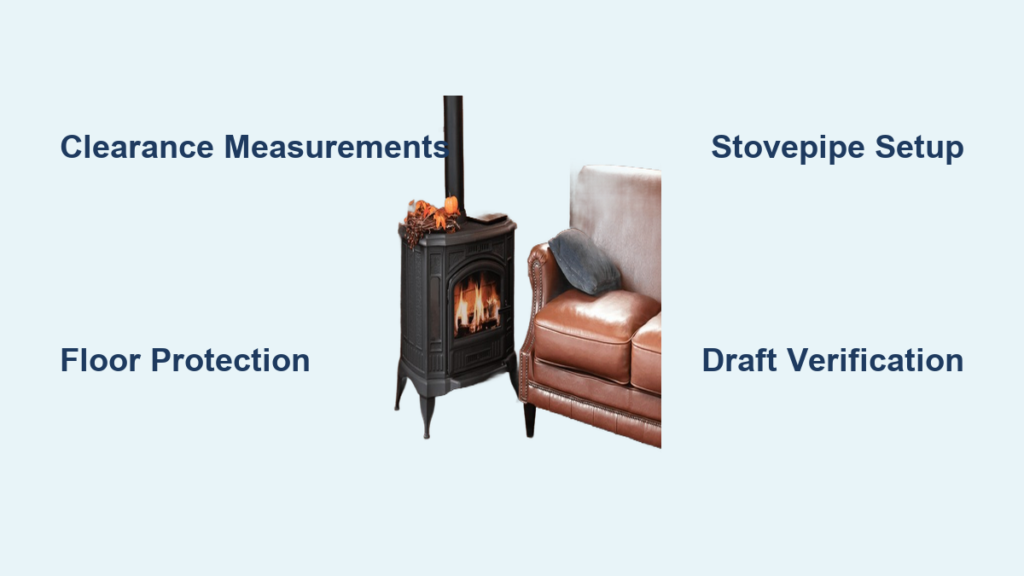
Critical Clearance Measurements Every Installer Must Verify Before Lighting

The majority of stove-related house fires stem from inadequate clearances during cast iron wood stove installation, making these measurements your most important safety checkpoint. National Fire Protection Association standards provide baseline requirements, but always verify local code specifications as jurisdictions often impose stricter standards.
Wall Clearance Reduction Strategies That Save Valuable Space
You can significantly reduce required clearances through proper wall protection:
– 24-inch clearance: 3-1/2″ masonry wall without ventilated air space
– 18-inch clearance: 1/2″ non-combustible board over 1″ insulation batts
– 12-inch clearance: 24-gauge sheet metal with 1″ ventilated air space over insulation
Never skip clearance verification—measure from the stove’s hottest points (typically the sides and top) to combustible surfaces, not just the outer casing. Use a laser thermometer during initial operation to confirm actual surface temperatures match manufacturer specifications.
Floor Protection Setup That Prevents Catastrophic Fires
All cast iron wood stove installations require floor protection extending 18 inches beyond the stove footprint on all sides. Your specific protection system depends on stove leg height:
- Legs <2″: Install only on non-combustible flooring (no wood subfloor)
- Legs 2-6″: 4″ hollow masonry units with air circulation, covered by 24-gauge sheet metal
- Legs >6″: 2″ minimum masonry thickness covered by 24-gauge sheet metal
Never remove or shorten manufacturer-installed legs, and ensure nothing obstructs air circulation beneath the stove. Verify local codes may require even more substantial protection than these baseline standards.
Avoiding Draft Problems: Proper Stovepipe Installation for Cast Iron Wood Stoves
Your cast iron wood stove installation fails without correctly configured stovepipe connections—improper installation causes 70% of draft-related performance issues according to hearth industry studies. Follow these critical protocols to ensure proper draft and prevent dangerous creosote accumulation.
Stovepipe Assembly Techniques That Maintain Safety
- Use 24-gauge or heavier uncovered sheet metal pipe matching your stove’s outlet size
- Install maximum 8-10 feet of pipe with no more than two 90-degree elbows
- Slope horizontal runs 1/4″ per foot toward the stove
- Point male pipe ends downward to funnel creosote back to stove
- Apply furnace cement at joints and secure with minimum three rivets per joint
Horizontal pipe runs should be avoided entirely when possible—each horizontal section creates a creosote collection point that requires more frequent cleaning and increases fire risk. Always maintain 18-inch clearance from combustible materials when pipe passes through walls, and never route stovepipe through unoccupied attic or crawl spaces.
7 Essential Pre-Installation Verification Checks Before Final Setup
Skipping these verification steps during cast iron wood stove installation creates legal, insurance, and safety nightmares that could force costly removal later. Complete all seven checks before bringing your stove home:
- Confirm UL or equivalent certification—unlisted stoves void insurance coverage
- Contact local building department for code compliance requirements
- Verify insurance policy allows wood stove installations
- Measure exact clearance requirements for your specific model
- Confirm chimney suitability (minimum 8″ diameter for wood)
- Test draft with smoke pellet before final installation
- Document all measurements for inspection paperwork
Many homeowners discover too late that their insurance company imposes premium penalties for wood stoves or that local codes require expensive masonry modifications. Completing these checks during the planning phase prevents costly surprises after your cast iron wood stove installation is complete.
Final Note: Proper cast iron wood stove installation demands respect for clearance requirements, precise stovepipe configuration, and thorough pre-installation verification. By following these protocols, you transform your stove from a potential fire hazard into a reliable heating centerpiece that delivers decades of safe, efficient warmth. Schedule annual professional inspections to maintain optimal performance, and always prioritize safety over convenience when operating your cast iron wood stove. The extra time invested in correct installation pays dividends in safety, efficiency, and comfort throughout your stove’s remarkable service life.


