
Achieving restaurant-quality chicken breast at home is simpler than you might think—with the right technique and the right pan. Cooking chicken breast in cast iron delivers unmatched searing power that creates a beautiful golden crust while locking in juices. This method solves the biggest challenge home cooks face: getting that perfect crisp exterior without drying out the lean meat inside. When you master this technique, you’ll consistently serve chicken breasts that are moist, flavorful, and visually impressive—no special equipment or culinary degree required.
The magic happens because cast iron retains heat better than almost any other cookware. While stainless steel pans cool dramatically when cold chicken hits the surface, your cast iron skillet maintains temperature stability, ensuring consistent browning from the first second to the last. This guide reveals exactly how to leverage your cast iron’s thermal properties to cook chicken breasts that rival professional kitchen results. You’ll learn precise timing, temperature control, and finishing techniques that transform this everyday protein into something extraordinary.
Why Your Cast Iron Skillet Is the Best Tool for Chicken Breast
Cast iron’s exceptional heat retention creates the perfect environment for developing that coveted restaurant-style crust. When properly preheated, a cast iron skillet maintains steady temperatures across its entire cooking surface, eliminating hot spots that cause uneven cooking. Unlike non-stick pans that can’t withstand high searing temperatures, cast iron thrives under the heat needed to trigger the Maillard reaction—the chemical process responsible for rich, complex flavors and appealing brown coloration.
The thermal mass of cast iron works in your favor when cooking lean proteins like chicken breast. As the cold meat contacts the hot surface, the pan absorbs the temperature drop and redistributes heat gradually, preventing the exterior from burning while the interior cooks through. This stability means you get consistent browning without the risk of overcooking the delicate meat. Professional chefs prize cast iron specifically for this quality—it’s why your favorite restaurant’s chicken has that perfect “bite-through” crust with moist, tender meat beneath.
Essential Skillet Preparation Steps for Flawless Results
Preheating to the Perfect Temperature
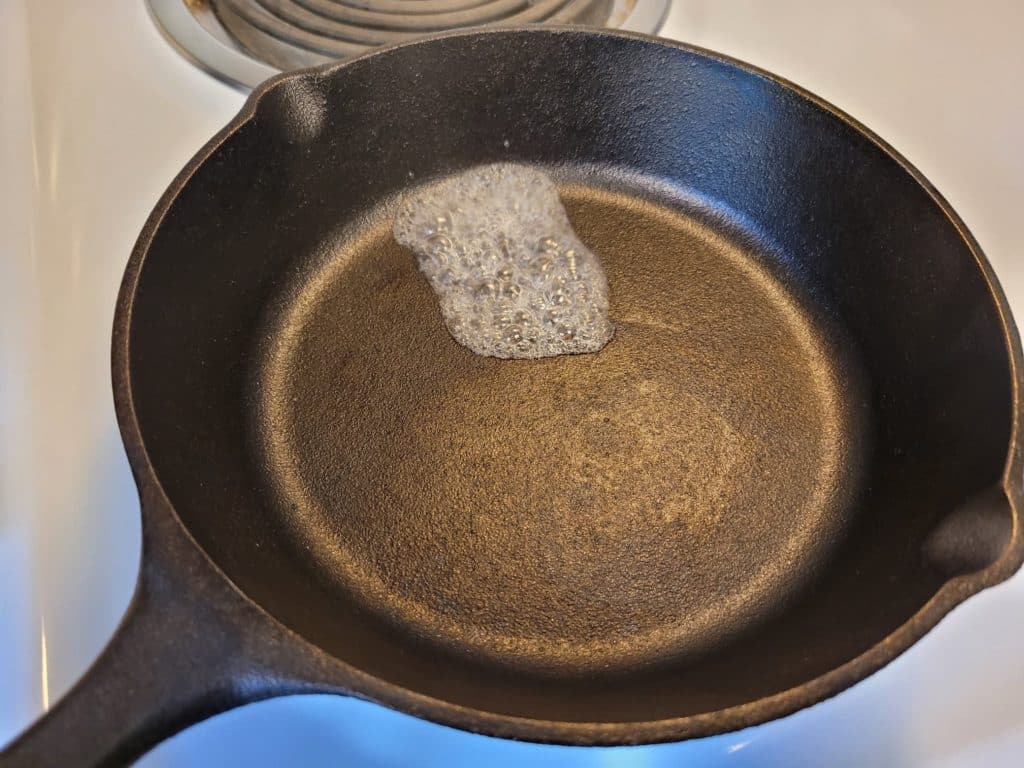
Never skip the preheating step—this is non-negotiable for successful cast iron cooking. Place your dry skillet over medium heat for 3-4 minutes until a drop of water sizzles and evaporates instantly. Too cool, and your chicken will stick; too hot, and your oil will smoke excessively. The ideal temperature allows for immediate sizzling without violent splattering when chicken makes contact.
Oil Selection and Application Technique
Choose oils with high smoke points like avocado, grapeseed, or refined vegetable oil (smoke point above 400°F). Add 1-2 tablespoons to your preheated pan, swirling to coat the entire surface including the sloped sides. Heat until the oil shimmers and flows like water—about 60 seconds—creating a thin, polymerized layer that prevents sticking. If excessive smoking occurs, reduce heat slightly and wait 30 seconds before adding chicken.
Chicken Selection and Preparation Secrets

Choosing the Right Cut
Select chicken breasts that are uniform in thickness (about 1-1.5 inches thick at the thickest point). Uniformity ensures even cooking—thinner ends won’t dry out while thicker portions finish. If your breasts vary significantly, gently pound thicker areas with a meat mallet until consistent thickness. Six to eight-ounce portions work perfectly for single servings.
Critical Moisture Removal Process
Pat chicken breasts thoroughly with paper towels until no moisture transfers to the paper—this step is crucial for proper browning. Wet surfaces steam rather than sear. For best results, let the dried chicken rest uncovered in the refrigerator for 30-60 minutes before cooking. This draws additional moisture to the surface, further enhancing browning potential.
Temperature Equilibration
Remove chicken from the refrigerator 20-30 minutes before cooking to bring it closer to room temperature (around 65°F internally). Cold chicken causes dramatic temperature drops in the pan, leading to sticking and uneven cooking. Properly tempered chicken maintains pan temperature stability for consistent searing.
Building Flavor with Strategic Seasoning
Salt Application Science
Use kosher salt (about 1 teaspoon per pound) rubbed into both sides and edges of the chicken. Its larger crystals penetrate meat more effectively than table salt. Apply at least 30 minutes before cooking—ideally the night before—to allow salt to migrate inward, improving both flavor and moisture retention through osmotic processes.
Creating Flavorful Rubs
Combine paprika, garlic powder, onion powder, dried thyme, and a pinch of cayenne for a versatile blend. Add brown sugar sparingly (¼ teaspoon per breast) to promote caramelization without burning. Apply dry rubs at least 30 minutes ahead to allow flavor penetration. Add black pepper just before cooking, as prolonged heat exposure diminishes its potency.
Mastering the Searing Process
Initial Placement Technique
Place chicken presentation-side down (the smoother, more attractive side) and resist moving it for the full searing duration. Properly heated cast iron creates an immediate seal that prevents sticking—moving the chicken breaks this seal. Listen for aggressive, consistent sizzling, indicating proper browning is occurring.
Visual Doneness Indicators
Look for deep golden-brown coloring across 75% of the surface with visible caramelization marks. The edges should appear slightly darker than the center. When you can slide a thin spatula underneath without resistance, it’s ready to flip—typically after 3-4 minutes. This visual assessment proves more reliable than timing alone due to variable factors like chicken thickness and stove output.
Precise Temperature and Timing Guidelines
Target Internal Temperatures
Remove chicken from heat at 160°F (measured horizontally at the thickest point) to account for 5-10°F of carryover cooking during resting. The USDA recommends 165°F for safety, but pulling at 160°F prevents overcooking that leads to dry, stringy texture. Always use an instant-read thermometer for accuracy—visual cues alone can’t confirm safe internal temperature.
Thickness-Based Cooking Times
- 1-inch breasts: 4-6 minutes total (2-3 minutes per side)
- 1.5-inch breasts: 6-8 minutes total (3-4 minutes per side)
- 2-inch breasts: 8-10 minutes total (4-5 minutes per side)
Adjust timing based on visual cues and thermometer readings rather than strict clock watching. Thicker cuts benefit from finishing in a 400°F oven after initial searing.
Butter Basting for Maximum Juiciness
After achieving a good sear on both sides, reduce heat to medium and add 2-3 tablespoons of butter with fresh herbs (thyme, rosemary) and a garlic clove. Continuously spoon the foaming butter over the chicken for 1-2 minutes per side. This technique gently cooks the interior while adding rich flavor and preventing the crust from burning. Maintain a gentle bubble—not vigorous frying—to avoid burning the milk solids while developing nutty, fragrant flavors.
Critical Mistakes That Ruin Cast Iron Chicken
Overcrowding the Pan
Cooking too many breasts at once causes dramatic temperature drops, resulting in steaming rather than searing. Cook in batches with adequate space between pieces, allowing the pan to recover heat for 1-2 minutes between batches. Each breast needs at least 1 inch of clearance from neighbors and pan edges.
Premature Movement
Moving chicken before the sear has properly formed breaks the initial seal, causing sticking and uneven browning. Wait for visual cues (deep golden color, easy release) rather than checking by force. If the chicken resists flipping, give it another 30 seconds.
Skipping the Resting Period
Cutting into chicken immediately after cooking releases all accumulated juices onto your cutting board rather than redistributing throughout the meat. Rest for 5-10 minutes (tented loosely with foil) to allow juices to reabsorb, ensuring maximum moisture in every bite.
Proper Resting and Serving Techniques
Transfer cooked chicken to a clean plate or cutting board and rest for 5-10 minutes depending on thickness. During this time, juices redistribute from the center outward, transforming potentially dry meat into succulent perfection. Slice against the grain (perpendicular to visible muscle fibers) to shorten fiber length, creating more tender, pleasant bites. Serve immediately with pan drippings transformed into a quick sauce by deglazing the skillet with chicken broth or white wine.
Essential Cast Iron Maintenance After Cooking
Clean while still warm using hot water and a stiff brush—avoid soap when possible. For stubborn residue, simmer a small amount of water in the pan to loosen stuck bits. Dry completely over low heat for 1-2 minutes, then apply a thin oil layer while still warm. Store in a dry location with air circulation to prevent rust. Consistent use and proper care develop a smooth, non-stick patina that improves with each cooking session, making your cast iron skillet an heirloom-quality tool that delivers exceptional results for generations.


