
Tired of spending hours at the salon for those effortlessly chic loose curls that seem to last all day? Your flat iron can transform your hair from flat to fabulous in minutes with the right technique. Unlike traditional curling irons that create uniform ringlets, your flat iron gives you complete control over curl size, direction, and looseness—perfect for achieving those natural, bouncy waves that look like you woke up with them. When you learn how to create loose curls with a flat iron, you’ll discover a versatile styling method that works for any occasion, from casual weekends to professional settings.
Mastering flat iron loose curls means understanding how to manipulate your existing tool into a curling wand. The key lies in wrapping sections around the plates rather than clamping them between, which creates softer, more natural-looking waves that fall beautifully. This guide reveals the exact techniques professional stylists use to create long-lasting loose curls without expensive equipment. You’ll learn how to customize the method for your specific hair type, avoid common mistakes that ruin your style, and make your curls last from morning coffee to evening cocktails—all with the flat iron already sitting in your bathroom cabinet.
Why Flat Irons Create Perfect Loose Curls
Flat irons excel at creating loose curls because they offer unmatched control over your styling results. When you wrap hair around the plates instead of clamping it, you’re able to manipulate exactly how much rotation occurs, determining whether you get tight spirals or relaxed waves. This wrapping technique flattens the curl slightly as it forms, producing those soft, undulating waves that mimic natural hair movement rather than looking artificially uniform. Unlike curling irons with fixed barrel sizes, your flat iron becomes a customizable styling tool that adapts to your desired outcome with simple technique adjustments.
The dual functionality of flat irons gives you an edge when creating loose curls—straighten sections that need smoothing while curling others to add dimension and movement throughout your hair. Many people find flat iron curls hold longer than traditional curling iron styles because the direct heat application seals the hair cuticle more effectively. This creates what stylists call “S-curls” that follow your hair’s natural wave pattern, giving you an organic, less manufactured appearance compared to the perfect spirals from curling wands. Your flat iron becomes a complete styling solution that transitions seamlessly between straight and wavy looks.
Essential Tools and Products You’ll Need

Your flat iron’s plate material significantly impacts your loose curl results, so choose wisely based on your hair type. Ceramic plates distribute heat evenly and work well for most hair types, providing gentle styling that minimizes damage while creating smooth, shiny curls. If you battle frizz or humidity, tourmaline plates emit negative ions that combat flyaways and add extraordinary shine. For thick, coarse, or stubborn hair that refuses to hold a curl, titanium plates heat quickly and maintain consistent temperatures for better hold. Plate width matters too—narrower 1-inch plates offer more control for short hair or face-framing pieces, while wider 1.5 to 2-inch plates cover more surface area quickly for long or thick hair.
Beyond your flat iron, these products transform your styling results from mediocre to exceptional. A quality heat protectant is non-negotiable—it creates a barrier against thermal damage while helping heat distribute more evenly. Look for formulas containing silicones or proteins that coat the hair shaft without weighing it down. A lightweight hairspray applied before styling (called “memory spray”) helps curls hold their shape without stiffness. Finish with shine serums or anti-frizz oils to tame flyaways after your curls cool. Having these ready before you start ensures you work efficiently without interruptions that compromise your results.
Prepare Your Hair for Heat Styling
Always start with clean, completely dry hair—product buildup, excess oil, and damp strands interfere with heat distribution and cause uneven, patchy curls that fall out quickly. Shampoo with lightweight, volumizing products if your hair tends to be fine or limp, as heavier formulas can weigh down your strands and prevent curls from holding volume. If your hair is naturally curly, you may need to straighten it first before creating loose curls for maximum definition and longevity.
Apply heat protectant correctly by misting throughout your hair, focusing on the mid-lengths and ends where most heat concentration occurs during curling. Work the product through with a wide-tooth comb to ensure even distribution—concentrated protectant in spots creates inconsistent results. Allow the protectant to dry fully before applying heat; styling damp protectant essentially bakes the product into your hair, defeating its purpose and potentially causing visible residue. If your hair is dry or damaged, consider applying a lightweight leave-in conditioner before your protectant for added moisture and protection during styling.
Master the Basic Wrapping Technique
The fundamental wrapping technique forms the basis for all flat iron curl styles—start by clamping your flat iron at the mid-shaft of a 2-inch section of hair rather than at the roots for more natural-looking volume. Hold the iron firmly, then rotate it away from your face for face-framing curls that draw attention to your features, or toward your face for a more contained look. Keep your rotation between 180 and 360 degrees—less rotation creates looser waves, while more creates tighter curls that gradually loosen as they cool.
Once rotated, slowly pull the iron down the length while maintaining rotation at a steady pace that allows heat to penetrate each strand fully. Moving too quickly results in curls that fall out almost immediately, while moving too slowly can cause heat damage. Hold the iron at the ends for an extra second to seal the curl completely, then release slowly and let the curl hang freely. Crucially, resist touching your curls immediately after releasing them—allow 2-3 minutes for cooling to set the style and dramatically extend longevity. Once cooled, gently finger-comb through to separate and soften the curls into loose, bouncy waves.
Try Advanced Methods for Natural Waves
Once comfortable with basic wrapping, the twisting technique adds organic variation by taking a section of hair and twisting it tightly before clamping your flat iron over the twist. When you release and unravel, you’ll discover a loose, rope-like wave that looks naturally imperfect rather than artificially uniform—perfect for creating beachy waves or adding texture to fine hair.
The S-curve method creates the most natural-looking loose curls by mimicking how hair naturally falls. Clamp your flat iron at the top of a section, then twist it in an alternating S-pattern as you move down the length—imagine writing the letter S repeatedly with the iron tip. Alternate the direction of your S-curves intentionally to create dimension that looks completely natural. This technique works especially well for medium to long hair, producing those coveted “expensive-looking” waves that appear effortless despite being carefully styled.
Temperature Settings by Hair Type
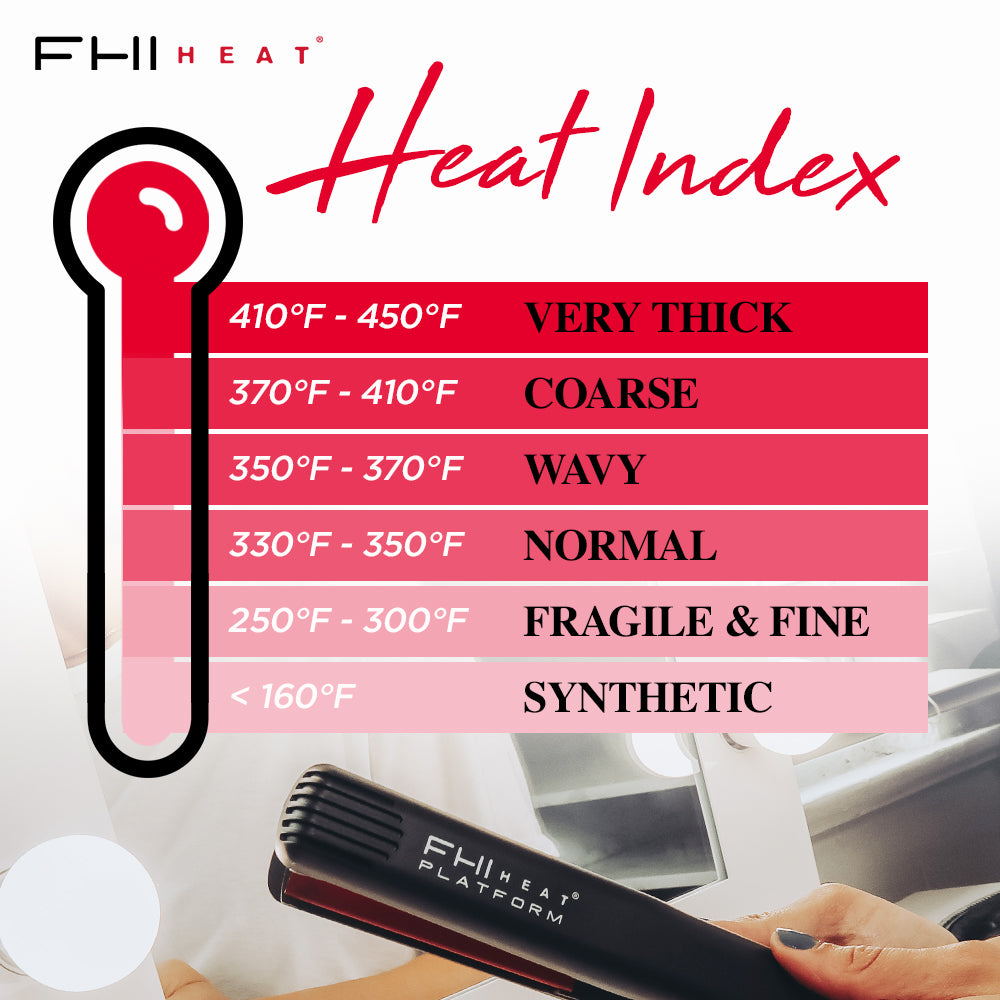
Fine, thin, or damaged hair requires lower temperatures (250-300°F) to achieve loose curls without burning fragile strands. At these settings, take smaller sections (1-1-1.5 inches) and hold the iron slightly longer (8-10 seconds). Fine hair also benefits from hairspray applied before styling to provide additional hold. Normal to medium hair typically responds best to 300-350°F with 2-inch sections and 8-12 second hold times—this range provides enough heat to set curls effectively while remaining gentle enough for regular styling.
Thick, coarse, or naturally curly hair demands higher temperatures (350-400°F) to penetrate the dense hair shaft. At these temperatures, work with smaller sections (1.5-2 inches) and extend hold times to 12-15 seconds. Always perform a quick test on a small, inconspicuous section before styling your entire head, and remember higher temperatures require extra attention to heat protectant application and cooling time for best results.
Avoid Common Styling Mistakes
Taking sections that are too large ranks among the most common mistakes—even with perfect technique, large sections prevent heat from reaching inner strands, resulting in curls that fall out within an hour. Smaller sections create more defined curls, while larger sections (2-3 inches) produce the loose, relaxed waves you want. Moving the flat iron too quickly through your hair creates similar problems by not allowing sufficient heat to set the curl, so maintain a slow, steady pace throughout.
Skipping heat protectant or applying it incorrectly undermines your entire styling effort by exposing hair to damage that eventually manifests as frizz and breakage. Touching your curls immediately after releasing them disrupts the cooling process and unravels the set before it can hold. Not allowing enough cooling time before styling the next section creates a cascade of problems—warm curls pressing against your head lose shape quickly, and residual heat can damage already-styled sections.
Make Your Loose Curls Last All Day
The cooling phase plays a crucial role in curl longevity—those 2-3 minutes after releasing each curl allow keratin proteins to “set” in their new shape. Rushing this process results in rapid fall-out, so practice patience. Once all curls cool completely, apply a light mist of workable hairspray to lock in the style without stiffness, focusing on mid-lengths and ends rather than roots.
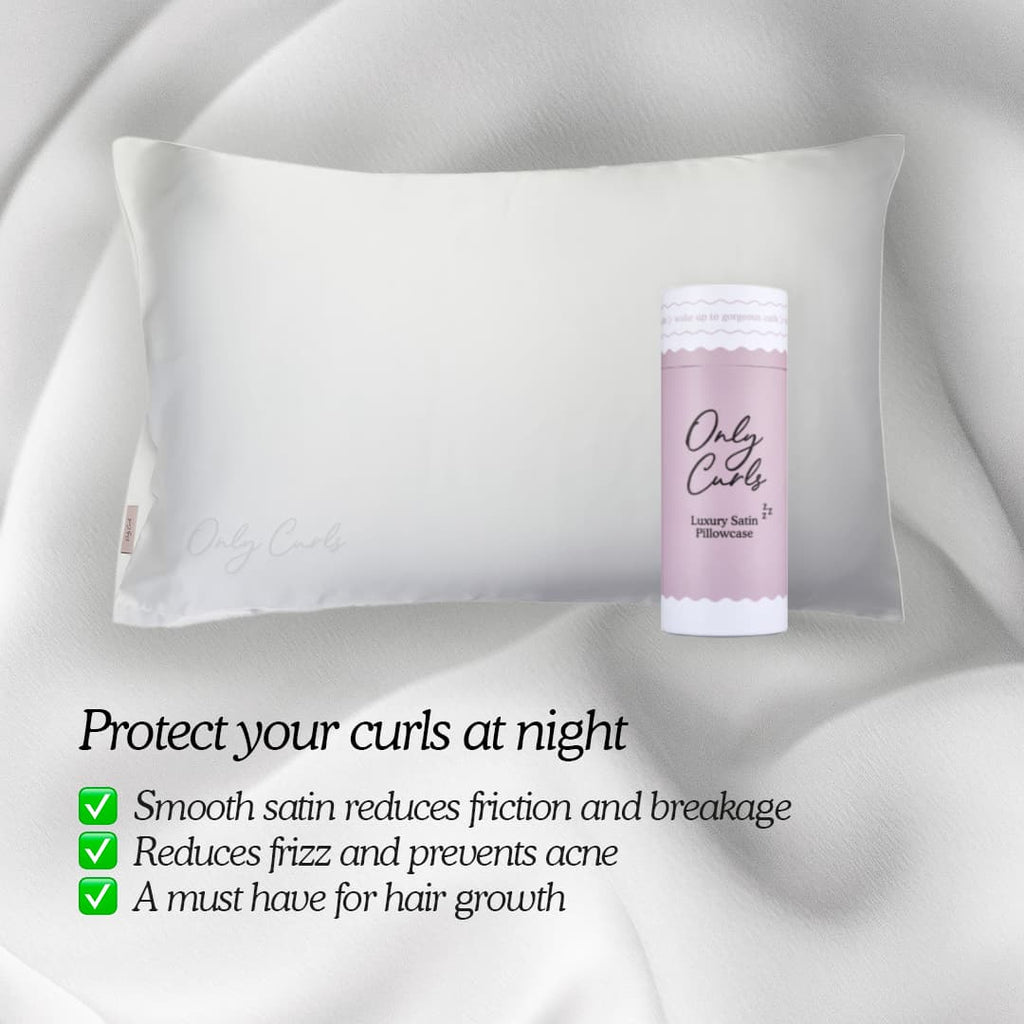
Nighttime care determines whether your morning-styled curls survive until evening. Sleep on a silk or satin pillowcase to reduce friction that creates frizz, or loosely gather your curls on top of your head secured with a soft scrunchie (“pineapple” method). If curls lose shape overnight, refresh with a water mist spray and a brief once-over with your flat iron. Dry shampoo at the roots adds lift and absorbs oil, giving second-day curls a boost without requiring a full restyle.
Quick Fixes for Styling Problems
Curls that won’t hold usually indicate temperature issues—your iron might be set too low or you’re moving too quickly through sections. Increase temperature by 25-50 degrees and extend hold times by 2-3 seconds per section. If increasing temperature isn’t an option, try stronger-hold hairspray before styling or switch to smaller sections. Sometimes simply waiting longer for curls to cool completely solves holding issues.
Frizz ruins otherwise perfect loose curls by creating a halo effect. Apply anti-frizz serum to mid-lengths and ends after curls cool, focusing on problem areas around your face. Ensure hair was completely dry before styling—trapped moisture expands when heated, pushing the cuticle outward. Using a flat iron with ionic technology helps seal the cuticle and neutralize ions that cause frizz. In humid conditions, finish with a light hairspray that creates a moisture barrier.
Creating beautiful loose curls with a flat iron combines the right tools, proper technique, and patience. Start with clean, dry, properly protected hair, select a flat iron appropriate for your hair type, and work in sections small enough for complete heat coverage. Master basic wrapping before advancing to twisting and S-curve methods, and always allow curls to cool completely before touching them. Adjust temperature to match your hair type, avoid rushing through sections, and protect your style overnight. With consistent practice applying these principles, you’ll achieve salon-quality loose curls at home that turn heads all day long.


