
There’s nothing quite like the sizzle of a perfectly cooked flat iron steak. But when outdoor grilling isn’t an option, your oven becomes the secret weapon for achieving restaurant-quality results at home. Many home cooks struggle with tough, dry steak when attempting oven cooking methods, often because they’re using techniques designed for other cuts. The flat iron steak, with its beautiful marbling and tender texture, requires a specific approach that honors its unique qualities.
This versatile cut, officially known as the top blade steak, comes from the shoulder area of the cow and features a distinctive grain pattern that delivers exceptional flavor when prepared correctly. Unlike thicker cuts like ribeye or filet mignon, the flat iron’s relatively uniform thickness makes it particularly well-suited for oven cooking—when you know the precise method. In the next few minutes, you’ll discover the exact temperature settings, timing, and finishing techniques that transform this affordable cut into a gourmet meal that rivals any steakhouse offering.
Why Your Flat Iron Steak Oven Recipe Failed Last Time
Incorrect Temperature Causing Tough, Chewy Results
Most home cooks make the critical mistake of using too high an oven temperature, which causes the exterior to overcook before the interior reaches the perfect medium-rare stage. The ideal oven temperature for flat iron steak sits between 375°F and 400°F—hot enough to create a flavorful crust but gentle enough to cook the interior evenly without creating a gray band around the edge.
When you blast the steak with 450°F+ heat, the proteins seize up too quickly, squeezing out precious juices and creating that disappointing chewy texture. Instead, embrace moderate heat and give your steak the time it needs to develop complex flavors through the Maillard reaction while maintaining tenderness. For best results, always preheat your oven fully before introducing the steak to ensure consistent cooking from the moment it enters the chamber.
Skipping the Essential Resting Period After Cooking
That tantalizing aroma wafting from your oven creates almost irresistible temptation to cut into your perfectly cooked steak immediately. However, slicing too soon releases all those carefully retained juices onto your cutting board instead of staying within the meat fibers where they belong. The science is clear: resting allows the muscle fibers to relax and reabsorb juices throughout the cut.
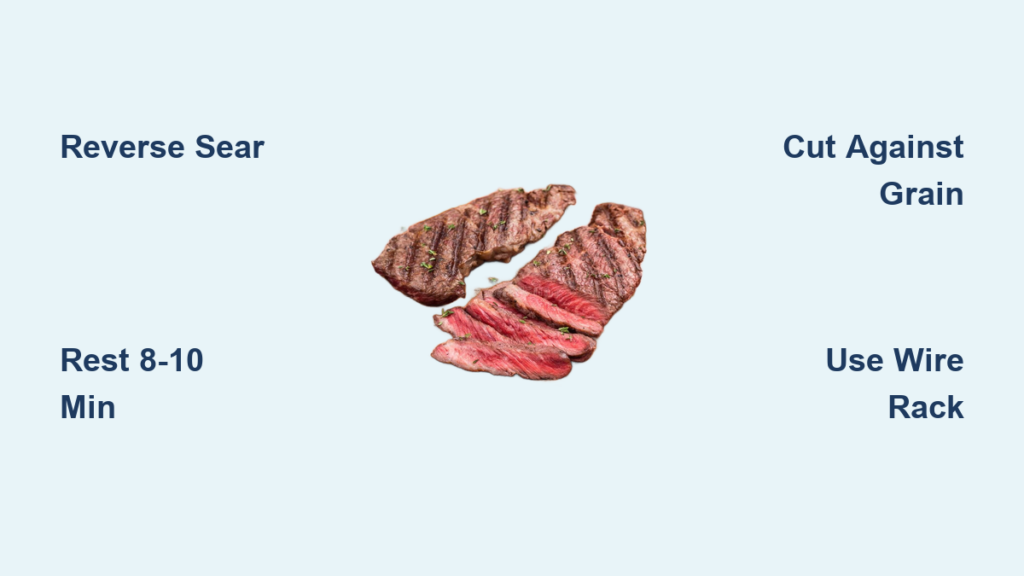
Plan for a minimum 8-10 minute rest under a loose tent of aluminum foil—time that actually improves texture rather than cooling your steak completely. During this crucial period, the internal temperature will continue rising 5-10°F (carryover cooking), so remove your steak from the oven when it’s 5°F below your target final temperature. This simple step transforms potentially dry results into consistently juicy perfection.
Best Oven Method for Flat Iron Steak: Reverse Sear Technique
Preparing Your Steak for Optimal Results
Begin with a 1-1.5 inch thick flat iron steak, preferably at least 24 hours before cooking. Pat the surface completely dry with paper towels—a critical step many overlook that directly impacts crust development. Season generously with coarse kosher salt (about 1 teaspoon per pound) and freshly ground black pepper, then place the steak on a wire rack set over a baking sheet in the refrigerator, uncovered.
This dry-brining process draws out surface moisture initially, then allows the salt to be reabsorbed along with the meat’s natural juices, enhancing both flavor and texture. The uncovered refrigeration creates a pellicle—a slightly dried surface—that promotes exceptional browning. For best results, allow at least 12 hours, though 24 hours yields even better flavor penetration and texture improvement.
Precise Cooking Steps and Temperature Monitoring
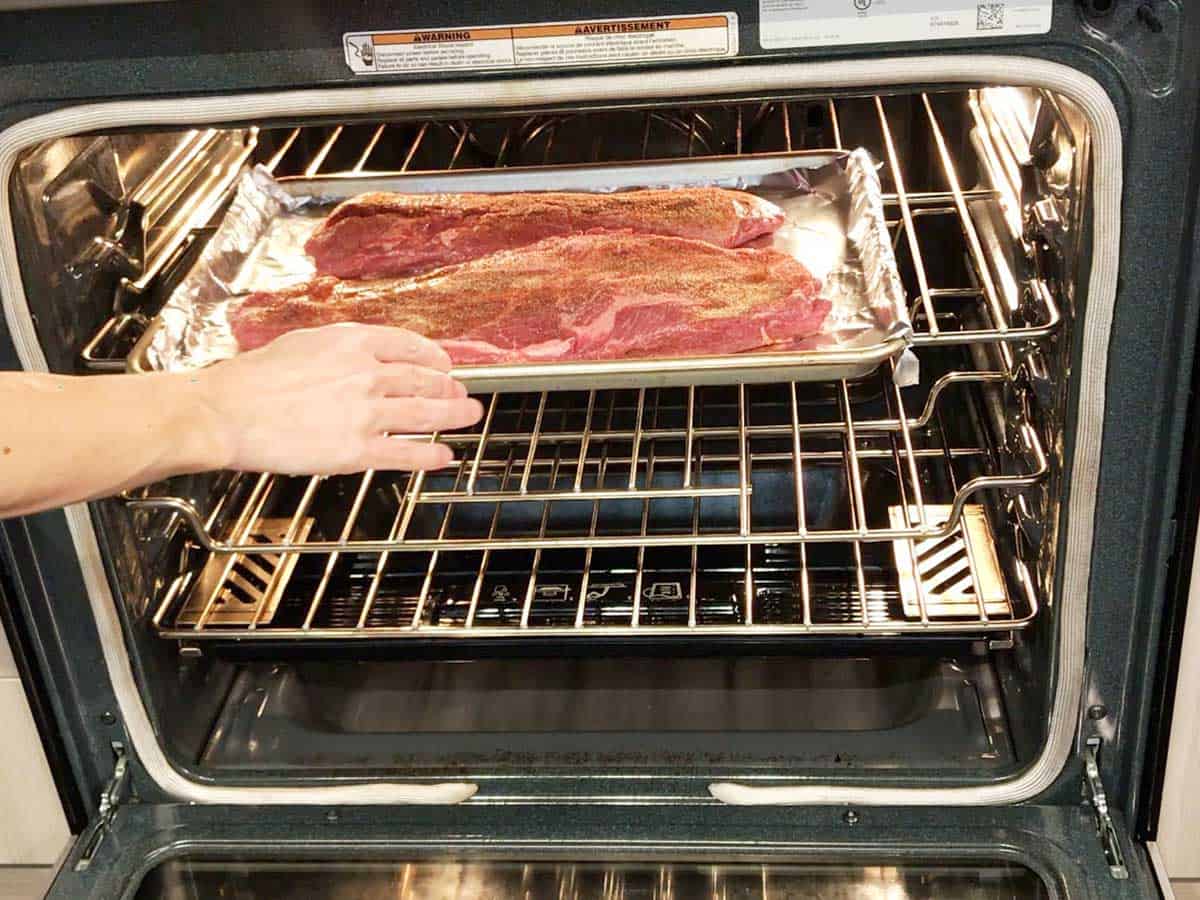
Remove your seasoned steak from the refrigerator 60-90 minutes before cooking to bring it close to room temperature—this ensures even cooking throughout. Place the steak on a wire rack over a baking sheet and insert an oven-safe meat thermometer into the thickest part, avoiding any fat pockets.
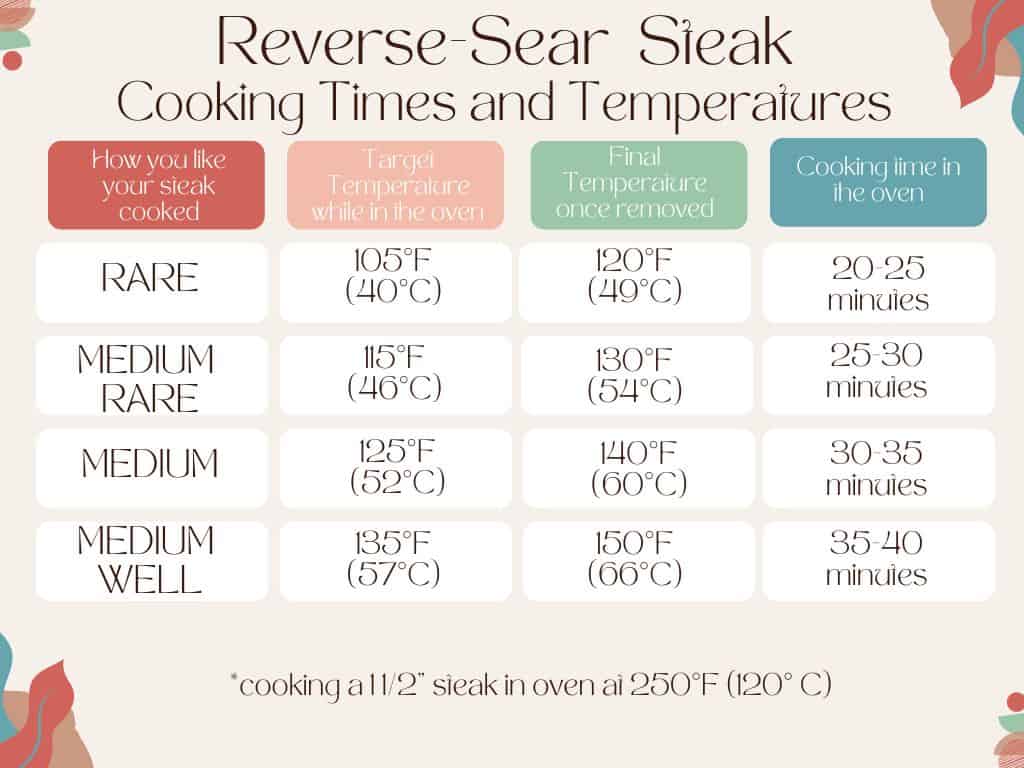
Place in a preheated 275°F oven and cook until the internal temperature reaches 115°F for medium-rare (approximately 25-35 minutes depending on thickness). This gentle low-and-slow approach allows the entire cut to come to temperature without overcooking the exterior. When the target temperature is reached, remove the steak and increase your oven temperature to 500°F to prepare for the final sear.
Creating the Perfect Crust Without Overcooking
Once your oven reaches 500°F, return the steak to the oven for 4-6 minutes to develop a rich, caramelized crust. Watch carefully during this stage, as high heat can quickly turn perfect to burnt. For an even better crust, consider finishing under the broiler for the last 1-2 minutes, watching constantly to prevent charring.
Alternatively, for superior results, heat a cast-iron skillet on high heat with a high-smoke point oil (avocado or grapeseed) and sear the steak for 60-90 seconds per side immediately after the oven phase. This two-stage approach delivers the most reliable results: even interior doneness from the gentle oven cooking, followed by an exceptional crust from direct high-heat contact.
Common Flat Iron Steak Oven Mistakes to Avoid
Using the Wrong Pan or Rack Setup
Placing your steak directly on a baking sheet creates steam that prevents proper browning and leads to boiled rather than roasted meat. Always use a wire rack positioned over your baking sheet to allow heat circulation around the entire steak. This simple setup prevents the bottom from steaming in its own juices and ensures even cooking on all sides.
If you don’t have a wire rack, create one by bending heavy-duty foil into supports or using oven-safe metal cookie bars placed across your baking sheet. Never skip this step—elevating the steak is non-negotiable for proper air circulation and consistent results. The minimal investment in a proper rack pays dividends in superior texture and appearance every time you cook.
Cutting Against the Grain Incorrectly
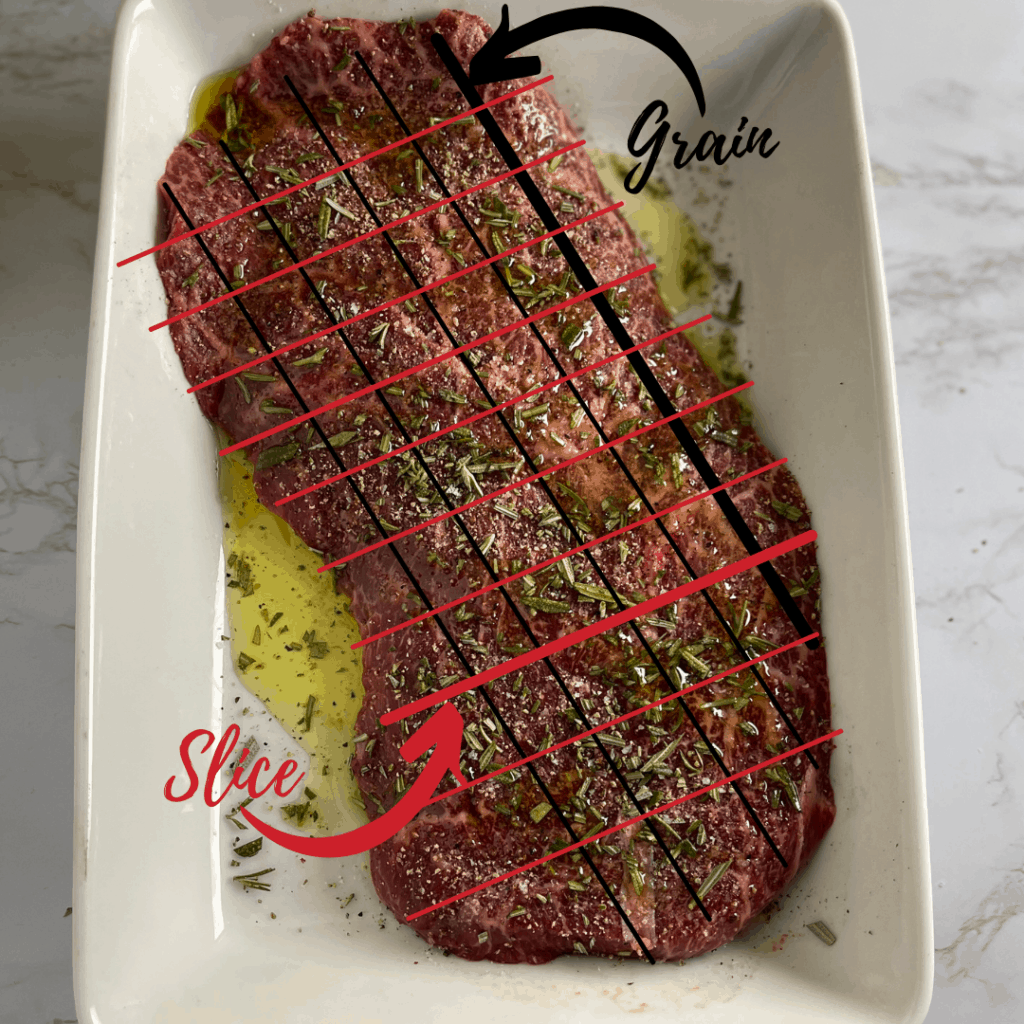
Flat iron steak has a distinctive grain pattern that runs in two different directions across the cut, creating a natural “V” shape in the muscle fibers. Slicing parallel to either grain direction will result in tough, chewy bites regardless of perfect cooking temperature. The solution? Cut perpendicular to the grain in the center section, then rotate your knife 90 degrees when approaching the outer edges where the grain direction changes.
For best results, examine your cooked steak carefully before slicing to identify the grain direction in different sections. Use a sharp chef’s knife and make clean, single-motion cuts rather than sawing back and forth, which tears the delicate meat fibers. This technique transforms potentially chewy results into melt-in-your-mouth tenderness that showcases the flat iron’s true potential.
Essential Seasoning Combinations for Oven-Cooked Flat Iron
Simple Salt and Pepper Perfection
Never underestimate the power of properly applied basic seasoning. Use coarse kosher salt (not table salt) at a ratio of 1 teaspoon per pound, applied at least 45 minutes before cooking to allow proper absorption. Freshly cracked black pepper adds complexity without overpowering the meat’s natural flavor.
For enhanced results, add a light coating of neutral oil (about ½ teaspoon per side) just before cooking to help the seasoning adhere and promote better browning. The oil creates a medium for the Maillard reaction to occur more efficiently, developing those complex, savory compounds that define great steak flavor.
Flavor-Boosting Compound Butter Finish
While your steak rests, prepare a simple compound butter by mixing softened unsalted butter with minced garlic, fresh herbs (rosemary and thyme work beautifully), and a touch of lemon zest. Form into a log, wrap in parchment paper, and chill until firm.
Slice ½-inch rounds of this flavored butter and place one on your hot steak just before serving. As it melts, it creates an instant sauce that complements rather than overwhelms the meat’s natural flavor. This technique adds restaurant-quality presentation and flavor complexity with minimal effort—perfect for impressing guests without complicated last-minute preparations.
Achieving Restaurant-Quality Results at Home
Transforming an affordable flat iron steak into a gourmet meal requires understanding its unique characteristics and applying precise cooking techniques. The reverse sear method in your oven delivers consistent, juicy results that outperform traditional high-heat approaches for this particular cut. Remember to always monitor internal temperature with a reliable thermometer, allow proper resting time, and most importantly, cut correctly against the grain.
For your next special dinner, try this oven method with a simple side of roasted vegetables and a bold red wine. The combination of proper technique and quality ingredients will create a memorable meal that proves you don’t need a professional kitchen to achieve steakhouse-quality results. When you master these fundamentals, you’ll find yourself reaching for flat iron steak more often—it’s not just budget-friendly, but with the right approach, it might just become your new favorite cut.


