
That neglected set of vintage irons in your garage could be just one restoration project away from becoming your favorite playing set. Golf iron restoration transforms rusty, worn clubs into gleaming equipment that performs like new while preserving decades of craftsmanship. With the right approach, you can save hundreds compared to buying new clubs and breathe new life into irons that store-bought sets can’t match for feel and character. This guide reveals exactly how to restore golf irons from start to finish, whether you’re working with a grandfather’s heirloom set or bargain finds from a thrift store.
Most golfers toss old clubs without considering restoration potential, but properly revived irons deliver exceptional performance at a fraction of replacement costs. The process demands patience and attention to detail, but skipping steps leads to disappointing results or even safety hazards. Set aside a full weekend in a well-ventilated space with your tools organized, and you’ll transform neglected clubs into equipment you’ll proudly carry onto the course.
Diagnose Your Irons’ Repair Potential Before Starting
Before investing time in golf iron restoration, determine whether your clubs merit the effort. Examine each clubhead closely for structural damage that no amount of refinishing can fix—cracks extending from the hosel, severe sole plate deformation, or broken ferrules indicate problems beyond DIY repair capabilities. Attempting to play clubs with structural damage risks serious injury from head separation during swings.
Test shaft integrity by flexing each shaft gently near the grip end while holding the clubhead stationary. Look for visible cracks, rust infiltration at the hosel connection point, or graphite shaft delamination where fibers separate. Steel shafts with surface rust often restore well, but damaged graphite shafts typically require replacement that may exceed vintage clubs’ value.
Evaluate clubface wear patterns carefully. Shallow groove wear improves with resurfacing, but deeply worn grooves compromise spin and distance control. Be realistic about your goals—some collectors accept performance trade-offs for sentimental value, while others seek clubs they’ll actually play. Document each club’s condition with photos to track your progress and identify problem areas needing special attention.
Assemble Critical Restoration Equipment and Safety Gear
Golf iron restoration fails without proper tools and safety precautions. Begin with essential protection: chemical-resistant nitrile gloves, ANSI-rated safety glasses, and a respirator with organic vapor cartridges for chemical work. Many restoration steps involve hazardous materials that cause permanent health damage without proper protection.
Your core toolkit needs:
– Bench vise with soft jaw covers to prevent marring shafts
– Rubber mallet for gentle disassembly
– Heat gun (800-1000°F range) for epoxy softening
– Wire brushes (brass for steel, nylon for delicate areas)
– 0000-grade steel wool for fine polishing
For chemical work, stock acetone for degreasing, white vinegar for rust conversion, and naval jelly for heavy corrosion. Choose your finish method carefully—cold blueing solutions create traditional patinas while automotive paints offer durability. Purchase new grips and ferrules before starting to avoid mid-project delays. Organize everything on a dedicated workbench with good lighting and ventilation.
Remove Heads and Clean Components Thoroughly
Disassembly requires patience to avoid damaging your irons. Secure the shaft in your vise with protective covers, then apply heat evenly around the hosel with your heat gun for 30-45 seconds. Rotate constantly to prevent overheating one spot, then attempt to twist the head gently. Repeat heating cycles as needed—never strike the clubhead with metal tools, as this deforms critical impact surfaces.
Once separated, clean epoxy residue from both shaft tip and hosel interior using acetone-soaked rags and plastic scrapers. Metal tools scratch surfaces and compromise reassembly adhesion. Inspect shaft tips for pitting or deformation—if damaged, the shaft likely needs replacement rather than restoration.
Soak clubheads in warm, soapy water for 30 minutes to loosen embedded dirt, then scrub all surfaces with soft brushes. Pay special attention to groove interiors where grass and debris accumulate. Rinse thoroughly and dry completely with compressed air—any remaining moisture causes flash rust that undermines your entire restoration effort. Verify complete dryness by checking for water droplets in grooves and hosel crevices.
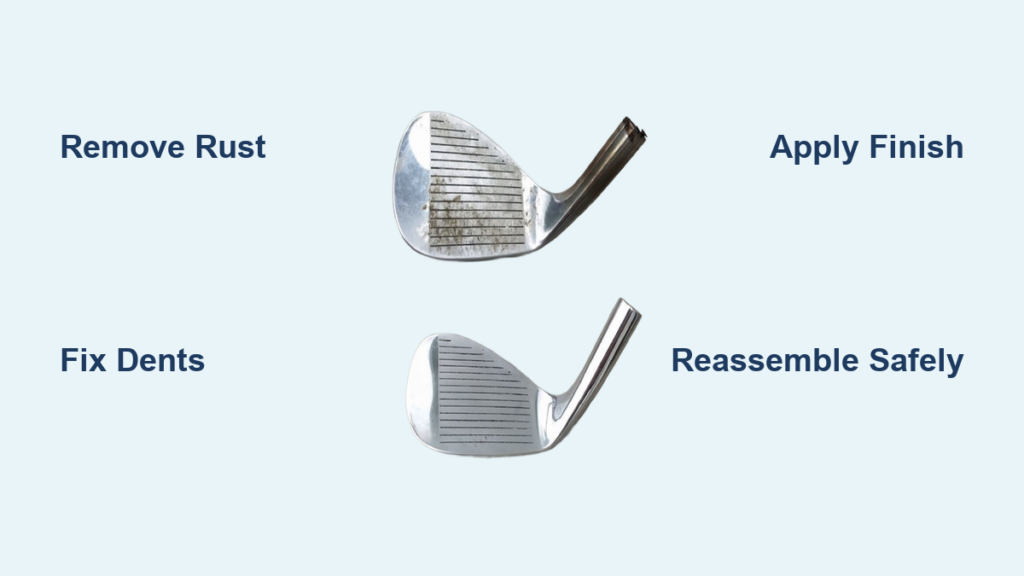
Eliminate Rust Without Damaging Clubheads

Rust removal makes or breaks golf iron restoration projects. Start with the gentlest method appropriate for your rust level—aggressive techniques remove too much metal from already-thin vintage clubfaces. For light surface rust, submerge clubheads in undiluted white vinegar for 2-4 hours. The acetic acid converts iron oxide back to metal without significant material loss.
Tackle stubborn rust with a baking soda paste applied to affected areas. Let it sit for 15-20 minutes before scrubbing with a soft brush—this alkaline solution neutralizes acidic corrosion while providing mild abrasive action. Focus on groove bottoms where rust hides and affects ball spin.
For severe pitting, use naval jelly (phosphoric acid) following manufacturer instructions precisely. Apply with a cotton swab to targeted areas only—never submerge entire clubheads as this damages unaffected surfaces. Allow 15-30 minutes of contact time, then neutralize with baking soda solution before thorough rinsing. Finish with 0000 steel wool to smooth surfaces for refinishing.
Fix Dents and Reshape Sole Grinds Properly
Minor dents respond well to careful hammer work when done correctly. Support the clubhead on a soft metal block or wooden surface, then tap dents from the reverse side with light, controlled strokes using a ball-peen hammer. Start with the least force necessary—over-hammering creates new deformities that require more extensive repair.
Sole grinding adjustments affect turf interaction and shot performance. Most restorers aim to return clubs to original specifications rather than modify bounce characteristics. If reshaping is necessary, use an 80-120 grit belt sander working slowly with frequent progress checks. Remove minimal material and maintain consistent angles across the entire sole—you can always remove more metal but never add it back.
After grinding, polish the sole to prevent debris accumulation and ensure smooth turf interaction. Some restorers apply specialized sole coatings for added protection, while others prefer the raw metal appearance. Regardless of choice, verify the sole has no sharp edges that could catch during swings—a properly finished sole glides effortlessly through grass and sand.
Apply Durable, Professional-Quality Finishes
Your finish choice determines both appearance and longevity of restored golf irons. Cold blueing creates the traditional deep blue-black patina prized by collectors. Apply multiple thin coats with 30-minute drying intervals between applications—rushing this process causes uneven color development. Work in climate-controlled conditions as temperature and humidity significantly affect results.
Gun blueing solutions produce richer colors but require more precise application. Some formulations need heated metal for optimal adhesion—research your specific product thoroughly before starting. Always protect surrounding areas with masking materials to avoid finish contamination on shafts.
For maximum durability in playing condition clubs, use automotive-grade metal paints. Apply thin, even coats with light sanding between layers using 1200-grit paper. Finish with UV-resistant clear coat to prevent sun damage—three light coats outperform one heavy application that causes runs and uneven texture. Allow 72 hours minimum cure time before handling restored clubs.
Reassemble Clubs with Precision and Safety
Proper reassembly ensures safe, playable restored irons. Mix fresh two-part epoxy designed for golf clubs—never use quick-setting adhesives that create time pressure leading to misalignment. Apply generous epoxy to both shaft tip and hosel interior, then twist the head onto the shaft to distribute adhesive evenly.
Seat the head fully against the hosel shoulder and verify alignment using a straightedge. Clamp horizontally with the clubhead slightly elevated to prevent epoxy migration into the shaft interior. Allow minimum 24-hour cure time—rushing this step risks head separation during swings, which can cause serious injury.
Install new grips using proper solvent techniques—apply solvent inside the grip and on the shaft, then slide quickly before drying occurs. Position carefully as adjustment becomes impossible once set. Allow 4+ hours cure time before playing, though overnight provides maximum grip security. Check all ferrules for proper seating to maintain professional appearance.
Maintain Restored Irons for Long-Term Performance
Proper maintenance preserves your golf iron restoration investment. Wipe clubs with a damp cloth after each round, focusing on groove interiors where debris accumulates. Dry thoroughly before storage—never put away damp clubs as this accelerates corrosion in restored finishes.
Store clubs in climate-controlled environments with moderate humidity. Garages and sheds experience damaging temperature fluctuations that degrade restoration work over time. If non-climate storage is unavoidable, use silica gel packets in your bag and consider protective headcovers.
Inspect restored clubs monthly for developing issues. Check grip security by attempting to twist them—any movement indicates loose installation requiring immediate attention. Examine hosel joints for gaps or movement signaling adhesive failure. Address small rust spots promptly before they compromise your restoration work. Regular maintenance extends your restored clubs’ life for decades of enjoyable play.


