
You’ve invested in a quality curling iron but find yourself stuck creating the same basic curls day after day. Many people struggle to move beyond simple ringlets, not realizing their curling iron can transform their hair into dozens of stylish looks for work, weekends, or special events. With the right techniques, your curling iron becomes the most versatile tool in your styling arsenal – capable of creating everything from red carpet waves to professional office-appropriate styles. This guide reveals ten curling iron hairstyles you can master at home, with specific techniques for different hair lengths, textures, and occasions, so you can finally unlock your tool’s full potential.
Mastering Curling Iron Sizes and Heat Settings

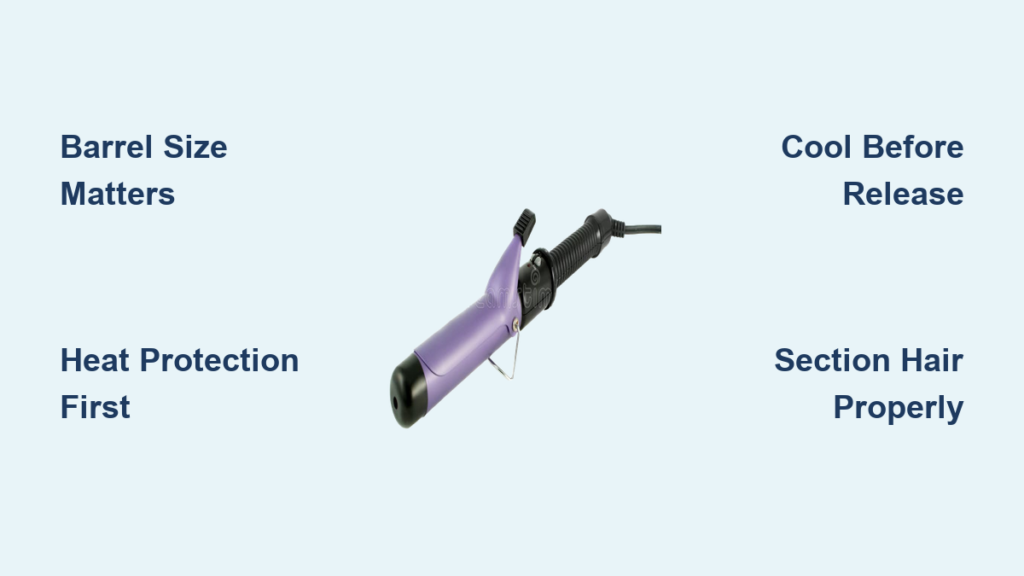
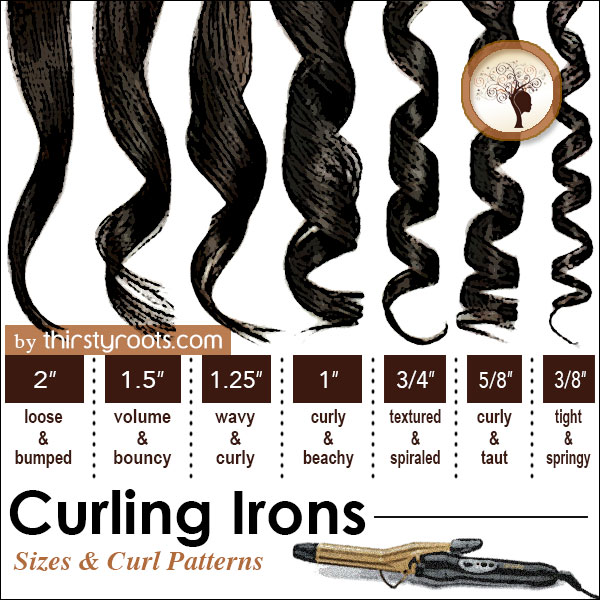
Choosing the Right Barrel Diameter for Your Desired Style
Your curling iron’s barrel size directly determines your final look. For tight spiral curls that last all day, select a ½-inch barrel that works especially well on shorter haircuts. Medium 1-inch barrels create that perfect Hollywood wave pattern ideal for shoulder-length hair and formal events. If you’re aiming for effortless beach waves with minimal heat damage, opt for a 1.5-inch barrel that produces loose, natural-looking bends rather than defined curls. Long-haired individuals should consider a tapered barrel that creates varied curl patterns from root to tip, preventing that uniform “curler” appearance that looks unnatural.
Heat Protection Essentials Before Styling
Applying heat protection product isn’t optional—it’s the critical step between beautiful curls and damaged hair. Spray a thermal protectant evenly through damp hair before blow-drying, focusing on mid-lengths and ends where heat damage occurs most frequently. For fine or damaged hair, set your curling iron to 300-350°F; medium thickness hair performs best at 350-375°F; while coarse or thick hair may require 375-400°F. Never apply additional heat protectant to dry hair before curling—that creates buildup that prevents proper heat transfer and causes inconsistent results. Wait until your hair is completely dry after styling before applying any finishing products.
Quick-Style Work-Ready Hairstyles
5-Minute Polished Office Waves
Create professional-looking waves that won’t distract during meetings with this efficient technique. Section hair horizontally from ear to ear, clipping the top section up. Starting at the nape, take 1-inch horizontal subsections. Wrap each section around the barrel away from your face, holding for exactly 8 seconds before releasing. Focus on curling only the bottom two-thirds of each section, leaving the top third straight for a sophisticated look. When you reach the crown, direct curls away from your face on one side and toward your face on the other for balanced dimension. Finish with a light mist of flexible hold hairspray to maintain shape without stiffness.
Why Your Curls Fall Flat Before Lunchtime
Fine hair loses curl definition faster because it lacks the structural integrity to maintain shape. Combat this by applying a lightweight mousse to damp hair before blow-drying—it creates internal support without weighing hair down. For medium to thick hair, insufficient heat setting is the most common culprit. Your curling iron must be hot enough to reset the hair’s hydrogen bonds, which requires proper temperature for your hair type. Another frequent mistake: releasing curls too soon after styling. Allow each curl to cool completely in your hand before releasing—this sets the shape through the cooling process that locks in the new configuration.
Weekend and Special Occasion Styles
Effortless Beach Waves for Casual Outings
Achieve that coveted “I just came from the beach” look with strategic sectioning and wrapping technique. After applying sea salt spray to damp hair, rough dry until 80% dry. Working with 2-inch sections, wrap hair around a 1.25-inch barrel but release after 3-4 seconds—just enough to create a bend, not a full curl. Alternate wrapping directions randomly throughout your head; consistency creates artificial-looking results. Once all sections are bent, run your fingers through the texture to break up defined curls. Scrunch gently with more sea salt spray for enhanced texture that lasts through brunch and beyond.
Red Carpet Vintage Curls with Modern Hold
Create timeless Hollywood waves that won’t droop during evening events using the pin curl method. Section hair into horizontal bands, starting at the bottom. Take 1-inch vertical subsections and wrap around a 1-inch barrel toward your face. Immediately after releasing each curl, pin it to your head with a bobby pin in a C-shape while still hot. Continue until all hair is curled and pinned. Allow hair to cool completely—this critical step sets the curl pattern through both heat and cooling phases. Remove pins carefully, then gently separate curls with a wide-tooth comb for that signature vintage wave pattern with modern staying power.
Troubleshooting Common Curling Iron Problems
Fixing Uneven Curl Patterns Across Your Head
Inconsistent curl results usually stem from improper sectioning or inconsistent timing. Use hair clips to create clean horizontal and vertical sections before beginning—this ensures uniform subsections. Always hold the iron vertically when wrapping to maintain consistent tension from root to tip. Set a timer for each curl: 6 seconds for fine hair, 8 for medium, 10 for thick. Release the curl immediately after the timer—holding longer doesn’t create tighter curls but causes damage. For persistent unevenness, check your iron’s heat distribution; some older models develop hot spots that create irregular results.
Preventing Heat Damage While Styling Daily
Daily heat styling doesn’t have to destroy your hair when you implement these protective measures. Always start with completely dry hair—curling damp hair causes steam damage that weakens hair structure. Never pass the iron over the same section twice; if a curl doesn’t take, increase heat slightly rather than re-curling. Focus styling primarily on mid-lengths and ends, minimizing direct heat on roots which produces natural volume without damage. Incorporate weekly deep conditioning treatments specifically formulated for heat-damaged hair. Rotate between heat styling and heatless methods to give your hair regular recovery periods.
Advanced Techniques for Long Hair
Creating Dimensional Curls That Don’t Turn Into a Triangle

Long-haired individuals often struggle with curls that look great at the top but become a voluminous triangle by the shoulders. Combat this by varying your barrel size throughout your hair—use a smaller barrel near the roots and a larger one on the lower sections. When curling, take diagonal sections from the opposite side of where you’re standing to create cross-body movement. Curl the top layers tighter and shorter, then create longer, looser bends on the bottom sections. This technique maintains volume at the crown while preventing excessive width at the bottom—a common problem with long hair styling.
Overnight Curls That Wake Up Perfect
Transform your morning routine with this heat-free overnight method that uses your curling iron as the base. After blow-drying, create two loose braids on either side of your part. Wrap each braid around a cool curling iron barrel, securing with heat-resistant hair ties. Sleep on a silk pillowcase to prevent friction that unravels your style. In the morning, carefully unwind the braids from the iron without pulling. Run fingers through the resulting waves for soft, natural-looking texture that appears professionally styled but required minimal morning effort—perfect for rushed workdays or weekend adventures.
Maintaining Your Curling Iron for Best Results
Regular maintenance ensures consistent performance and extends your tool’s lifespan. Clean the barrel weekly with a damp microfiber cloth while the iron is cool—never use liquids directly on the tool. Remove product buildup with a specialized cleaning spray designed for styling tools. Check the swivel cord connection monthly for fraying or damage that could cause inconsistent heating. Store your iron vertically in a heat-resistant holder rather than coiling the cord tightly around it, which damages internal wiring. Replace your curling iron every 18-24 months as heating elements degrade, causing inconsistent results even at the same temperature setting.
Final Note: Mastering these curling iron techniques transforms your daily styling from a chore into a creative opportunity. By selecting the right barrel size, applying proper heat protection, and using directional wrapping techniques, you’ll create styles that look professionally done but require only basic tools. Remember that cooling time is as crucial as the curling process itself—never rush this step if you want long-lasting results. For best outcomes, practice each technique on second-day hair when natural oils provide additional protection, and always finish with a texture spray that enhances rather than weighs down your style.


