
That frustrating moment when your iron shot flies off target despite a seemingly good swing? The problem likely started before you even began your backswing. Proper address position with irons sets up clean contact, consistent trajectory, and accurate distance control. Most amateur golfers waste hours practicing swings while neglecting the critical half-second setup that determines everything. This guide reveals exactly how to position your body, align your stance, and prepare for solid iron shots every time—whether you’re hitting a delicate wedge shot or a long iron approach.
Perfect Iron Stance Width for Maximum Power

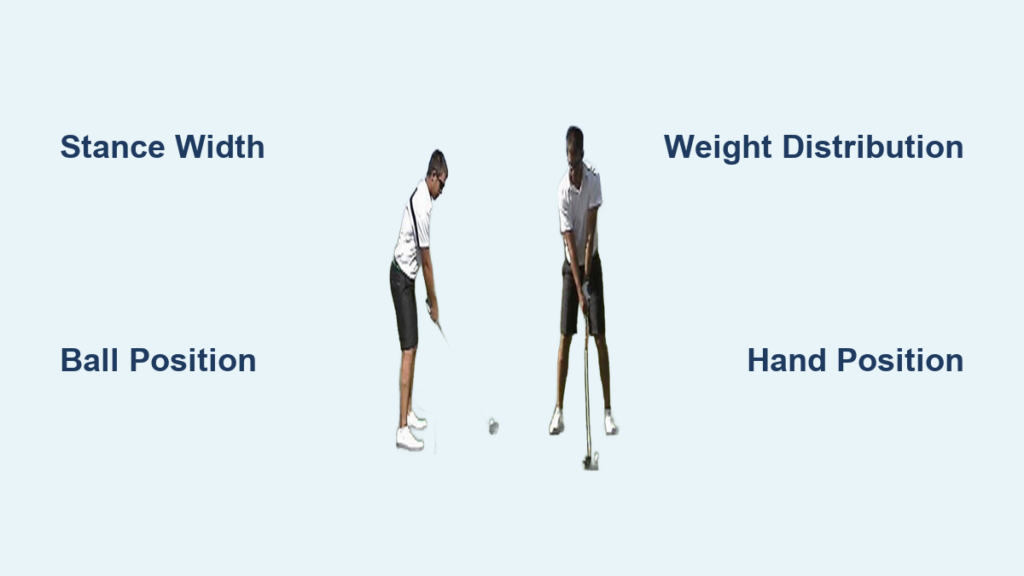
Your feet position creates the foundation for your entire swing sequence. Stand with feet shoulder-width apart for mid-irons (5-7 irons), creating enough stability to maintain balance while allowing full hip rotation. Taller golfers should add an inch to their stance width, while shorter players might narrow theirs slightly—but never so narrow that you feel unstable. For short irons (8-iron through wedge), reduce your stance width by 2-3 inches to promote faster hand action and better control for precision shots. With long irons (2-4 irons), widen your stance by 1-2 inches beyond shoulder width to accommodate the longer swing arc and maintain balance.
How to Check Your Stance Alignment
Place a club shaft on the ground parallel to your target line, then position your feet along a line parallel to that club but offset toward the target side. Your front foot (left for right-handed golfers) should align with this parallel line. This technique ensures your body is aligned left of the target—not open or closed—which matches the necessary in-to-out swing path for straight iron shots. Many amateurs mistakenly aim their feet directly at the target, causing slices or pulls without realizing their alignment is the root cause.
Common Stance Mistakes That Ruin Iron Shots
Standing too close to the ball forces you to stand up during the swing, creating thin or topped shots. If your arms feel cramped against your chest, you’re too close. Standing too far away makes you reach with your arms, causing fat shots and inconsistency. The club should hang naturally from your shoulders with your arms forming a comfortable triangle. Check your position by ensuring your front knee points toward the ball, not collapsed inward or flared outward—that subtle alignment keeps your lower body stable while allowing proper rotation.
Ball Position Secrets for Every Iron in Your Bag
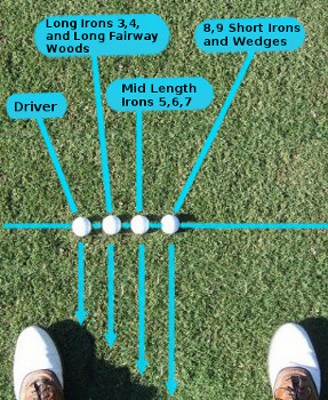
Position the ball opposite the middle of your front foot for short irons (9-iron through wedge), creating the downward strike needed for clean contact and proper spin. Move the ball forward to align with your front heel for mid-irons (5-7 irons), allowing the club to shallow slightly through impact for optimal launch conditions. With long irons (2-4 irons), place the ball just ahead of your front heel to catch the ball on a slightly ascending path—this adjustment prevents the common “fat long iron” problem that plagues most amateurs.
Why Ball Position Varies by Club
Each iron has different loft and center of gravity characteristics requiring specific contact points. Shorter irons work best with a descending blow that compresses the ball against the turf, while longer irons need a slightly shallower angle of attack to launch the ball higher. Placing a 7-iron ball too far back in your stance causes thin shots because the club bottoms out before reaching the ball. Positioning a pitching wedge too far forward creates fat shots as the club strikes the ground before the ball. The simple adjustment of moving the ball just 1-2 inches can transform your iron play from inconsistent to reliable.
Weight Distribution That Guarantees Clean Contact
Rest 55-60% of your weight on your front foot at address, with your knees flexed and weight centered on the balls of both feet. This forward bias isn’t about leaning—it’s about establishing the proper pressure distribution that allows your body to move correctly through impact. Imagine standing ready to jump; you wouldn’t be on your heels, but neither would you be on your toes. This athletic position keeps your hips rotated open slightly, promoting the correct weight shift during your swing.
How to Check Your Weight Distribution
Place a small coin under the arch of your front foot—if you can feel it distinctly but aren’t balancing on it, you’ve got proper weight distribution. Many amateurs make the mistake of setting up with equal weight or even more weight on their back foot, which forces them to slide laterally instead of rotating, causing inconsistent contact. Your front knee should show a slight flex but not collapse inward—this position maintains stability while allowing proper hip rotation through the shot.
Hand Position and Grip Pressure for Crisp Iron Strikes
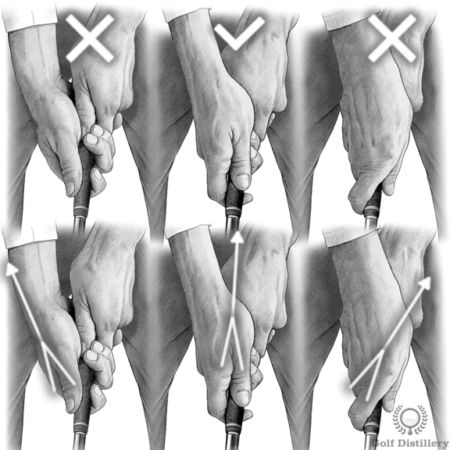
Position your hands slightly ahead of the ball at address, with the grip pointing toward your front thigh rather than your chest. This “forward press” ensures the clubface returns square at impact and promotes the downward strike essential for iron play. Grip pressure should feel like you’re holding a small bird—firm enough not to let it escape, but gentle enough not to harm it (about a 5 on a 1-10 scale). Tension in your hands travels up your arms, restricting wrist hinge and reducing clubhead speed.
Common Hand Position Errors
Hands too far behind the ball at address cause the club to approach the ball from the outside, creating slices or pulls. Hands excessively ahead of the ball (beyond your front thigh) produces low, weak shots that lack distance. The ideal hand position varies slightly by club: with short irons, hands move slightly farther ahead to promote a steeper angle of attack, while long irons require hands only minimally ahead to encourage a shallower swing path.
Body Alignment Checklist for Straighter Iron Shots
Your shoulders, hips, and feet should all align parallel left of your target (for right-handed golfers), not directly at it. An easy alignment trick: place a second club on the ground pointing at your target, then align your feet parallel to this club but offset toward the target side. Your eyes should focus directly on the back of the ball with your head resting naturally on your spine angle—never lifted to watch the target. Many golfers make the critical mistake of looking up at the target during address, which alters their spine angle and disrupts their entire swing sequence.
How to Fix Misalignment on the Course
Before each shot, take your normal stance then look up at your target without moving your head. If you see your target directly in front of you, you’re aligned correctly. If the target appears to the right, you’re aimed left (good); if it appears to the left, you’re aimed right (bad). This simple visual check prevents the most common alignment error that causes consistent shot patterns to drift offline.
Iron-Specific Setup Adjustments You’re Missing
Scoring irons (8-iron through wedge) require a slightly narrower stance and ball position moved back toward the center of your stance. This setup promotes a steeper angle of attack for crisp contact and better spin control around the greens. Long irons (2-4 irons) need a wider stance with the ball positioned just ahead of your front heel to encourage a sweeping motion that launches the ball higher. Mid-irons (5-7 irons) sit in the middle—shoulder-width stance with ball at front heel for optimal launch conditions.
Why Most Golfers Struggle with Long Irons
The #1 long iron mistake: setting up like a driver with the ball too far forward. Long irons need only a slightly forward ball position—just ahead of your front heel, not opposite your front foot like a driver. Combine this with excessive weight on your back foot, and you’ve created perfect conditions for thin or topped shots. Instead, maintain 55-60% weight on your front foot and position the ball only marginally forward to catch the ball on a shallow downward strike.
Quick Iron Setup Checklist Before Every Shot
Run through these six steps before every iron shot to guarantee consistent setup: 1) Align your feet parallel left of target using the club-on-ground method, 2) Position the ball according to your specific iron (middle front foot for short irons, front heel for mid-irons, slightly ahead for long irons), 3) Distribute 55-60% of weight on front foot with pressure on balls of feet, 4) Position hands slightly ahead of ball with grip pointing toward front thigh, 5) Check that your front knee points toward the ball with slight flex, and 6) Focus eyes on back of ball with head resting naturally on spine angle.
This 10-second routine builds muscle memory that translates to consistent contact regardless of pressure. Many golfers skip these fundamentals when playing quickly or under stress—don’t let that be you. Consistent setup equals consistent results with your irons.
Mastering your address position with irons transforms inconsistent ball-striking into reliable performance. By implementing these specific setup techniques—proper stance width, precise ball positioning, correct weight distribution, and iron-specific adjustments—you’ll immediately notice cleaner contact and more predictable shot patterns. Remember that small setup adjustments make big differences: moving the ball just an inch forward or back can eliminate fat or thin shots with specific clubs. Commit to practicing these address fundamentals before every range session, and you’ll build the foundation for iron play that consistently finds the fairway and greens. The next time you step up to an iron shot, focus on these setup elements rather than swing thoughts—you’ll be amazed at how much simpler solid contact becomes.


