
When your Lodge cast iron skillet arrives with that distinctive black finish, you’re seeing factory seasoning—but knowing how to cure Lodge cast iron properly transforms it from functional cookware into a culinary heirloom. Many home cooks mistakenly believe factory seasoning is the final product, not realizing that hand-curing builds stronger, more durable non-stick properties that improve with each use. This guide reveals the exact techniques for creating that coveted glassy patina on your Lodge cast iron, whether you’re seasoning a brand-new skillet or resurrecting a rusty family heirloom.
The magic happens when oil bakes onto the iron surface, creating a polymerized layer through a chemical reaction called polymerization. Unlike non-stick coatings that degrade over time, properly cured Lodge cast iron actually improves with age and use. You’ll discover that curing isn’t complicated—it’s a straightforward process requiring minimal equipment but delivering maximum cooking performance. By the end of this guide, you’ll confidently restore any Lodge piece to flawless cooking condition and understand exactly when and how to maintain that perfect seasoning.
Why Proper Curing Makes Your Lodge Cast Iron Perform Better
Curing Lodge cast iron creates a naturally non-stick surface that rivals or exceeds synthetic coatings. When you learn how to cure Lodge cast iron correctly, you’re building layer upon layer of polymerized oil that fills the microscopic pores in the iron surface. This transformed surface releases eggs effortlessly, sears steaks with perfect crust, and browns vegetables evenly without sticking—achievements that often elude even expensive modern cookware.
Factory seasoning provides only a single protective layer, while hand-curing builds multiple durable layers that bond permanently to the iron. Each additional curing cycle increases the depth and resilience of your seasoning, creating that prized glossy black patina that seasoned cast iron users cherish. The difference becomes apparent during cooking: properly cured Lodge cast iron develops a slick surface that improves with regular use rather than deteriorating like traditional non-stick pans.
Curing also protects against rust, the arch-nemesis of cast iron cookware. Bare iron exposed to moisture will rust within hours, but a properly cured surface creates an impermeable barrier that prevents oxidation. This protection extends your pan’s lifespan from years to generations—many cooks use Lodge pieces that have been in their families for decades, all thanks to proper curing and maintenance techniques.
Essential Supplies for Perfect Lodge Cast Iron Seasoning

You don’t need specialty products to cure Lodge cast iron—common kitchen items deliver professional results. The right oil selection makes all the difference in creating durable seasoning. Vegetable oil, canola oil, or grapeseed oil work perfectly for most home cooks due to their high smoke points (around 400°F) and neutral flavors. Flaxseed oil creates exceptionally hard seasoning but requires precise temperature control as it polymerizes at lower temperatures.
Gather these basic tools before starting:
– Paper towels or lint-free cloths for oil application
– Aluminum foil to line your oven racks
– Tongs for handling hot cookware
– Mild dish soap (contrary to popular myth, soap won’t damage cured seasoning)
– Fine steel wool (0000 grade) for rust removal
Optional but helpful items include a baking sheet for oven drips, a wire brush for stubborn residue, and bacon drippings for the final seasoning layer. Avoid olive oil and butter for curing—their low smoke points cause them to burn rather than polymerize, leaving sticky residue instead of protective seasoning.
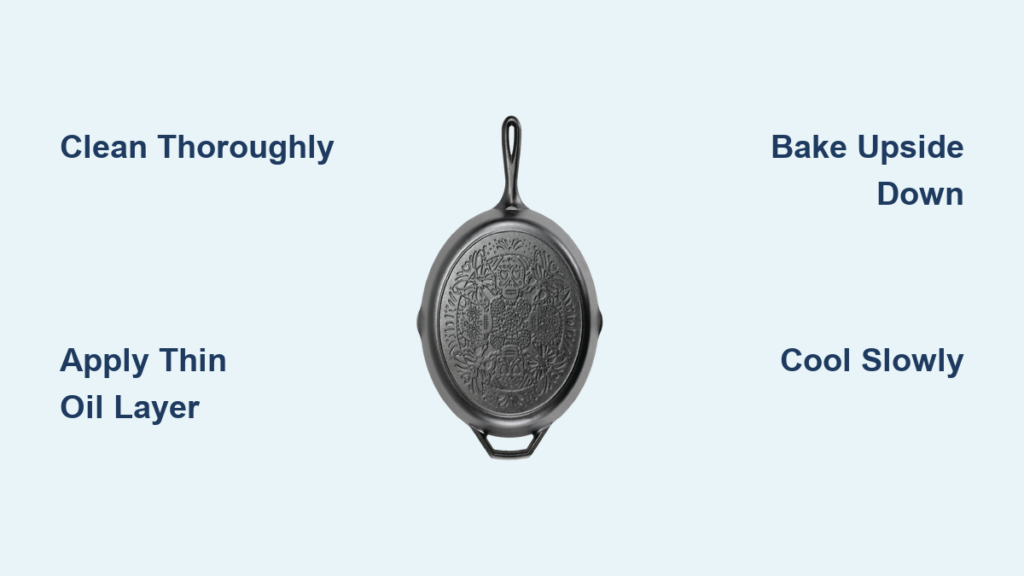
Prepare Your Lodge Pan for Maximum Curing Results
Proper preparation separates successful curing from disappointing results. For brand-new Lodge cast iron, wash thoroughly with hot, soapy water to remove the factory’s light protective coating. This counterintuitive step allows you to build your own custom seasoning from scratch rather than trying to bond new layers to the factory finish. Rinse well and dry immediately—either with a towel or by heating on the stovetop for 5-10 minutes.
When restoring rusty Lodge cast iron, create a paste of baking soda and water or use fine steel wool to scrub away all corrosion until the metal appears clean and gray. For severe rust, soak in a 50/50 vinegar-water solution for up to 30 minutes before scrubbing, but rinse thoroughly afterward to prevent acid damage. After rust removal, heat the pan on the stovetop to evaporate all moisture—the bare metal will flash-rust within minutes if left damp.
For pans with damaged or gummy seasoning, strip completely before re-curing. Place the pan upside down in a 400°F oven for one hour, then scrub with warm, soapy water and steel wool to remove residue. Alternatively, use your oven’s self-cleaning cycle for complete seasoning removal, followed by thorough washing.
Apply Oil Using the Thin-Layer Technique
The oil application method determines curing success. Pour approximately one teaspoon of oil onto a 10-inch skillet, adjusting proportionally for other sizes. Spread evenly using a paper towel, starting with the cooking surface, then the rim, handle, and exterior. The critical insight? Thin layers cure perfectly while thick layers fail—your paper towel should feel nearly dry after application with no visible pooling.
Work methodically to ensure complete coverage without missing spots. Pay special attention to the corner where the cooking surface meets the side walls—this area often receives less oil and develops weak spots. For Lodge Dutch ovens or deep pots, use a folded paper towel on a spoon handle to reach interior surfaces.
After initial application, take a fresh, dry paper towel and buff aggressively to remove excess oil. You should see no visible oil on the surface—this microscopic layer transforms into durable seasoning during curing. Excess oil creates sticky, gummy layers that flake off during cooking.
Perfect Oven Curing Process for Lodge Cast Iron
The oven transforms liquid oil into a hard, protective polymer through precise heat application. Preheat your oven to 400°F and allow full preheating (15-20 minutes). Place your oiled pan upside down on the middle rack—with this positioning, any excess oil drips away from the cooking surface rather than pooling. Position a baking sheet or aluminum foil on the rack below to catch drips.
Bake for exactly one hour—this extended heating allows complete polymerization rather than surface drying. Don’t open the oven during this time; temperature fluctuations interfere with the curing process. Some smoke is normal and indicates proper curing, but excessive smoke means too much oil was applied.
After one hour, turn off the oven and allow the pan to cool completely inside. This gradual cooling prevents thermal shock that could crack the seasoning. Removing a hot pan to cool on the counter creates stress points. Typically, a two-hour cooling period brings the pan to room temperature safely.
For maximum durability, repeat the process 2-3 times. Each additional layer bonds to the previous one, creating cumulative protection. Single-layer seasoning provides basic protection, but multiple cycles build the glossy patina that characterizes well-maintained Lodge cast iron.
Troubleshoot Common Lodge Cast Iron Curing Problems

Even experienced users encounter issues—knowing how to fix them saves time and frustration. Sticky or gummy seasoning indicates too much oil was applied. Fix this by scrubbing with warm, soapy water and steel wool, then re-curing with a significantly thinner oil layer. Some cooks bake at 200°F for 30 minutes to dry the oil before the full-temperature cure.
Uneven coloring or bare spots result from inconsistent heating or insufficient oil. Identify affected areas, scuff lightly with steel wool, apply oil sparingly, and cure again. Convection ovens or rotating pans halfway through curing helps ensure even heat distribution.
Rust appearing after curing suggests moisture exposure or incomplete drying before oil application. Scrub the rust completely, dry thoroughly (heat on stovetop for 10 minutes), apply oil immediately, and cure. Check your storage area for humidity and ensure the pan cools completely before storing.
Excessive smoking during cooking indicates overly cured layers. This typically resolves with use, but stripping and re-curing with thinner oil layers provides a faster solution.
Maintain Your Cured Lodge Cast Iron for Longevity
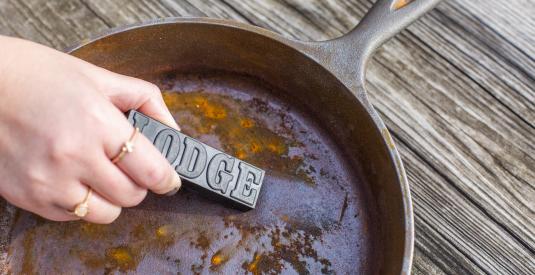
Proper maintenance preserves your curing investment and actually improves the seasoning through normal use. Clean after each use with hot water and a stiff brush—contrary to popular myth, mild dish soap won’t strip properly cured seasoning. Avoid harsh abrasives except for removing stuck-on food. For stubborn residue, boil water in the pan to loosen debris, then scrape with a spatula.
Oil after every use while the pan is still warm. Apply a thin layer of your chosen oil to replenish the protective coating and fill micro-scratches. Buff lightly with a paper towel until no visible oil remains—the warming helps the oil penetrate the seasoning.
Store properly in a dry location with adequate air circulation. Stacking pans directly against each other traps moisture and damages seasoning. Place a paper towel between stacked pieces to absorb residual moisture. Avoid airtight containers, which create environments conducive to moisture buildup and rust.
Mastering how to cure Lodge cast iron transforms you from a cook who owns cast iron to a true cast iron connoisseur. The process requires attention to detail, but the rewards—a naturally non-stick surface that improves with age, cookware that lasts generations, and meals that taste better than anything prepared in synthetic coatings—make every curing session worthwhile. Your Lodge pan has already served countless families since the company’s founding in 1896; with proper curing and maintenance, it will serve yours for generations to come. Regular curing sessions, performed correctly, ensure your Lodge cast iron remains the most versatile, durable, and high-performing piece in your kitchen arsenal.


