
That effortlessly tousled, sun-kissed wave look doesn’t require a trip to the coast or expensive salon treatments. Learning how to do beach curls with a flat iron puts professional styling in your hands, transforming your everyday straightener into a versatile tool for creating natural-looking waves that work with your hair rather than against it. Unlike rigid curling irons that produce uniform ringlets, the flat iron technique yields soft, irregular waves that mimic how hair naturally falls after a day at the beach—effortless, textured, and full of movement.
Whether you’re preparing for a special event or simply want to elevate your everyday look, mastering this technique gives you complete control over your style with just one tool. The best part? You don’t need professional training—just the right approach and a few insider techniques that separate stunning results from disappointing ones. By the end of this guide, you’ll know exactly how to do beach curls with a flat iron that hold beautifully from morning until midnight, regardless of your hair type or length.
Why Your Flat Iron Creates Perfect Beach Waves
Your flat iron’s parallel plates and consistent heat distribution make it surprisingly effective for creating natural-looking waves. When you learn how to do beach curls with a flat iron correctly, you’re actually using the tool’s straightening function in reverse—reshaping hair into soft undulations rather than eliminating them.
The magic happens through controlled rotation: instead of clamping and pulling straight down (which straightens), you clamp near the roots, rotate the iron away from your face while simultaneously pulling downward. This single motion creates the signature S-shaped wave pattern that defines authentic beach curls. Unlike curling irons that create uniform ringlets from root to tip, the flat iron technique produces varied wave patterns that look naturally formed rather than artificially styled.
How Rotation Creates Natural-Looking Waves
The angle and degree of rotation determine your wave pattern. For subtle, barely-there texture, rotate the iron only 90-180 degrees as you pull downward. For more defined waves, increase your rotation to 270-360 degrees. The key is varying your rotation pattern throughout your head—some sections with tighter rotations, others with looser ones—to avoid the “helmet head” effect of uniform curls.
Why Flat Iron Waves Outlast Curling Iron Curls
Flat iron waves typically hold longer than traditional curls because the heat penetrates the entire subsection of hair as you pull the iron through, rather than just wrapping around a barrel. This creates a more even heat distribution that sets the wave pattern throughout the hair shaft rather than just on the surface.
Essential Tools for Flawless Beach Waves

Flat Iron Specifications That Matter
For optimal beach curls, your flat iron should have ceramic or tourmaline-coated plates (1-1.5 inches wide) with adjustable heat settings. Ceramic plates distribute heat evenly to prevent hot spots, while tourmaline emits negative ions that smooth the hair cuticle for shinier results. The wider plate size allows you to create loose waves with fewer passes, reducing heat exposure.
Supporting Products You Can’t Skip
- Heat protectant spray: Apply from mid-lengths to ends before any heat styling
- Sectioning clips: Keep organized while working through subsections
- Lightweight mousse or sea salt spray: Creates texture and hold without stiffness
- Wide-tooth comb: For detangling before styling
- Finishing serum: Controls flyaways and adds shine to completed waves
Perfect Your Hair Preparation
The Critical Dryness Factor
Never attempt beach curls on damp hair—this causes steam damage that weakens the hair shaft. Hair should be completely dry (80-100%) before heat styling. For best results, apply products to slightly damp hair, then blow-dry on medium heat before beginning the curling process.
Product Application Sequence
- Apply heat protectant to damp hair, focusing on mid-lengths and ends
- Distribute evenly with a wide-tooth comb
- Apply lightweight mousse or sea salt spray for added texture
- Blow-dry completely using a diffuser or round brush
- Detangle thoroughly before sectioning
Optimal Heat Settings for Your Hair Type
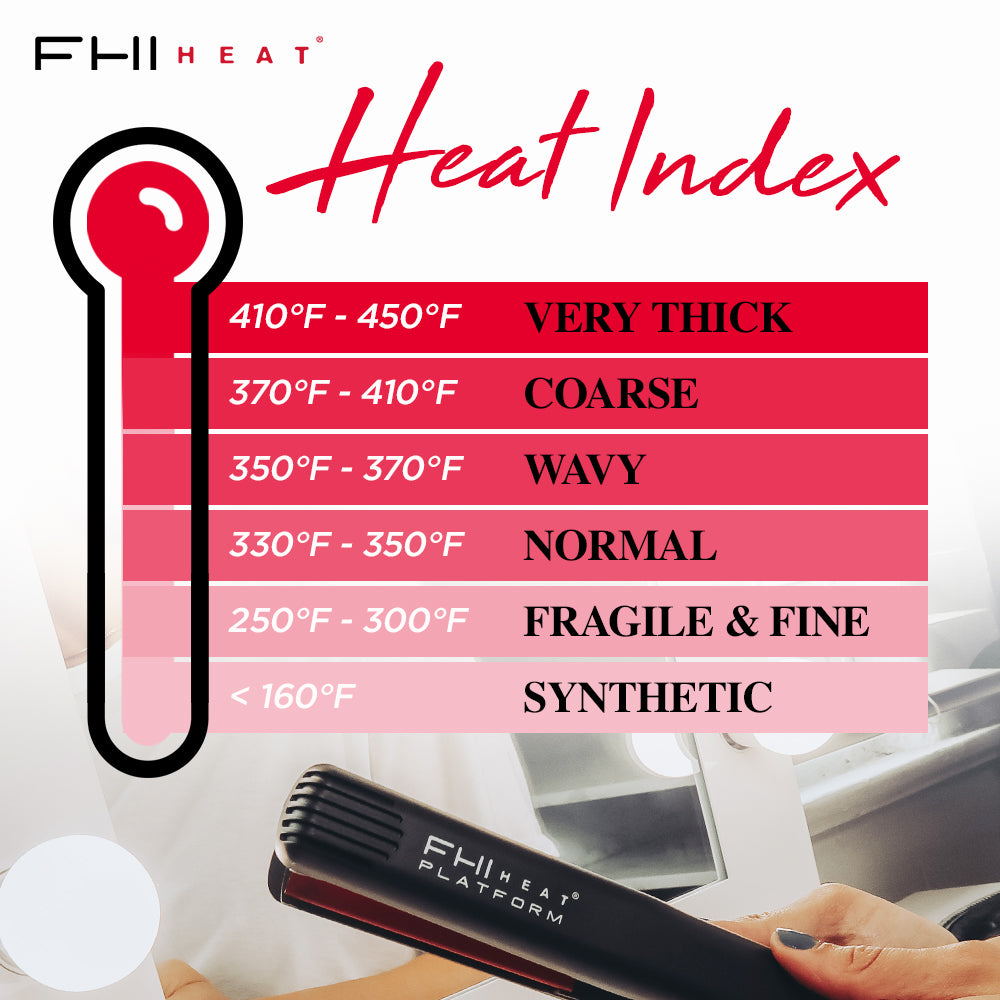
Fine or damaged hair: 250-300°F
Medium hair: 300-350°F
Thick or coarse hair: 350-400°F
Always test a small hidden section first. If your hair resists styling at lower temperatures, increase gradually rather than starting too high. Never exceed 400°F regardless of hair type—higher temperatures increase damage without improving results.
Strategic Sectioning for Professional Results
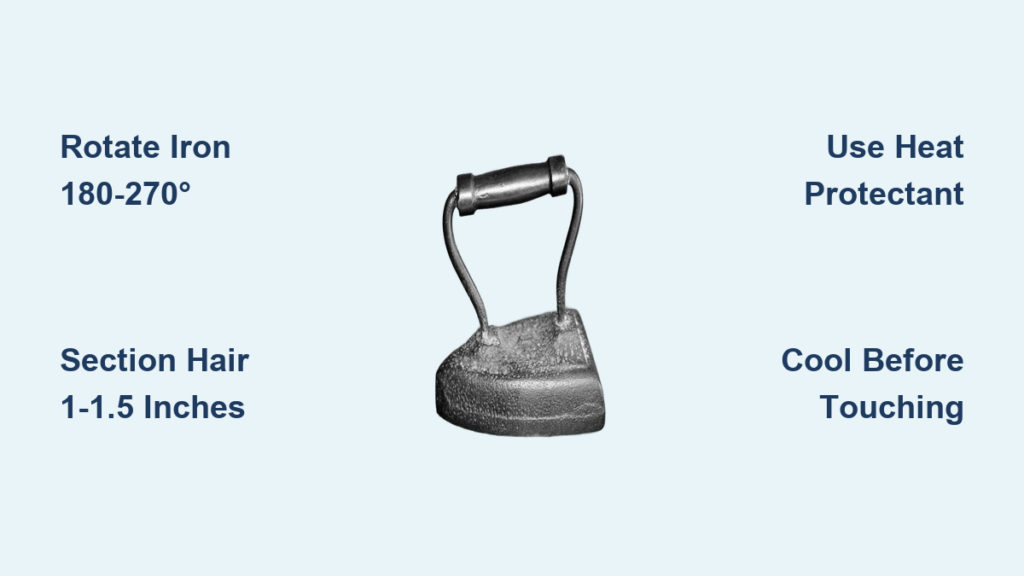
Divide hair into four main sections (two front, two back), securing with clips. Work from the bottom up, starting with the lower back section. Within each section, create subsections 1-1.5 inches wide for loose waves—thinner for tighter curls, wider for more relaxed texture. This systematic approach prevents flattened sections and ensures even styling throughout.
Step-by-Step Flat Iron Technique
- Take a 1.5-inch subsection, ensuring it’s completely detangled
- Clamp flat iron vertically near roots (hinge toward scalp)
- Rotate iron 180-270 degrees away from your face while slowly pulling downward
- Maintain consistent tension—not too tight, not too loose
- Move at a steady pace (5-8 seconds per section)
- Release and allow to cool before touching
Pro Technique: The Double-Pass Method
For extra definition that still looks natural:
– First pass: Create the initial wave pattern
– Second pass: Focus on mid-lengths to ends with less rotation
– This creates variation in wave pattern that mimics natural texture
Common Beach Curl Mistakes to Avoid
Visible root creases: Caused by clamping too tightly at roots—use just enough pressure to grip hair without mashing it flat.
Curls that fall flat: Usually from moving too quickly through hair—each section needs adequate heat exposure time.
Frizzy ends: Results from insufficient heat protection or working with damaged hair—always apply protectant to ends.
Uneven wave patterns: Caused by inconsistent subsection size or rotation—use clips to maintain uniform sections.
Make Your Beach Curls Last All Day
Allow curls to cool completely (5-10 minutes) before touching—warm curls reset when manipulated. Once cooled, gently run fingers through waves to break them up, then apply a light-hold texturizing spray. For extra staying power, wrap small sections around your finger and secure with a pin curl while cooling.
Overnight Beach Curl Preservation
Sleep with hair loosely gathered on top of your head with a silk scrunchie, or wear a satin bonnet. Avoid cotton pillowcases that create friction and disrupt wave patterns. For second-day refresh, mist with water and sea salt spray, then reshape waves with cool air from your blow dryer.
Customize for Your Specific Hair Type

Fine hair: Use smaller subsections (1 inch) and lower heat (250-300°F). Focus waves on mid-lengths rather than roots to create volume illusion. Add texturizing spray before styling for extra grip.
Thick hair: Use wider subsections (2 inches) and higher heat (350-400°F). Apply anti-frizz serum before heat protectant to combat humidity. Consider rough-drying with a round brush first for smoother base.
Short hair: Focus on creating bend and separation rather than full waves. Use a 1-inch flat iron for better control. Style small sections individually to add movement throughout.
Protect Your Hair from Heat Damage
Apply heat protectant every single time—no exceptions. Limit flat iron styling to 2-3 times weekly with heat-free days in between. Incorporate weekly deep conditioning treatments with keratin or argan oil. Schedule trims every 6-8 weeks to remove damaged ends before they travel up the hair shaft.
Final Beach Curl Checklist
Before putting away your flat iron, ensure you’ve:
– Allowed curls to cool completely
– Applied finishing serum to control flyaways
– Gently separated waves with fingers (not a brush)
– Sprayed with light-hold texturizing spray
– Checked for any missed sections or uneven patterns
Mastering how to do beach curls with a flat iron transforms your styling routine, giving you salon-quality waves without the salon price tag. With practice, you’ll develop the perfect rhythm of rotation, tension, and movement that creates effortlessly beautiful waves every time. Start with clean, protected hair, work systematically through sections, and remember that natural-looking waves require variation—not uniform perfection. Your flat iron isn’t just for straightening anymore; it’s your ticket to gorgeous, beach-inspired waves whenever you want them.


