
Your hands are the only connection between your body and the club, making how to hold a golf iron correctly the most overlooked yet critical fundamental in golf. Many amateurs focus on swing mechanics while ignoring their grip, not realizing that grip errors cascade through their entire swing, causing frustrating inconsistencies. When your grip is perfect, you gain precise clubface control, consistent swing paths, and predictable shot patterns. When flawed, even perfect swing mechanics fail to deliver solid contact. This guide reveals the exact techniques used by professionals to establish control over every iron shot, from selecting the right grip style for your hands to mastering the pressure dynamics that transform erratic ball striking into consistent performance.
Three Grip Styles for Golf Irons
Choosing the right grip style for your hand size and swing characteristics creates the foundation for consistent iron play. Each technique offers distinct advantages, and selecting the wrong one can sabotage your ball striking regardless of swing quality.
The Overlapping Grip
The overlapping grip, often called the Vardon grip after Harry Vardon who popularized it, remains the most common choice among professionals and serious amateurs. Place your trailing hand’s pinky finger (right hand for right-handed golfers) in the groove between your leading hand’s index and middle fingers, then wrap your trailing hand around the handle while maintaining your leading hand position.
This grip promotes unity between both hands, creating a single striking unit that moves together throughout your swing. Golfers with larger hands typically find this comfortable since it prevents the club from feeling crowded in the fingers. The even pressure distribution reduces fatigue during extended play, making it ideal for frequent golfers who need consistent performance from the first to the last hole.
The Interlocking Grip
The interlocking grip creates a physical connection between your hands by looping your trailing hand’s pinky finger through the gap between your leading hand’s index and middle fingers. This configuration provides security that many golfers describe as making the club feel like an extension of their arms. Tiger Woods and Jack Nicklaus achieved extraordinary success using this technique.
This grip works particularly well for golfers with smaller hands who struggle with the club moving during aggressive swings. The interlocked fingers prevent hand separation, promoting proper wrist hinge during the backswing and facilitating powerful release through impact. If you tend to slice the ball, this grip often helps maintain a squarer clubface position at impact.
The Baseball Grip
The baseball grip, also known as the ten-finger grip, places all ten fingers naturally on the handle without interlocking or overlapping. Your trailing hand simply wraps around the leading hand’s knuckles, creating parallel alignment. This technique resembles how you’d hold a bat, making it the most intuitive option for beginners.
This grip maximizes grip surface area and pressure distribution, benefiting golfers with arthritis or hand weakness. Junior golfers often find it more comfortable as they develop hand strength. The trade-off involves slightly reduced hand unity compared to other techniques, which can lead to inconsistent shot patterns for developing players.
Set Up Your Leading Hand Correctly
:max_bytes(150000):strip_icc()/lead-grip-text-58725aba5f9b584db3670e8e.jpg)
Establishing proper leading hand placement (left hand for right-handed golfers) forms the foundation of your entire grip technique. This process requires attention to specific anatomical reference points for optimal control.
Run the grip diagonally across the base of your leading hand’s fingers, positioning it from the pad at the base of your pinky finger diagonally across your palm to the middle joint of your index finger. This diagonal placement ensures the club sits deeper in your fingers rather than your palm, promoting better wrist hinge and clubhead control. Your fingers should wrap around the handle naturally, with your thumb resting lightly on the top edge.
When looking down at address, you should see the knuckles of your index and middle fingers showing slightly, indicating proper finger placement. Your thumb’s pad should press gently against the grip’s side, creating light pressure that maintains control without restricting wrist mobility. If your fingers turn white from pressure, you’re squeezing too tightly, and that tension will transfer to your arms, restricting swing speed.
Position Your Trailing Hand Properly
After establishing your leading hand position, closing your trailing hand around the grip completes your golf iron grip. This step requires careful attention to finger placement and pressure points.
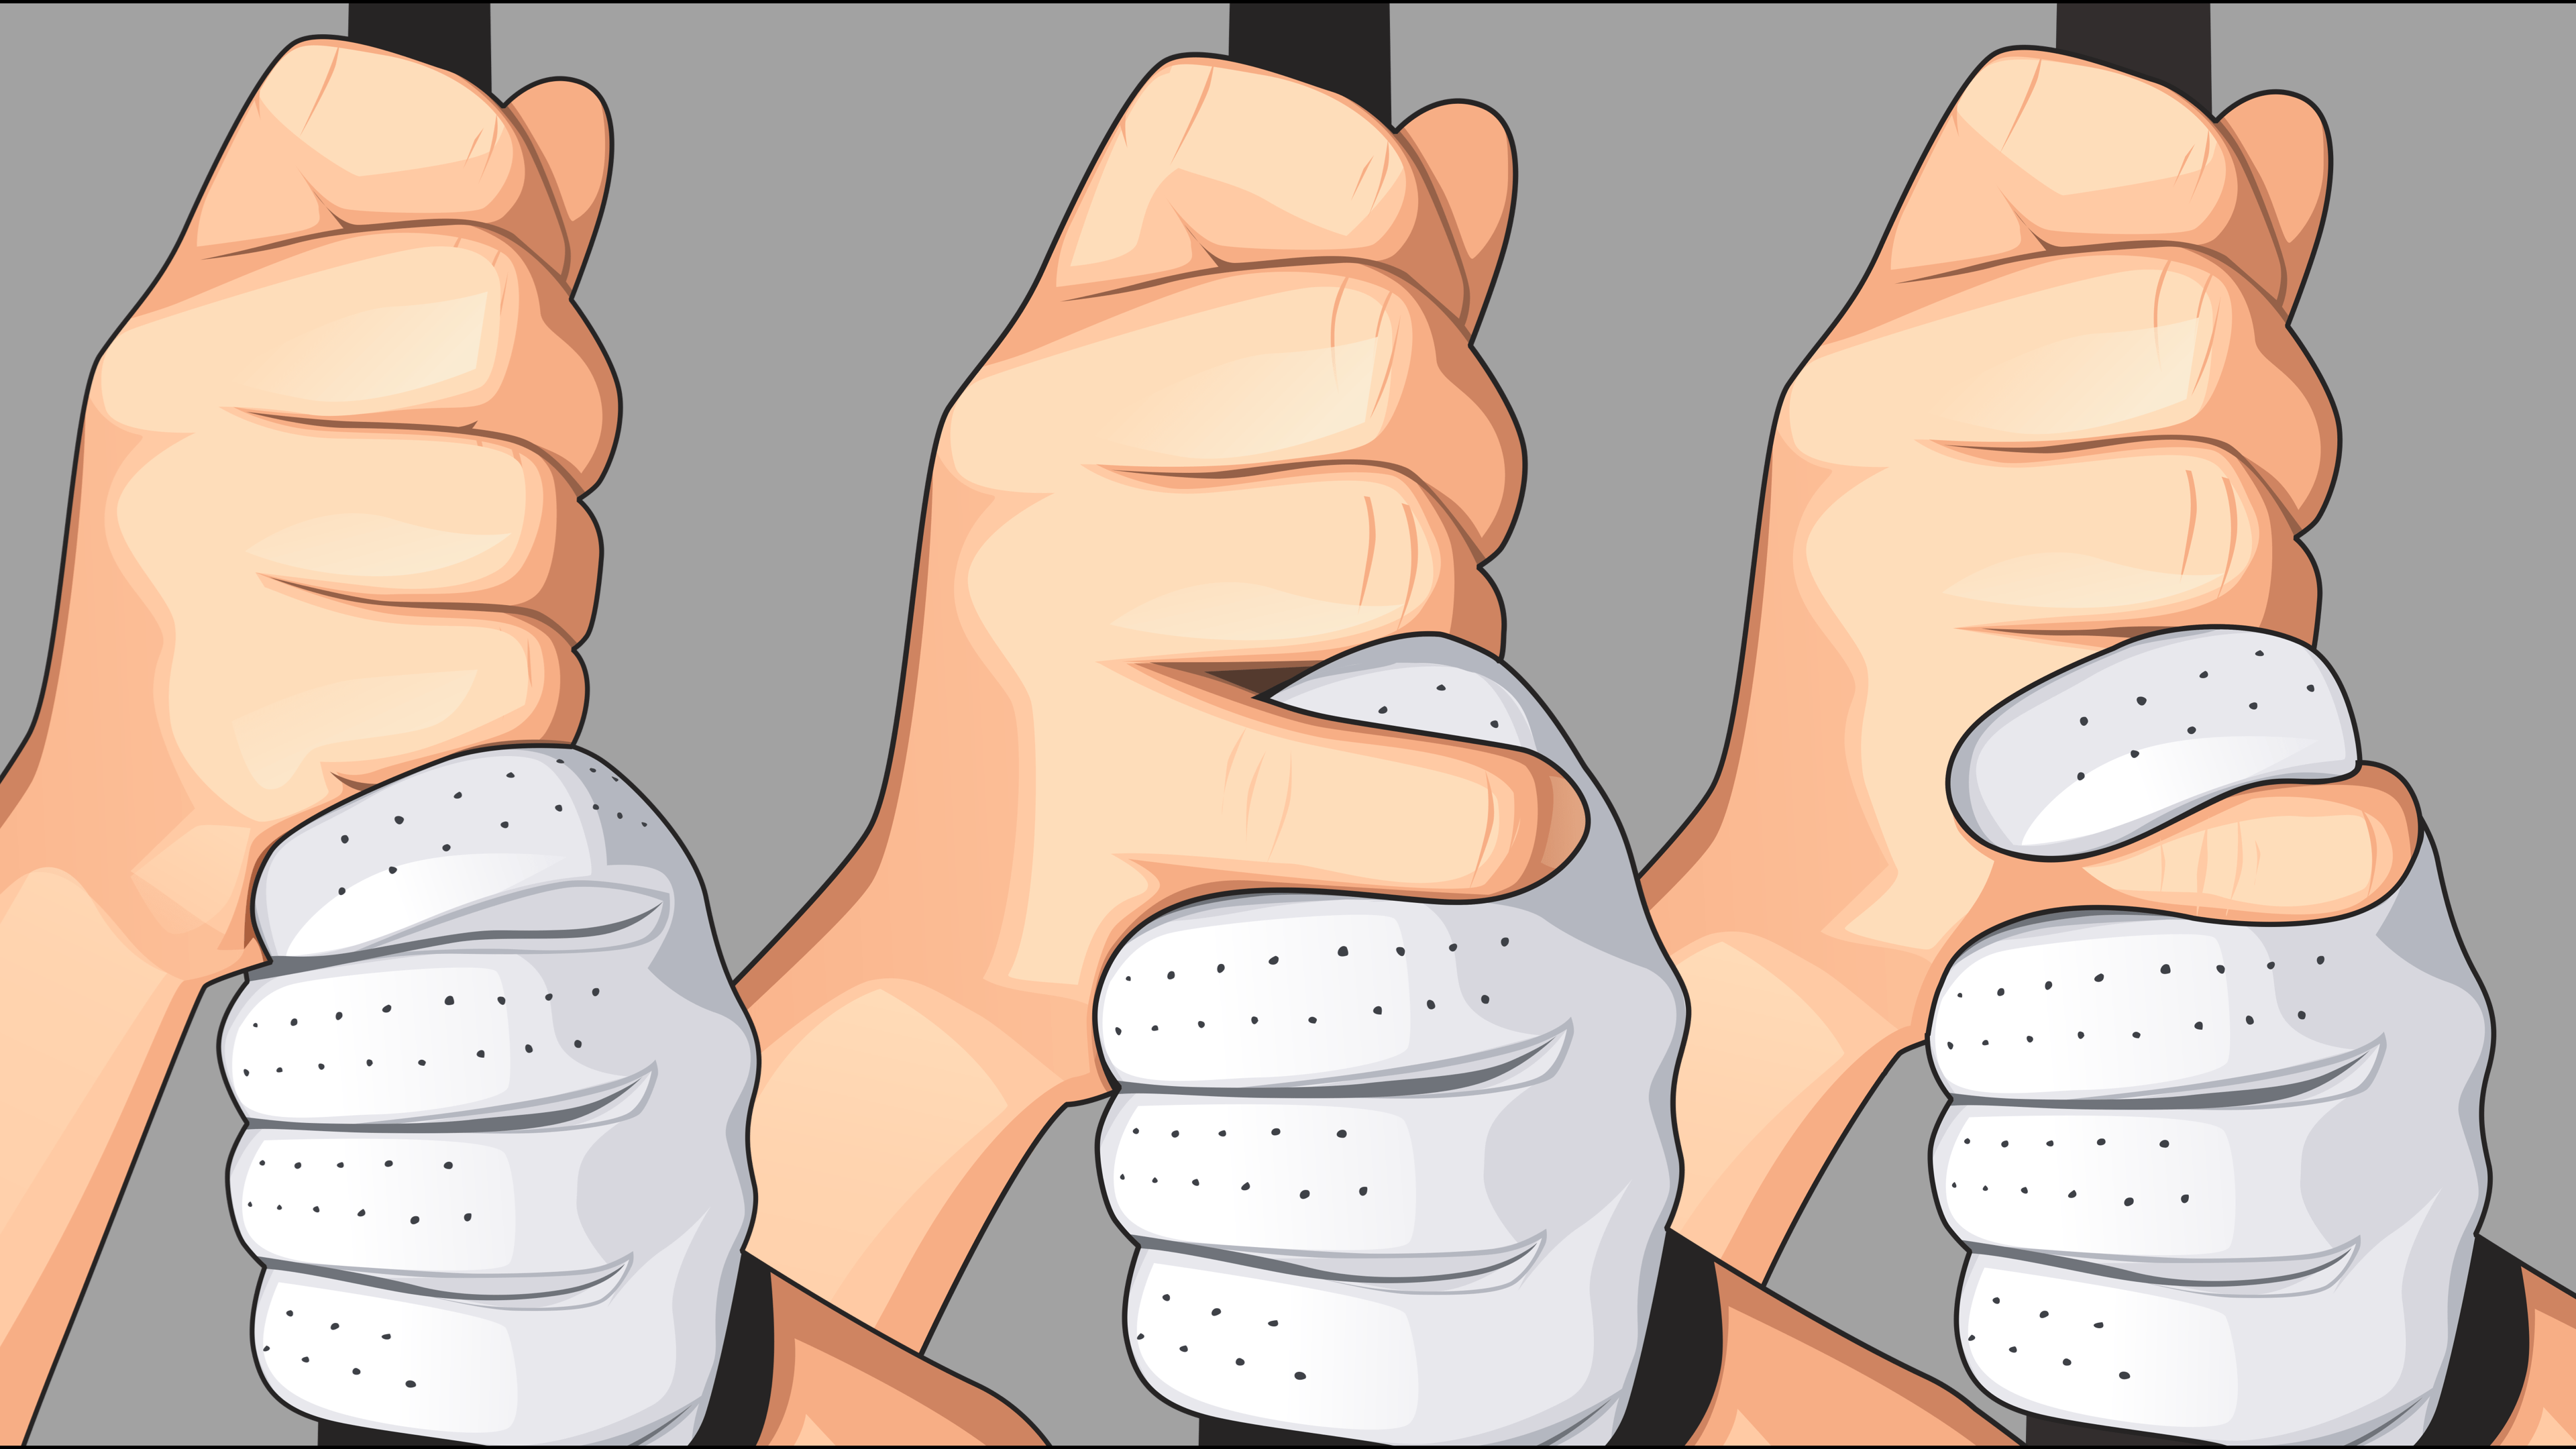
Wrap your trailing hand’s fingers over the top of your leading hand’s knuckles, with your pinky either overlapping or interlocking against your leading hand’s index finger depending on your chosen grip style. Your trailing hand’s palm should face somewhat toward your target, with the grip resting more in your fingers than in your palm for optimal sensitivity.
Place the pad of your trailing hand’s thumb lightly against the grip’s top surface, pointing slightly down the shaft toward your leading hand. The crease where your thumb meets your palm should sit comfortably against the grip’s top edge. Your trailing hand’s fingers should wrap around the grip sufficiently to show their outlines on the underside without creating excessive pressure points that restrict natural motion.
Master Grip Pressure Control
Maintaining appropriate grip pressure throughout your swing represents one of the most challenging aspects of grip technique for developing golfers. Understanding optimal pressure levels separates consistent ball strikers from erratic players.
Find Your Ideal Pressure Level
The ideal grip pressure is approximately a 4 or 5 on a 10-point scale where 10 represents maximum squeezing force. Think of holding a small bird: tight enough that it cannot escape, but loose enough that you don’t harm it. Grip pressure should remain consistent throughout your entire swing sequence, with no significant increase during the transition from backswing to downswing.
Many amateur golfers unconsciously squeeze harder during this transition, creating arm tension that restricts hip rotation and often leads to fat shots. Practice grip pressure awareness by regularly checking your pressure during slow practice swings and developing the habit of releasing and re-establishing the grip to calibrate appropriate tension levels before each shot.
Balance Pressure Between Both Hands
Most golf instructors recommend that your leading hand control approximately 60-70% of the grip pressure, with your trailing hand providing directional guidance. This distribution promotes proper wrist hinge during the backswing and facilitates a square clubface at impact.
Within each hand, focus pressure in specific areas for optimal control:
– Leading hand: Concentrate pressure in last three fingers (middle, ring, and pinky)
– Leading hand index finger: Maintain lighter pressure for sensory feedback
– Trailing hand: Concentrate pressure in fingers wrapping around the grip
– Trailing hand palm: Provide backing surface rather than primary pressure point
Control the Clubface Effectively
The positioning of your fingers directly influences clubface angle throughout your swing sequence, making clubface control one of the most important functions of your grip technique.
Align Your “V” Patterns
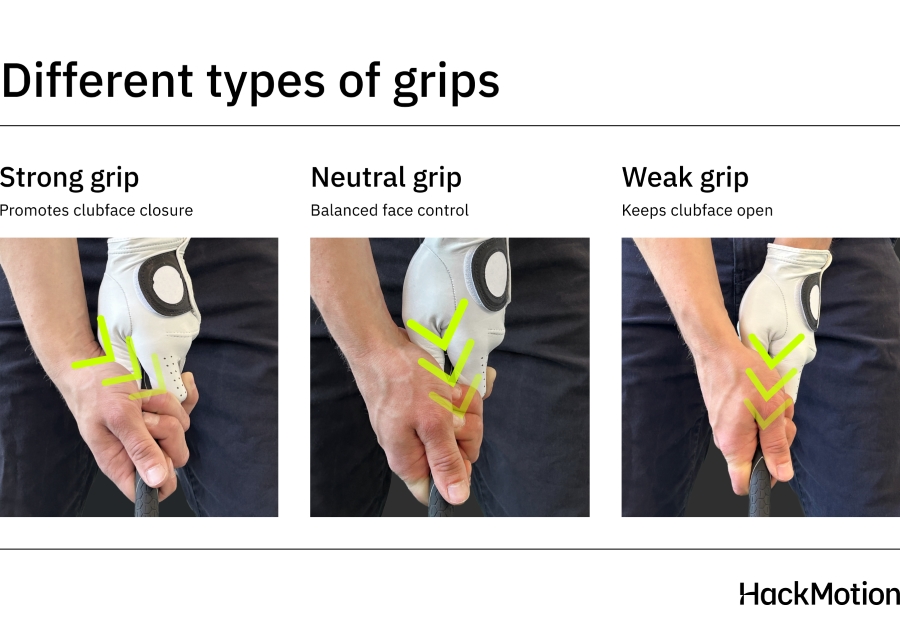
The “V” formed by your thumb and index finger of each hand serves as a critical alignment indicator. In a properly neutral grip, both “V” patterns should point toward your trailing shoulder (right shoulder for right-handed golfers). This alignment indicates that the clubface is naturally square to the swing path.
When your “V” patterns point too far toward your leading shoulder, you have a weak grip position that typically produces fades and slices. Conversely, when these “V” patterns point toward your trailing shoulder or chin, a strong grip position develops that promotes draws but can lead to closed clubface tendencies.
Enable Natural Wrist Hinge
Your grip establishes the foundation for proper wrist hinge during the backswing. With the club properly seated in your leading hand’s fingers, your wrist should hinge naturally as the clubhead moves away from the target. Your leading hand’s wrist should hinge such that the back of your hand faces the sky at the top of the backswing.
The grip should allow your wrists to hinge and unhinge freely without resistance, which requires maintaining sufficient pressure for control but not so much that it restricts natural motion. Practice wrist hinge awareness by taking slow practice swings while focusing on the sensation of the hinge developing naturally.
Fix Common Grip Errors
Even experienced golfers develop grip faults over time, often without realizing these errors are contributing to inconsistencies. Recognizing and correcting these common mistakes will improve your ball striking more than most swing adjustments.
Cure the Death Grip
The death grip describes excessive grip pressure that creates tension throughout your arms and shoulders. To correct it, practice taking slow practice swings while holding the club with only enough pressure to prevent it from slipping. This forces you to discover the minimum pressure necessary for control.
Develop a pressure reference by squeezing a tennis ball and then releasing to a lighter pressure level that you can replicate on the course. During actual swings, periodically check your pressure by mentally scanning your hands and arms for tension, particularly during the transition from backswing to downswing.
Strengthen a Weak Grip Position
A weak grip occurs when the “V” patterns formed by your thumb and index finger point toward your leading shoulder. To strengthen your grip, rotate both hands slightly toward the trailing side of the handle while maintaining the grip’s diagonal nature across your fingers.
The goal is to see more knuckles of your leading hand at address while ensuring the “V” pattern points toward your trailing shoulder. Make gradual adjustments over multiple practice sessions, as sudden dramatic grip changes often lead to compensatory swing alterations.
Perfecting how to hold a golf iron requires patience and deliberate practice. By selecting the appropriate grip style, establishing proper hand placement, mastering pressure control, and regularly practicing grip drills, you’ll develop a foundation that improves every aspect of your ball striking. Remember that your grip should feel natural and require minimal conscious attention during actual swings. With dedication to these fundamentals, your grip will become the solid foundation supporting consistent, powerful shots.


