
Your iron shafts absorb brutal punishment with every swing—repeated flexing, vibration, and impact forces gradually degrade material integrity until performance suffers. When your once-reliable irons suddenly produce inconsistent shot dispersion or unexpected distance changes, reshafting golf irons offers a smarter solution than buying an entire new set. This complete DIY guide reveals exactly how to replace iron shafts yourself, saving hundreds while customizing clubs to match your current swing characteristics. Most golfers generate swing speeds between 70-100 mph, subjecting shafts to stress that eventually requires replacement—graphite shafts typically last 3-5 years with regular play, while steel versions endure longer but still develop micro-fractures over time.
Learning how to reshaft golf irons unlocks significant performance benefits and cost savings. Professional reshafting services charge $400-1,200 for a complete iron set, while DIY replacement typically costs $120-500 in materials. Beyond economics, controlling the entire process ensures your rebuilt irons match exact specifications—whether you’ve improved your swing speed and need stiffer shafts, developed joint issues requiring lighter graphite options, or simply want to experiment with newer shaft technology. This guide walks you through every critical step to achieve professional-grade results in your own workshop.
Identify When Your Golf Iron Shafts Need Replacement
Recognizing shaft failure signs prevents frustrating on-course surprises. Visible cracks near the hosel or grip end indicate immediate replacement necessity—graphite shafts often show delamination as white or cloudy areas where composite layers separate. Inconsistent shot dispersion without changes to your swing technique frequently stems from shaft fatigue, as degraded materials no longer provide consistent flex and energy transfer. Unexpected distance loss of 10-15 yards across multiple clubs suggests shaft performance has deteriorated beyond useful life.
Golfers often overlook vibration changes that signal shaft problems—increased harshness at impact or unusual buzzing sensations indicate material fatigue. Perform the shaft flex test by holding the clubhead stationary while gently flexing the shaft near the grip end; inconsistent resistance or “dead spots” along the shaft length confirm internal damage. Remember that steel shafts rarely break catastrophically but gradually lose performance, while graphite shafts provide clearer failure warnings through visible damage.
Gather These 7 Critical Tools Before Reshafting Irons
Skipping proper tool preparation guarantees frustration during the reshafting golf irons process. Epoxy adhesive forms the foundation of a durable bond—choose two-part golf-specific epoxy with 1:1 or 2:1 mixing ratio and 10-15 minute working time for manageable application. Heat gun set to 300-400°F softens existing epoxy bonds without damaging clubheads—never substitute direct flame which discolors metal and weakens structural integrity.
Shaft pulling vise ($40-80 investment) securely clamps clubheads while allowing controlled force application. Look for rubber-padded jaws preventing cosmetic damage with adjustable pressure settings. Hosel cleaning brushes come in brass (for steel hosels) and nylon (for aluminum) varieties to remove old epoxy without enlarging the bore. Fine-toothed hacksaw or dedicated shaft cutter ensures clean, perpendicular cuts when trimming replacement shafts.
Swing weight scale verifies consistency across your iron set after reshafting—critical for maintaining consistent feel through the bag. Grip tape and solvent complete your toolkit for securing new grips before final assembly. Skipping any of these tools risks damaging clubheads or creating weak shaft bonds that fail prematurely.
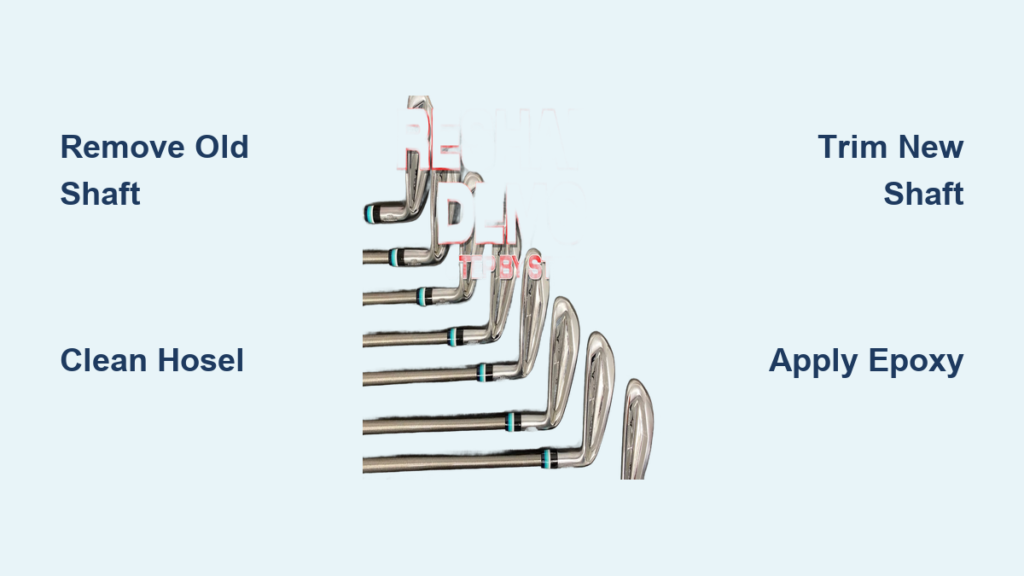
Safely Extract Old Shafts Without Damaging Clubheads
Improper shaft removal destroys more clubheads than failed epoxy bonds—follow these steps to protect your investment. Secure the clubhead in your shaft pulling vise with the hosel facing upward, applying heat evenly around the hosel using your heat gun. Maintain 300-400°F temperature for 2-3 minutes, moving in slow circular motions to prevent hot spots. Never rush this phase—insufficient heat requires excessive force that cracks hosels or breaks shafts.
Insert the shaft puller into the grip end and apply steady, even pressure while maintaining heat on the hosel. The shaft should slide out smoothly—if resistance persists, reapply heat for another minute. For stubborn bonds, use rotational torque while pulling rather than brute force. Once removed, inspect the hosel interior for remaining epoxy residue using a flashlight.
Remove Stubborn Epoxy Residue Properly
Incorrect cleaning techniques ruin hosel geometry permanently. Use appropriate brushes—brass for steel hosels, nylon for aluminum—removing loose material with light pressure. Never press hard, which enlarges the hosel bore and compromises future bond strength. For stubborn residue, apply small amounts of acetone to soften epoxy before scraping carefully.
Finish by wiping the hosel interior with clean acetone on a lint-free cloth, checking for smooth, clean surfaces with no visible debris. Run your finger along the interior edge—any roughness indicates incomplete cleaning requiring additional attention before proceeding.
Trim and Prepare Replacement Shafts for Perfect Fit
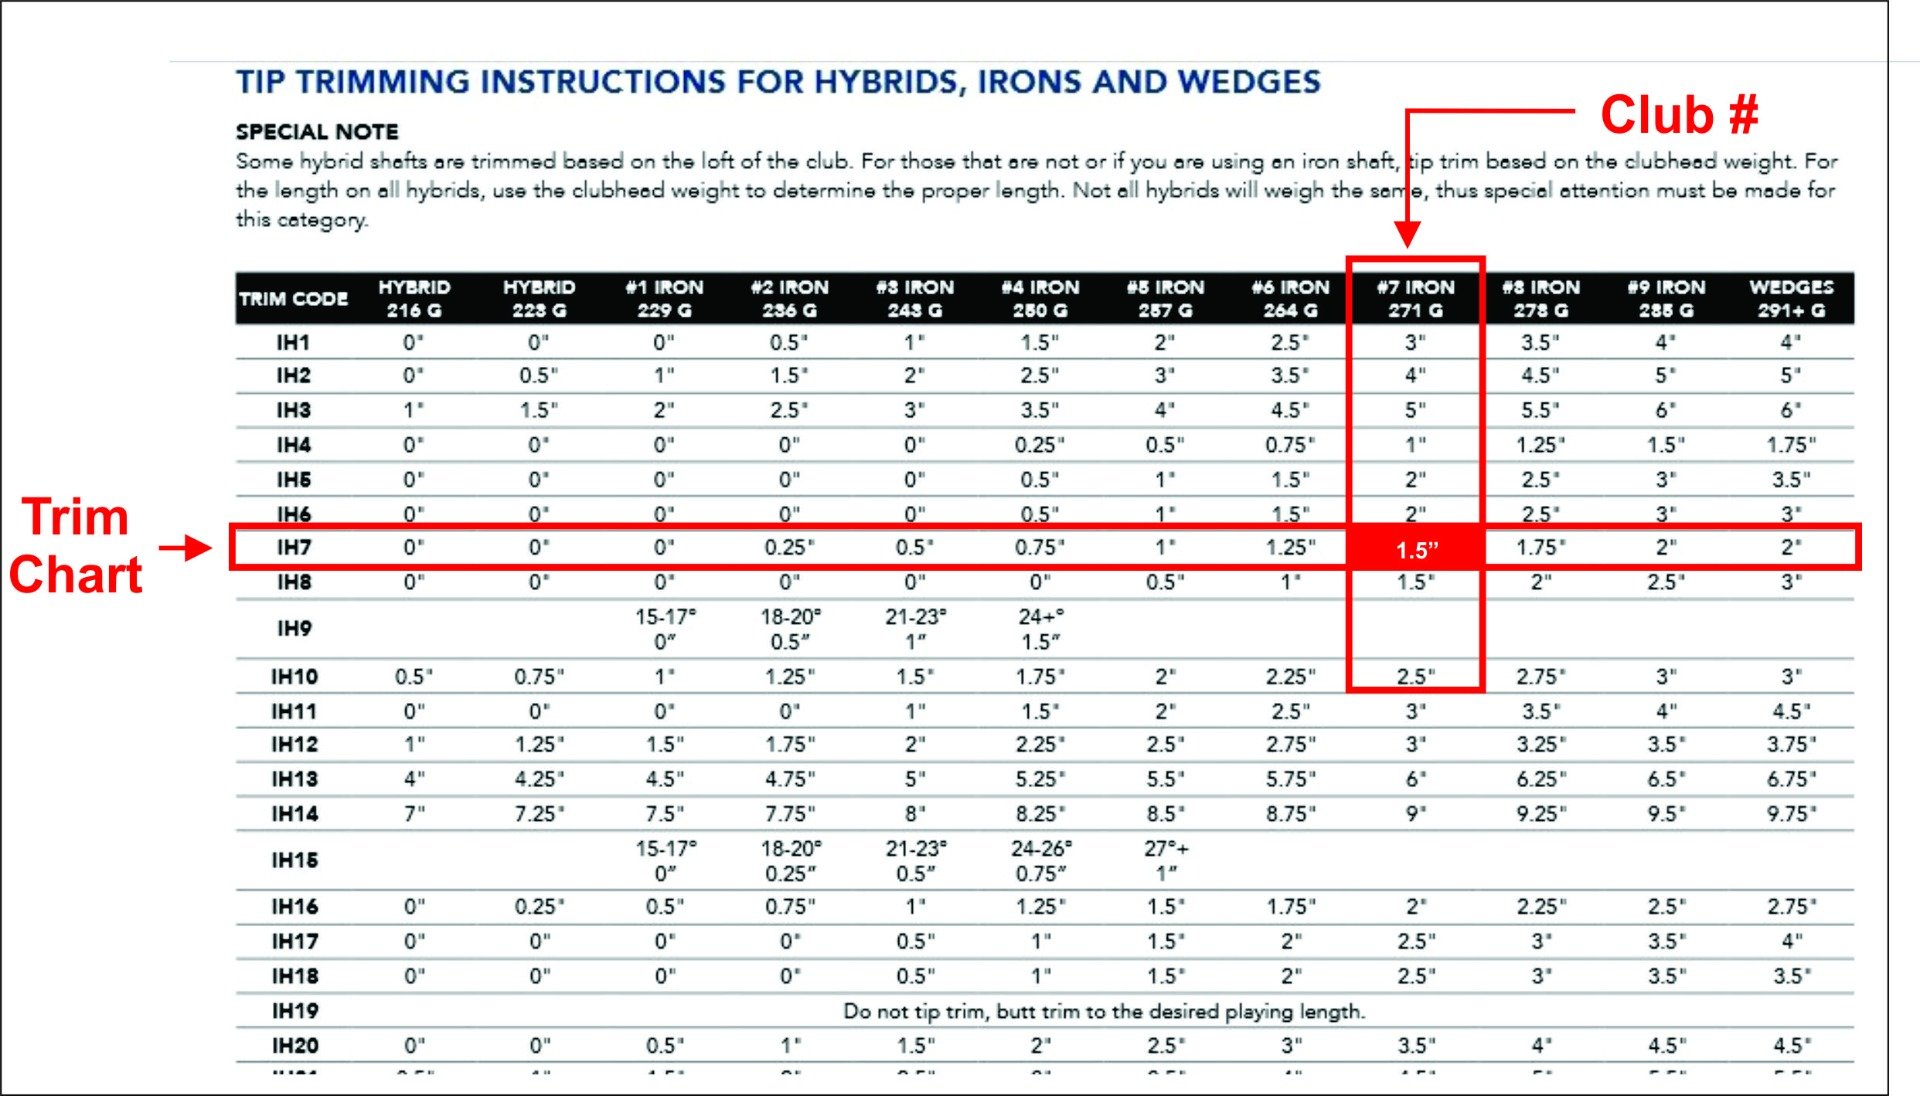
Tip trimming determines effective shaft flex—mistakes here undermine your entire reshafting effort. Most replacement shafts require trimming according to manufacturer specifications, with the tip section (inserting into the hosel) controlling flex characteristics. Use a fine-toothed hacksaw for clean cuts perpendicular to the shaft axis—angled cuts create uneven contact with the hosel bottom.
Deburr and Sand Shaft Tips Correctly
Sharp edges from cutting damage grips and interfere with installation. Deburr the cut edge using fine sandpaper or a dedicated deburring tool, removing only enough material to eliminate sharpness without altering shaft diameter. Lightly sand the insertion area with 80-120 grit sandpaper to create mechanical bond surface, then wipe thoroughly with acetone to remove all dust and oils.
Apply grip tape and solvent if installing new grips before shaft installation—this prevents epoxy contamination during assembly. Slide the grip onto the shaft’s butt end, positioning it to leave 0.5-1 inch of shaft exposed beyond the grip. Allow at least 2 hours drying time before proceeding to final assembly.
Achieve Professional-Quality Shaft Installation in 4 Steps
Epoxy mixing errors cause 70% of DIY reshafting failures—follow these precise steps for perfect bonds. Mix two-part epoxy according to manufacturer instructions, combining resin and hardener in specified ratio. Mix thoroughly for at least 30 seconds until uniform color with no streaks—insufficient mixing causes incomplete curing.
Apply Epoxy and Insert Shaft Perfectly
Apply thin, even epoxy layer to hosel interior using small brush, coating entire surface without excessive buildup at the bottom. Similarly coat the prepared shaft section inserting into the hosel, avoiding exterior surfaces above the hosel line. Never over-apply epoxy—excess creates messy squeeze-out that interferes with grip installation.
Carefully align the shaft with the hosel opening and insert with slow, twisting motion. The shaft should slide in smoothly to full depth—if resistance occurs, remove and check for obstruction. Once fully inserted, rotate the shaft to ensure even epoxy distribution and proper face angle alignment. Clamp the grip end in a padded vise for 15-20 minutes during initial cure, allowing full 24-hour cure before play.
Match Shaft Flex to Your Swing Speed: Steel vs Graphite

Choosing wrong shaft flex sabotages performance gains from reshafting. Ladies flex (L) suits swing speeds below 70 mph (45-65g weight), while senior flex (A) fits 70-85 mph swingers (55-75g). Regular flex (R) serves most golfers with 85-95 mph swing speeds (60-85g), and stiff flex (S) handles 95-105 mph (65-95g). Extra stiff (X) works for elite players exceeding 105 mph (70-110g).
Steel shafts (110-130g) offer superior consistency and feedback but increase swing fatigue. Graphite shafts reduce weight by 30-50% for potentially higher swing speeds while dampening vibration—ideal for players with joint issues. Modern graphite iron shafts incorporate multi-layer composite designs optimizing specific performance characteristics, though they require replacement every 3-5 years compared to steel’s indefinite lifespan.
5 Costly Reshafting Errors That Damage Your Irons
Insufficient heat application during removal causes most DIY disasters—without proper temperature, epoxy bonds won’t soften, requiring destructive force. Poor surface preparation leaves oils and debris preventing strong epoxy adhesion. Incorrect epoxy mixing ratios result in weak bonds that fail during play.
Excessive epoxy application creates messy squeeze-out interfering with grip installation and club aesthetics. Premature club use before full epoxy cure causes bond failure—allow minimum 4-6 hours (24 hours preferred) before hitting balls. Misaligned shaft installation throws off club face angle, creating timing issues that ruin shot consistency.
Test New Shaft Bonds Before Hitting the Course
Verify shaft alignment after initial epoxy set by checking centering in the hosel opening and matching clubface angle to original configuration. Measure swing weight once fully cured—adjust with lead tape or grip weight changes to maintain consistency within 1-2 points across your iron set.
Perform integrity testing before play: inspect hosel-to-shaft junction for gaps or squeeze-out, gently try rotating the shaft (should feel solid), and flex near grip end to ensure bond holds under stress. Listen for creaking or popping sounds indicating potential failure. Address any concerns immediately before full cure completes.
Extend Reshafted Iron Life With These Maintenance Tips
Inspect shafts before each round for visible damage, focusing on hosel and grip end areas. Run fingers along shaft surfaces to detect flat spots or reduced flexibility. Store clubs in temperature-controlled environments—extreme heat or cold degrades shaft materials over time.
Never lean clubs on clubheads during transport or storage, which stresses the hosel-shaft connection. Avoid using irons for inappropriate shots like cart paths or thick rough where excessive force damages shafts. Proper maintenance extends reshafted iron life to match or exceed original equipment performance.
Learning how to reshaft golf irons empowers you to customize club performance, extend equipment life, and save significant money versus professional services. With proper technique, appropriate tools, and patience throughout the process, you’ll achieve reliable performance from your reshafted irons for years to come. Take your time with each phase, verify your work thoroughly, and your DIY reshafting project will deliver measurable improvements to your game.


