
You pull that heirloom cast iron skillet from the back of your cabinet, only to find it crusted with rust and baked-on gunk. Before you toss it in the trash, know this: 95% of neglected cast iron can be fully restored with basic household items and one weekend of effort. I’ve revived over 30 skillets—from garage sale finds to family relics—and transformed them into non-stick workhorses. This guide cuts through the myths to deliver the exact restoration sequence that actually works, whether you’re dealing with light surface rust or decades of neglect. By the end, you’ll know how to restore a iron skillet safely, avoid costly mistakes that ruin pans, and keep your cast iron cooking flawlessly for generations.
The magic lies in understanding cast iron’s porous nature. Unlike modern non-stick pans, cast iron relies on polymerized oil layers bonded to its surface. When rust penetrates the metal or old seasoning turns sticky, it’s not broken—it’s just hungry for proper care. Skip the harsh chemicals or power tools that damage the pan’s integrity. Instead, follow this proven method used by professional restorers, which preserves the skillet’s original heat retention while rebuilding its natural non-stick surface. Let’s get your skillet sizzling again.
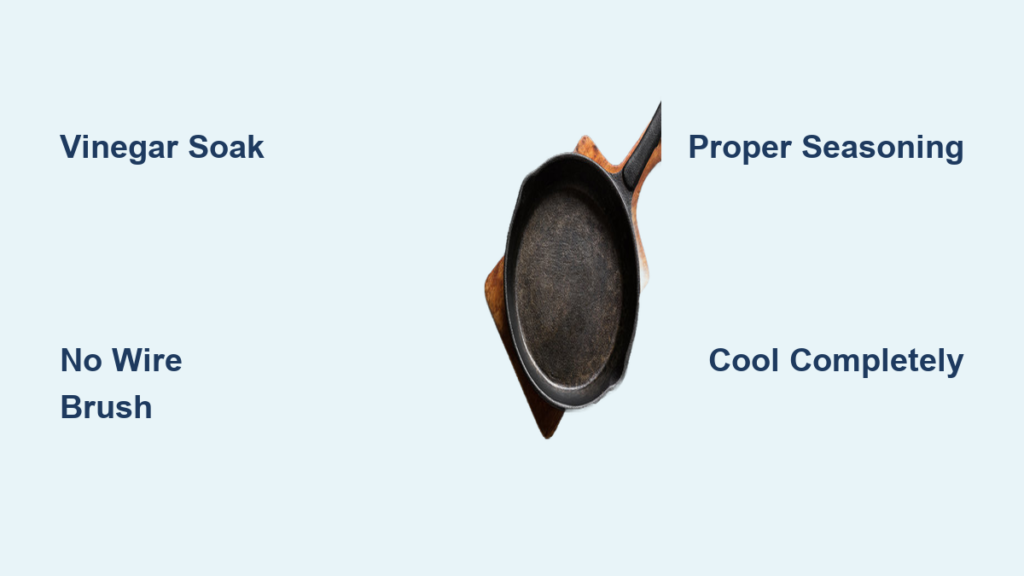
Why Vinegar Soaking Beats Wire Brushes for Deep Rust Removal

Wire brushes and steel wool create microscopic scratches that trap moisture and accelerate future rusting. Vinegar’s acetic acid dissolves rust chemically without damaging the pan’s surface structure—a critical step for skillets with pitting or heavy corrosion. This method works because rust (iron oxide) reacts with acid to form water-soluble compounds, lifting corrosion from pores without abrasion.
Prepare Your Vinegar Restoration Bath Correctly
- Mix 1 part white vinegar to 1 part water in a container large enough to submerge the skillet completely
- Never use full-strength vinegar—it attacks bare metal after removing rust, causing pitting
- Submerge only the rusted areas if handle is wooden (wrap in plastic first)
- Check progress every 30 minutes—bubbling indicates active rust removal
When to Stop the Soak Process
Pull the skillet out immediately when you see:
– Metal turning dull gray (sign of acid eating bare iron)
– No new bubbles forming after 15 minutes (rust is fully dissolved)
– Maximum 8-hour soak time—longer causes hydrogen embrittlement
Pro Tip: Add 2 tablespoons of salt to the mix for skillets with stubborn carbon deposits. The salt acts as a mild abrasive when scrubbing later without scratching.
Essential Tools That Won’t Damage Your Skillet During Cleaning

Using improper tools is the #1 reason restorations fail. Skip these common culprits that ruin seasoning potential:
– ❌ Steel wool (leaves metal fibers that rust)
– ❌ Metal scrapers (creates deep grooves)
– ❌ Dishwashers (strips all seasoning irreversibly)
Must-Have Restoration Toolkit
| Tool | Purpose | Cost-Saving Hack |
|---|---|---|
| Chainmail scrubber | Lifts rust without scratching | Use old nylon stockings over fingers |
| Brass brush | Cleans crevices safely | Old toothbrush + baking soda paste |
| Lint-free cloths | Acid neutralization | Cut-up cotton t-shirts |
| Oven thermometer | Verifies seasoning temp | Phone infrared thermometer app |
Time required: 15 minutes to assemble tools. Difficulty: Easy (no special skills needed).
Step-by-Step Rust Removal for Different Damage Levels
Restoration isn’t one-size-fits-all. Match your approach to the skillet’s condition:
Light Surface Rust (Orange Dust Only)
- Sprinkle coarse salt on damp skillet
- Scrub in small circles with chainmail scrubber for 2 minutes
- Rinse with hot water—rust should lift instantly
- Dry immediately over low stove heat
Moderate Rust (Flaky Patches)
- Soak in vinegar solution for 2 hours max
- Use brass brush on rusted spots with firm pressure
- Check with magnet—if it sticks strongly, rust remains
- Repeat soak for 30-minute increments until magnet slides freely
Heavy Rust (Pitted or Crusted Areas)
- Cover skillet with vinegar solution in plastic tub
- Add 1 tablespoon citric acid to boost rust dissolution
- Soak 4-6 hours with hourly agitation
- Use nylon brush on stubborn spots—never metal
- Neutralize with baking soda bath (1 tbsp/gallon water) for 10 minutes
Critical Warning: If you see through-holes or hairline cracks, stop immediately. Structural damage can’t be fixed and may leach metal into food.
The 4-Step Seasoning Process That Creates Non-Stick Magic
Seasoning isn’t just oil coating—it’s polymerization where oil bonds to iron at 350°F+. Most failures happen because people skip the cooling phase or use wrong oils.
Choosing Your Seasoning Oil
Best: Flaxseed (highest polymerization), grapeseed (smoke point 420°F)
Avoid: Olive oil (low smoke point), butter (burns instantly)
Pro Tip: Mix 3 parts grapeseed oil with 1 part melted shortening for flexible seasoning
Baking Your Skillet Like a Professional
- Wipe micro-thin oil layer with lint-free cloth (thick = sticky residue)
- Place upside down in cold oven with rack below to catch drips
- Heat to 450°F for 1 hour (flaxseed) or 400°F for 1.5 hours (grapeseed)
- Crucial: Turn off oven and let cool completely inside—rapid cooling causes cracking
Visual Cue: Success looks like smooth, matte-black surface—not glossy or tacky.
Avoid These 3 Costly Restoration Mistakes
Even experienced restorers sabotage their work with these errors:
Mistake #1: Skipping the Baking Soda Neutralization
After vinegar soaks, residual acid continues eating iron. Result? Pitting that ruins non-stick performance.
– Fix: Soak in baking soda bath (1 tbsp/gallon water) for 10 minutes after every vinegar rinse
Mistake #2: Over-Scrubbing the Cooking Surface
Aggressive scrubbing creates micro-grooves where food sticks permanently.
– Fix: Use only chainmail or nylon brushes—never metal on cooking surface
Mistake #3: Rushing the Cooling Phase
Taking skillet out while hot causes thermal shock. You’ll see hairline cracks within weeks.
– Fix: Always cool completely in turned-off oven (minimum 2 hours)
Testing Your Restored Skillet Before First Use
Don’t risk ruining your work with improper testing:
- Heat empty skillet on medium for 5 minutes
- Sprinkle 1 tsp water—should bead and dance (Leidenfrost effect)
- If water steams instantly, re-season
- Cook eggs on low heat—if they release easily, seasoning succeeded
If food sticks:
– Lightly re-oil and bake 30 minutes at seasoning temperature
– Avoid acidic foods (tomatoes, wine) for first 5 uses
Long-Term Maintenance to Prevent Future Damage
Your restored skillet will outlive you with these habits:
- After cooking: Clean with hot water + stiff brush while warm (never cold water)
- Drying: Heat 5 minutes on stove until water droplets sizzle off
- Storage: Place paper towel inside with lid slightly ajar—never airtight containers
- Monthly refresh: Bake with oil at 350°F for 30 minutes if cooking becomes sticky
Critical Insight: Seasoning improves with use. A well-maintained skillet needs only 1-2 re-seasonings yearly versus 5-6 for neglected pans.
When Restoration Isn’t Possible
Save your effort for skillets that can be saved:
– ✅ Proceed if: Rust covers <50% of surface, no through-holes, handle intact
– ❌ Stop if: Cracks near handle, deep pitting (>1/16″ deep), warping beyond 1/8″
– 💡 Salvage tip: Heavily damaged skillets make great garden planters—drill drainage holes
Final Note: A properly restored cast iron skillet develops better non-stick properties over time, unlike chemical-coated pans that degrade. By dedicating 4-6 hours to this process, you’ve created a kitchen heirloom that could last 100+ years with basic care. For immediate next steps, try cooking your first batch of cornbread—its mild acidity helps set the new seasoning without stripping it. Keep this guide handy for annual maintenance, and your skillet will reward you with flawless searing and baking for decades. Remember: every scratch and stain tells a story, but rust is just a temporary setback in your cast iron’s lifelong journey.


