
That heirloom skillet gathering dust in your garage? The thrift store find buried under layers of rust? Don’t toss it—how to restore cast iron cookware is simpler than you think. Most neglected pieces can transform from crusty relics to non-stick champions with basic tools and one afternoon. I’ve seen decades of rust vanish from Lodge cast irons using methods that cost less than $20. By the end of this guide, you’ll confidently tackle any restoration project, turning “ruined” pans into kitchen workhorses that last generations. Forget complicated chemistry—this is about elbow grease, patience, and understanding why cast iron deserves a second chance.
Assessing Your Cast Iron’s Damage Before Starting
Before grabbing steel wool, determine if your pan is salvageable. Cracks deeper than 1/8 inch or holes through the cooking surface usually mean retirement—these compromise structural integrity during heating. Tap suspicious areas with a spoon; a hollow “ping” instead of solid “clink” indicates hidden fractures. For pans with minor cracks (hairline only), prioritize seasoning over cooking acidic foods to prevent metal leaching.
Spotting Repairable Rust vs. Permanent Damage
Surface rust that feels powdery and lifts with light scrubbing is 100% fixable. But rust that’s eaten pits deeper than paper thickness requires aggressive treatment. Check the cooking surface: if you see light orange discoloration without texture changes, it’s early-stage rust. Dark red, flaky patches that leave indentations need immediate action. Always inspect handle joints—rust here often hides weakened castings.
When Restoration Isn’t Worth the Effort
Skip pans with warping exceeding 1/16 inch (test by placing on flat glass). Severely warped bases won’t heat evenly even after restoration. Also abandon pieces with lead solder repairs (common in pre-1950s pans) due to toxicity risks. If the pan smells like motor oil when heated, it’s absorbed contaminants beyond cleaning—recycle it responsibly.
Essential Tools for Cast Iron Restoration (No Specialized Gear Needed)

You likely own 90% of what’s required. For light rust jobs (under 30 minutes), grab fine steel wool (000 grade), a stiff nylon brush, white vinegar, and paper towels. Tackle severe cases with a cordless drill + brass wire wheel attachment ($12 at hardware stores)—brass won’t scratch like steel brushes. Never use oven cleaners or lye; they etch pores where seasoning anchors.
Budget Setup for Heavy Rust Removal
For pans encrusted in decades of rust:
– 5-gallon plastic bucket (for vinegar soak)
– 1 cup distilled white vinegar per gallon of water
– Battery-powered angle grinder with brass cup brush (rent for $15/day)
– Heat-resistant gloves (essential when handling hot pans post-cleaning)
Skip electrolysis setups—they require dangerous electrical knowledge and create toxic sludge. Vinegar soaks safely dissolve rust without damaging metal integrity.
Mechanical Rust Removal: Fastest Method for Most Pans
This method works for 80% of restoration projects and takes under 2 hours. Plug your angle grinder into an outdoor outlet (indoor use risks metal dust inhalation). With the pan clamped securely, gently press the brass brush against rust spots using circular motions—never apply downward pressure. Let the brush do the work; excessive force creates swirl marks that trap future rust. Focus on cooking surfaces first, then tackle exterior rust.
Hand-Scrubbing Technique for Delicate Pieces
For antique or thin-walled pans:
1. Soak in hot water + 2 tbsp dish soap for 10 minutes
2. Use 0000 steel wool dipped in vegetable oil (oil lifts rust without scratching)
3. Scrub in straight lines—not circles—to follow cast iron’s grain
4. Rinse every 2 minutes to check progress
Stop immediately if you see shiny metal—over-scrubbing creates weak spots. For stubborn rust in crevices, wrap steel wool around chopsticks for precision control.
Vinegar Soak Protocol for Deep Rust Penetration
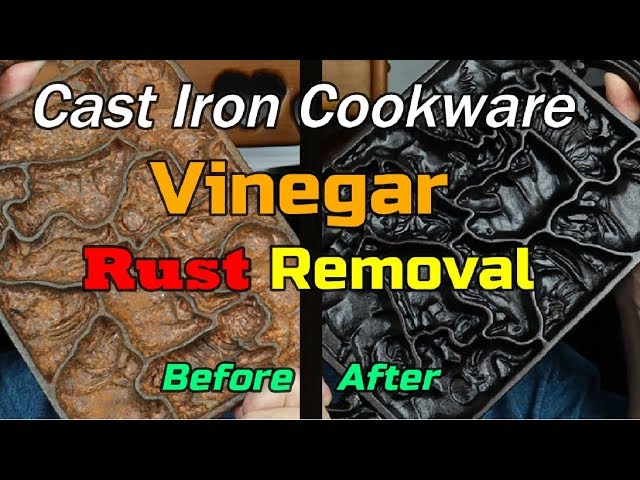
When rust won’t budge mechanically, vinegar’s acetic acid dissolves oxidation without harming cast iron. Fill a container with equal parts white vinegar and water. Submerge only the rusty areas (keep handles dry to preserve wood). For light rust: 1-2 hours. Heavy rust: up to 8 hours—but never exceed 12 hours or vinegar etches the metal.
Critical Vinegar Soak Mistakes to Avoid
- ** ❌ Using undiluted vinegar** (causes pitting)
- ** ❌ Leaving pans overnight** (leads to hydrogen embrittlement)
- ** ❌ Skipping neutralization** (vinegar residue attracts new rust)
After soaking, scrub with a nylon brush under running water until water runs clear. Immediately neutralize with baking soda paste (3 tbsp baking soda + 1 tbsp water). Rub vigorously for 60 seconds—this halts acid action. Rinse thoroughly.
Oven-Drying Process That Prevents Flash Rust
This 20-minute step makes or breaks your restoration. Never air-dry cast iron—moisture triggers instant “flash rust.” Place the cleaned pan upside-down on the middle oven rack. Set to 250°F (120°C) for 20 minutes. Check at 15 minutes: if you see any moisture beads, extend drying time. The pan should feel uniformly warm with no cool spots when done.
Emergency Flash Rust Fix
If orange spots appear during drying:
1. Immediately remove pan with oven mitts
2. Rub affected areas with paper towel soaked in vinegar
3. Return to oven for 10 more minutes
4. Apply first seasoning layer while still warm
This catches rust before it bonds deeply. Prevention is better—always have your oil ready before starting the drying cycle.
Perfecting the First Seasoning Layer for Non-Stick Results
Flaxseed oil creates the hardest seasoning but smokes heavily. For beginners, grapeseed oil (smoke point 420°F) is more forgiving. Apply one drop per cooking surface area—less than you’d think. Use a paper towel to spread until the metal looks dry. Any visible oil will polymerize into sticky residue. Heat in oven at 375°F for 1 hour, upside-down with a drip tray below.
Why Your Seasoning Failed Last Time
- ** ❌ Thick oil layers** (causes flaking)
- ** ❌ Oven temperature swings** (use an oven thermometer)
- ** ❌ Skipping cooling time** (pan must cool completely in oven)
After the first bake, wipe the cooled pan with a dry cloth. It should feel smooth like glass—not greasy. Repeat with 2 more thin layers for daily cooking readiness.
Troubleshooting Sticky Residue After Seasoning
That tacky film means oil polymerized incompletely. Don’t panic—this is fixable. Heat the pan on the stovetop at medium for 5 minutes. Immediately rub with coarse salt + paper towel until smooth. For severe stickiness:
1. Bake at 450°F for 30 minutes
2. Cool completely
3. Lightly sand with 400-grit paper
4. Apply one ultra-thin oil layer
5. Bake at 400°F for 45 minutes
Never use steel wool on sticky seasoning—it removes the entire layer. Salt abrasion targets only the imperfect polymerization.
Daily Care Routine That Preserves Your Restoration
Wash with hot water + stiff brush ONLY—no soap. For stuck food, simmer 1 cup water in the pan for 5 minutes, then scrape with a wooden spoon. Dry over low stovetop heat until water droplets actively sizzle off. While still warm, rub with 1/8 tsp oil using a paper towel—just enough to leave a faint sheen.
Storage Secrets Most Guides Miss
Never stack restored pans—trapped moisture causes rust between layers. Place a paper towel inside each pan with a silica gel packet (from shoeboxes) to absorb ambient humidity. For long-term storage, wrap handles in breathable cotton (never plastic) to prevent condensation.
Final Note: Restoring cast iron isn’t magic—it’s chemistry you control. With these proven methods, that rust-caked skillet can become your most reliable cooking tool within a weekend. The key is respecting cast iron’s porous nature: thin oil layers, consistent heat, and immediate moisture prevention. Start with a small pan to build confidence before tackling heirlooms. Within three uses, your restored cookware will develop that coveted non-stick patina while adding iron to your food naturally. Ready for your next challenge? Learn how to identify vintage Griswold markings to determine if your restoration project holds collector value.


