
Your soldering iron sits on the workbench, ready to transform loose wires into functional circuits—but without proper technique, you could end up with weak connections, damaged components, or even injury. Learning how to soldering iron use correctly separates successful electronics projects from frustrating failures. This essential tool heats to extreme temperatures (350°F-850°F) to melt solder and create permanent electrical joints that conduct efficiently and withstand physical stress. Whether you’re repairing a gaming console, building an Arduino project, or fixing household electronics, mastering these fundamentals ensures professional-quality results. In this guide, you’ll learn the exact steps to set up safely, prepare materials properly, create strong connections, and maintain your equipment—all while avoiding common beginner mistakes that ruin joints and damage components.
Stop Before You Solder: Critical Safety Measures You Can’t Skip
Never solder near food or drinks—period. Both solder and flux contain toxic compounds that become hazardous when ingested. Even microscopic residue transferred from your hands can contaminate food, creating serious health risks. Clear your work area of all food items and beverages before plugging in your iron, and designate a permanent soldering zone that stays food-free.
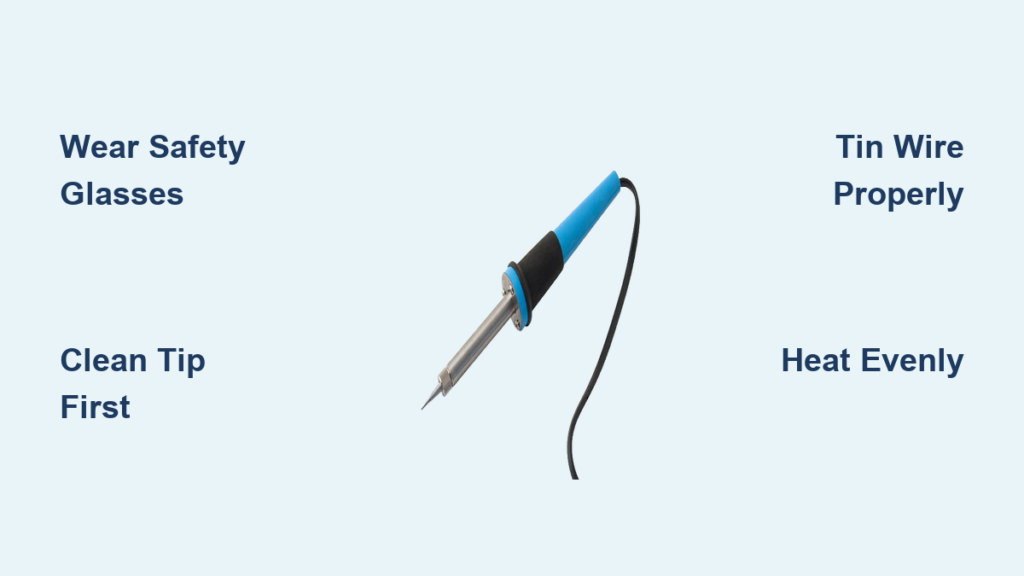
Protect your eyes and lungs immediately. Molten solder can splatter unexpectedly, causing permanent eye damage. Wear safety glasses with side shields before powering on your iron. Simultaneously, activate your fume extractor—flux fumes contain boric acid and other compounds that irritate your respiratory system with short-term exposure and cause long-term damage with repeated contact. Position the extractor intake within 2-3 inches of your work area for maximum fume capture.
Verify circuits are completely dead before touching components. This non-negotiable rule prevents electrocution and component destruction. Unplug devices, remove batteries, and discharge capacitors using appropriate methods. Test connections with a multimeter to confirm zero voltage before applying heat. One moment of carelessness with live circuits can destroy expensive components or cause severe injury.
Set Up Your Soldering Station for Success in 4 Minutes
Position your iron holder away from bench edges. Place the stand at least 6 inches from your workspace perimeter where accidental bumps won’t send the hot tip flying. Fill the stand’s sponge reservoir with distilled water (never tap water—it leaves mineral deposits) and position brass wool beside it for quick tip cleaning during sessions.
Organize tools within your natural reach zone. Arrange wire strippers, flush cutters, and helping hands clamps so you can grab them without stretching over the hot iron. Keep solder spools in a dedicated holder that feeds smoothly—tangled solder causes jerky movements that lead to accidental burns. A well-organized station reduces movement by 70%, minimizing contact risks with the hot tip.
Select the right temperature for your solder type. Start with these baseline settings: 600°F for standard 60/40 lead-tin solder on circuit boards, 700°F for lead-free solder, and 350°F for sensitive components like LEDs. Higher temperatures speed work but increase component stress—never exceed 800°F unless working with large metal joints. Allow 3-5 minutes for the iron to stabilize at your selected temperature before beginning.
Prepare Wires for Perfect Joints Every Time
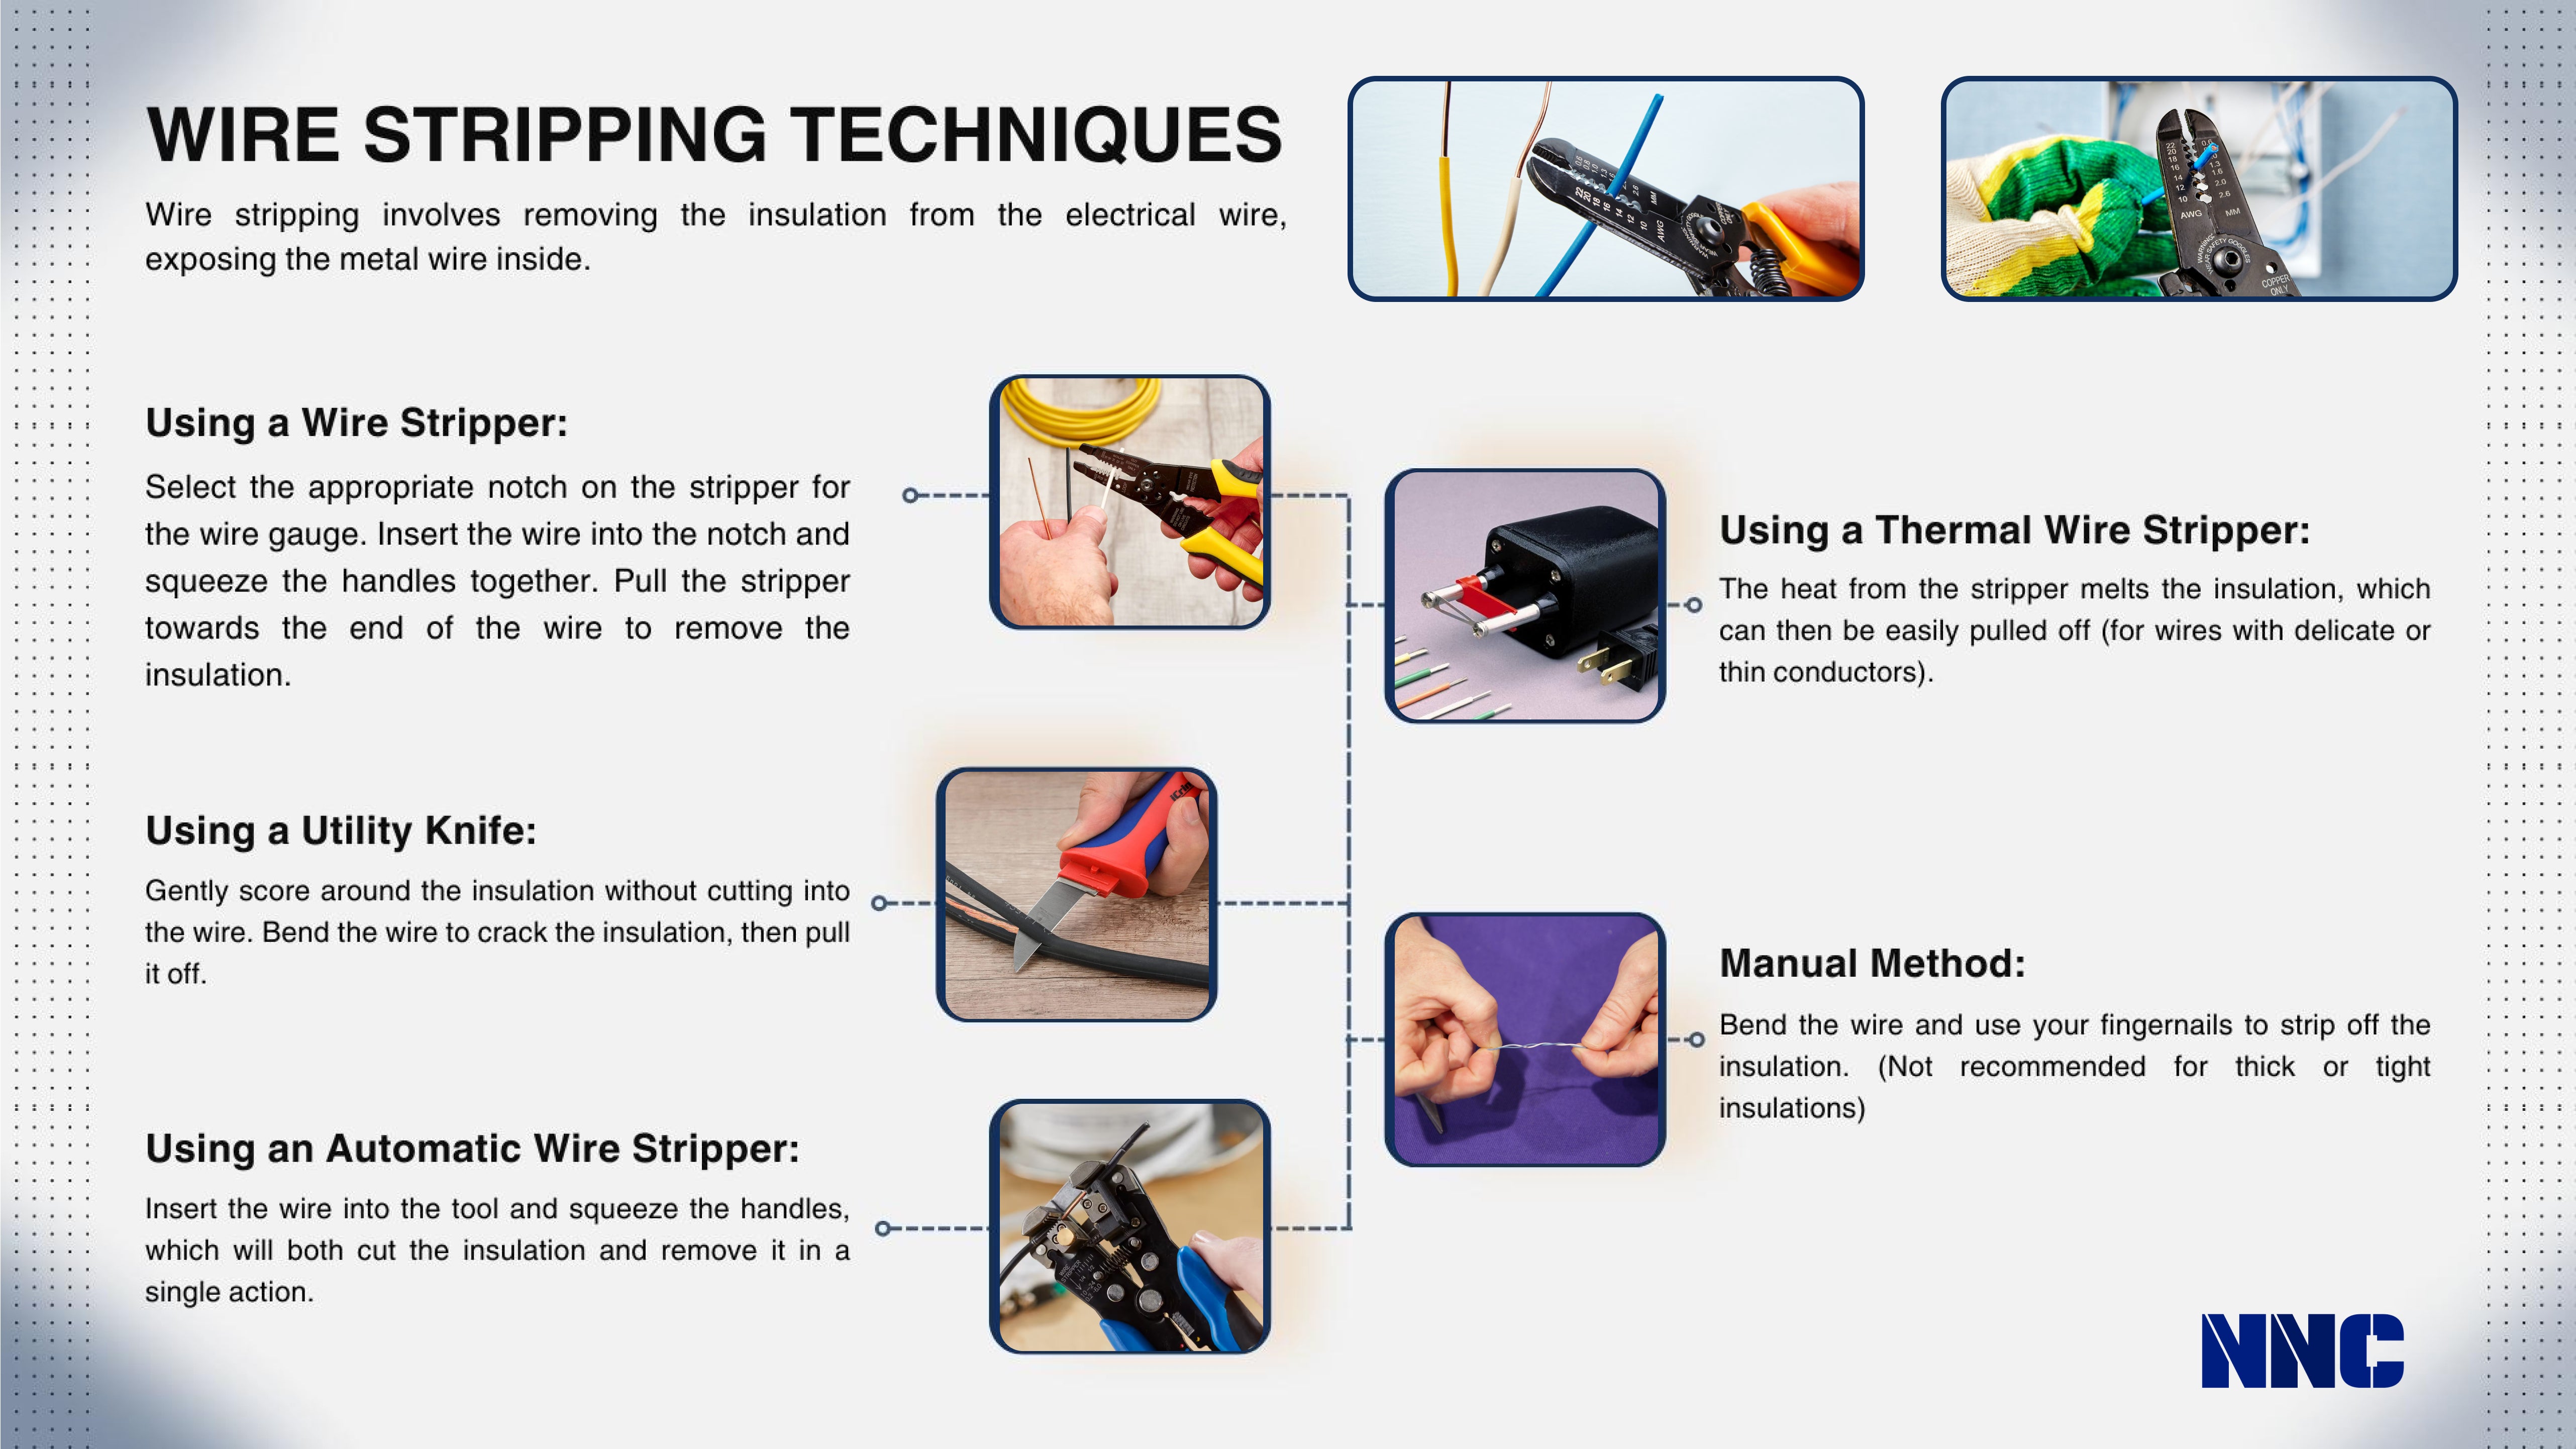
Strip insulation precisely with the correct gauge setting. Match your wire stripper notch to the wire’s gauge—using the wrong size nicks strands or leaves insulation remnants. Position the wire so you’ll remove exactly 3/8 inch of insulation, then squeeze firmly until the insulation cuts through. Rotate the wire slightly while pulling the strippers off to remove the insulation cleanly without damaging strands.
Realign frayed strands immediately after stripping. Pinch the exposed wire between thumb and forefinger, twisting gently to bundle all strands into a tight cylinder. For stranded wire, this compression prevents individual strands from escaping during tinning. Solid-core wire benefits from this step too—straightening minor bends creates uniform heating for consistent solder flow.
Tin Components Before Making Final Connections
Clean and re-tin your iron tip before each soldering session. Draw the warm tip through brass wool 3-4 times with firm pressure, then apply a small bead of fresh solder to coat the entire tip surface. A properly tinned tip appears uniformly silver—not dark or pitted—and transfers heat 40% more efficiently than a dirty one. Repeat this cleaning process every 2-3 minutes during extended sessions.
Tin wire leads using the heat-from-the-lead technique. Hold the soldering iron against one side of the stripped wire for 2 seconds to heat the metal, then touch solder to the opposite side—not the iron tip. The flux-activated solder should flow smoothly over the entire exposed surface within 1-2 seconds. Apply just enough solder to create a thin, even coating; excess solder creates bulky joints that stress connections.
Create Reliable Solder Joints in Under 10 Seconds
Position tinned components with zero movement. Use helping hands clamps to hold wires firmly with tinned surfaces touching. Any shifting during soldering creates weak “cold joints” that fail prematurely. For circuit boards, secure components with tape or a third hand tool before applying heat—wiggling parts during cooling is the #1 cause of joint failure.
Apply heat strategically for perfect flow. Touch the soldering iron to both tinned surfaces simultaneously for 2-3 seconds to melt existing solder. The joint should form as the molten solder flows together into a smooth, concave fillet. Remove the iron immediately—prolonged heating damages components. A properly formed joint cools to a shiny finish within 5 seconds; dull or lumpy results indicate insufficient heat or movement during cooling.
Fix These 3 Common Soldering Mistakes Immediately
Cold joints that look grainy and break easily. These occur when solder doesn’t fully melt and bond, often from insufficient heat or movement during cooling. Fix by reheating the joint while holding components perfectly still, then allowing undisturbed cooling. Prevention: Increase temperature by 20°F and ensure full thermal contact between tip and workpiece.
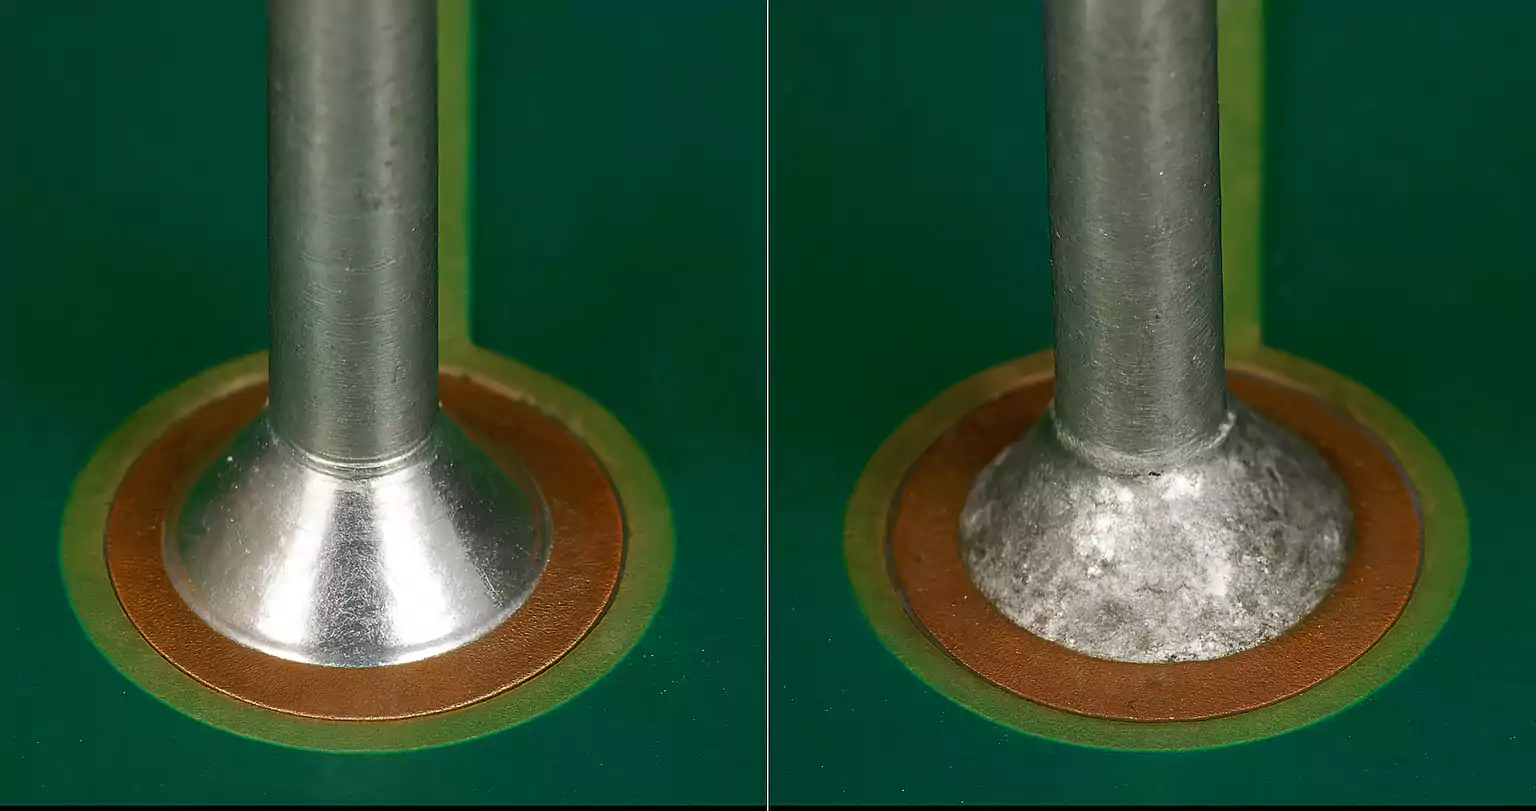
Insufficient wetting where solder beads up instead of flowing. This indicates surface contamination overwhelming the flux. Clean connections with 90%+ isopropyl alcohol before retrying. Prevention: Tin components immediately after stripping wires—delaying allows oxidation that blocks solder flow.
Oxidized tips that won’t accept solder. Dark, pitted tips transfer heat poorly and create inconsistent results. Clean aggressively with brass wool while warm, then re-tin immediately. Prevention: Always apply fresh solder to the tip before storing—this protective coating prevents oxidation during cooling.
Maintain Your Soldering Iron for Years of Reliable Service
Clean the tip after every 5-10 joints during use. Drag the hot tip through brass wool with medium pressure—never use a damp sponge for modern irons as moisture damages the tip plating. Apply a small amount of fresh solder immediately after cleaning to protect the bare metal surface. This simple habit extends tip life by 300%.
Store properly after each session. Turn off the iron and clean the tip one final time while warm. Apply a generous coat of solder to completely cover the working surface, then place in the stand until fully cooled. Never store with a clean, bare tip—oxidation will ruin it overnight. Replace tips when they develop visible pits or won’t accept solder evenly.
Replace consumables before they degrade performance. Change brass wool when it becomes saturated with solder (typically after 10-15 hours of use). Discard solder spools with hardened or flaky solder—old flux loses effectiveness. High-quality rosin-core 60/40 solder stays fresh for 2-3 years when stored sealed in a cool, dry place.
Mastering how to soldering iron use transforms intimidating electronics projects into achievable tasks. By prioritizing safety with proper ventilation and workspace setup, preparing materials meticulously through precise stripping and tinning, and applying heat strategically for perfect joint formation, you’ll create connections that function reliably for years. Remember to clean your tip regularly during sessions, store equipment properly after use, and address common issues like cold joints immediately. These fundamentals form the foundation for all electronics work—whether you’re repairing a favorite gadget or building your first custom circuit. Start with these techniques on scrap components to build muscle memory, and within hours you’ll solder with the confidence of a professional technician. Your next project awaits—plug in that iron and get started!


