
Learning how to turn on a Sunbeam iron correctly is the first essential step to achieving perfectly pressed garments. Whether you’ve just purchased a new Sunbeam steam iron or need a refresher on operating your current model, understanding the proper power-on sequence ensures safe and effective ironing results. This comprehensive guide walks you through every stage of the startup process, from initial preparation to troubleshooting common power issues, helping you get your iron heating up and ready for use in just a few minutes.
Modern Sunbeam irons share similar control layouts across most product lines, though subtle differences exist between the Classic Series, Steam Master Series, and models with retractable cord systems. The brand has designed their irons with user-friendly operation in mind, featuring clearly marked controls and intuitive power switches that make activation straightforward even for first-time users. Before you begin ironing, take a moment to familiarize yourself with your specific model’s layout, as this knowledge will streamline your ironing routine and help you avoid common mistakes that could damage your clothing or the appliance itself.
Prepare Your Iron for First Use
Before attempting to turn on your Sunbeam iron, proper preparation sets the stage for successful operation. Start by placing your iron on a stable, flat, heat-resistant surface such as an ironing board or countertop protected by a heat-safe mat. Ensure the soleplate—the smooth metal base that contacts your fabric—is clean and free from any packaging materials, dust, or debris that may have accumulated during storage or shipping. A clean soleplate glides smoothly across fabrics and prevents unwanted staining or scorching.
Next, check the water reservoir if your model includes steam functionality. Most Sunbeam steam irons require distilled water to operate effectively, as tap water contains minerals that can build up inside the iron over time and reduce steam output. Open the water fill compartment—typically located at the front or rear of the iron’s body—and add distilled water until it reaches the indicated maximum fill line. Avoid overfilling, as this can cause water to spill during operation or movement. If your iron has been stored for an extended period, consider emptying any remaining water and adding fresh distilled water to ensure optimal steam performance.
Check Soleplate and Components
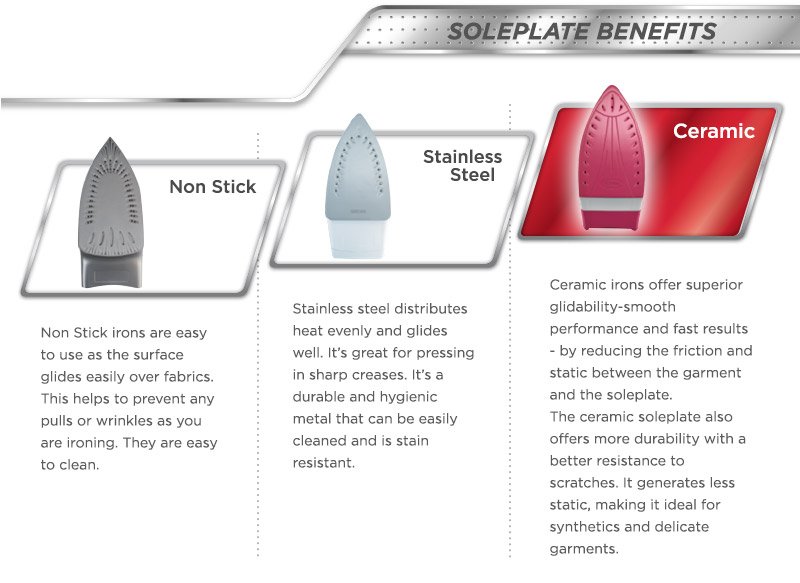
Take a moment to inspect the soleplate for any visible damage or residue that might affect performance. Run your finger along the surface (when cool) to feel for dents or scratches that could snag fabrics. Some new irons come with a protective coating that requires a quick cleaning before first use—check your manual for specific instructions. Never attempt to turn on your Sunbeam iron with anything covering the soleplate, as this creates a fire hazard and prevents proper heat distribution.
Locate the Power Controls and Switch
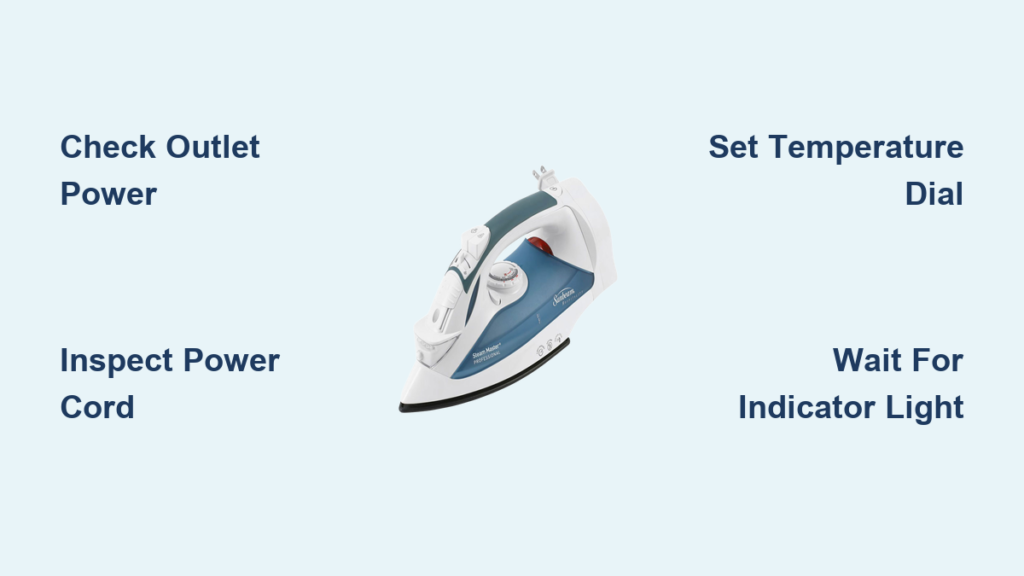
Finding the power controls on your Sunbeam iron requires understanding where Sunbeam positions these essential elements across their various models. On most Sunbeam irons, the power switch appears on the front of the handle or along the body where the handle connects to the main iron housing. This placement keeps the switch easily accessible while you grip the handle during ironing, allowing you to quickly toggle power on and off without changing your hand position.
The temperature control dial sits adjacent to or near the power switch, typically featuring a circular design with fabric symbols and heat level markings. You’ll find symbols representing synthetic fabrics and silk at the lower end of the dial, wool and polyester settings in the middle range, and cotton and linen designations at the higher heat settings. Some models include additional markings for specific temperature ranges in degrees Celsius or Fahrenheit, providing precise guidance for temperature-sensitive fabrics.
Identify Model-Specific Features
Sunbeam’s Classic Series models usually feature a simple sliding power switch positioned right next to the temperature dial. Steam Master Series models often incorporate electronic displays showing exact temperature readings and may have a dedicated power button rather than a sliding switch. If you own a retractable cord model, look for the cord release button on the heel of the iron before attempting to turn it on. Take 30 seconds to locate these controls before plugging in your iron—this prevents fumbling with hot surfaces when you’re ready to start ironing.
Connect to a Proper Electrical Outlet

Connecting your Sunbeam iron to electricity requires attention to outlet compatibility and cord safety. North American Sunbeam iron models operate on standard 120V electrical circuits, so ensure your outlet matches this voltage specification before attempting to plug in. Using the iron with incompatible voltage can cause immediate damage to the heating element and electronic components, potentially creating fire or shock hazards.
Fully extend the power cord before plugging in, avoiding any kinks, tangles, or compression that could damage the internal wires over time. A damaged cord poses serious safety risks, including electrical shock and fire, so inspect the entire length of the cord for visible signs of wear, fraying, or exposed wiring. If you notice any damage, discontinue use immediately and contact Sunbeam customer service or a qualified appliance repair technician.
Avoid Extension Cord Hazards
While it’s technically possible to use an extension cord with your Sunbeam iron, this practice carries significant risks. Irons draw high electrical current (typically 1000-1500 watts), and most standard extension cords cannot handle this load safely. If you absolutely must use an extension cord, select one rated for at least 15 amps with a gauge of 14 or lower, and keep it fully extended during use. The safest practice is to position your ironing station near a wall outlet to eliminate extension cord use entirely.
Activate the Power Switch Correctly
Turning on your Sunbeam iron involves engaging the power switch, which controls electricity flow to the heating element. Most Sunbeam irons feature either a sliding mechanism or a push-button design for the power switch, with both types providing clear tactile feedback when activated. Locate the switch—usually positioned near the temperature dial on the iron’s body—and move it to the “ON” position according to its design.
For sliding switches, push the control toward the “ON” indicator until it clicks or stops moving. Sliding switches often feature a small tab or raised area that makes them easy to operate even while wearing ironing gloves. Push-button switches require a firm press to engage, with most models producing an audible click that confirms activation. Avoid pressing the button multiple times rapidly, as this can confuse the iron’s electronic controls in models with digital features.
Recognize Power Activation Signals
Upon successful activation, a pilot light or indicator LED illuminates to confirm the iron is receiving power and the heating cycle has begun. This indicator typically glows red, blue, or green depending on your model, serving as your primary confirmation that the iron has powered on correctly. If no indicator light appears after activating the switch, proceed to the troubleshooting section of this guide to identify and resolve the power issue before continuing.
Set the Temperature for Your Fabric
Setting the correct temperature ensures effective ironing while protecting your fabrics from heat damage. Rotate the temperature control dial clockwise to increase heat or counterclockwise to decrease, aligning the dial’s indicator with the appropriate fabric symbol or temperature setting. Sunbeam irons typically divide settings into three main categories: low heat for synthetic materials and silk, medium heat for wool and polyester blends, and high heat for cotton and linen.
When selecting a temperature, always start with the lowest heat setting appropriate for your fabric and increase as needed. Delicate fabrics like silk, rayon, and synthetic blends can scorch or melt under excessive heat, causing permanent damage to your garments. Conversely, thick cotton fabrics require higher temperatures to effectively remove wrinkles, and insufficient heat will produce disappointing results while requiring multiple passes over the same areas.
Temperature Setting Tips
- Synthetics (Nylon, Polyester): Use low heat (275-300°F) with no steam
- Silk and Wool: Medium heat (300-375°F) with light steam
- Cotton and Linen: High heat (375-450°F) with full steam
Never begin ironing immediately after setting the dial—most Sunbeam irons require approximately two to three minutes to fully heat to the selected temperature. Rushing this step leads to poor results and may cause you to increase heat unnecessarily.
Wait for the Heating Indicator Signal
The heating indicator light serves as your iron’s communication tool, signaling when the appliance is actively heating and when it has reached operating temperature. When you first turn on your Sunbeam iron, the indicator light illuminates or begins blinking to show the heating element is drawing power and working to warm the soleplate. During this active heating phase, the light typically remains steady or pulses, depending on your model.
The indicator behavior changes once the iron reaches the selected temperature, usually by turning off entirely or changing color. This signal indicates the heating element has cycled off because the soleplate has achieved the target temperature, and the iron is now ready for use. Some premium Sunbeam models feature digital displays that show the current temperature in real-time, providing precise feedback rather than relying on indicator light behavior.
Test Heat Readiness Safely
Before pressing your garment, perform a quick moisture test to confirm your Sunbeam iron has reached proper temperature. Hold the iron over a tissue or paper towel and press the steam button. If the iron is properly heated, the water should evaporate instantly with a strong burst of steam. If you see water droplets instead of steam, wait another minute before testing again—this prevents water spots on your fabrics.
Troubleshoot Power Problems Effectively

When your Sunbeam iron fails to turn on, systematic troubleshooting identifies the cause and guides you toward an appropriate solution. Begin by testing the electrical outlet, as a non-functional outlet commonly mimics iron failure. Plug another device—such as a lamp or phone charger—into the same outlet to verify it delivers power. If the outlet fails to energize the test device, reset the circuit breaker or try a different outlet in your home.
Inspect the power cord thoroughly for visible damage that could interrupt electrical flow. Feel along the cord’s entire length, bending it gently at intervals to reveal internal wire breaks that may not be visible externally. Check the cord’s connection point at the iron’s heel, ensuring the plug seats securely without looseness or wobble. Damaged cords require professional replacement, as amateur repairs create fire and shock hazards.
Common Power Failure Solutions
- No power indicator light: Verify outlet functionality and cord connection
- Light comes on but iron doesn’t heat: Check temperature dial position (some models require minimum setting)
- Intermittent power: Test with different outlet to rule out circuit issues
- Iron worked previously but now fails: Allow 30 minutes for thermal fuse reset after overheating
If your Sunbeam iron still won’t turn on after these checks, contact Sunbeam customer support with your model number for further assistance.
Follow Essential Safety Precautions
Operating your Sunbeam iron safely requires consistent attention to potential hazards throughout each ironing session. Never leave a powered-on iron unattended, as unexpected distractions can lead to scorch marks on fabrics, potential fire hazards, or accidental contact with the hot soleplate. If you must step away, even briefly, turn off the iron and move it to a safe location away from flammable materials and out of reach of children or pets.
Unplugging the iron after each use represents a fundamental safety practice that eliminates the risk of accidental activation or electrical faults while the appliance sits unattended. After completing your ironing task, turn off the power switch first, then unplug the cord from the electrical outlet. Allow the iron to cool completely—typically fifteen to thirty minutes—before storing it. Some Sunbeam models include automatic shut-off features that activate after a period of inactivity, but you should not rely on this safety measure as your primary precaution.
Mastering how to turn on a Sunbeam iron properly ensures both effective garment care and household safety. By following these steps—from preparation through activation—you’ll achieve professional results while extending your iron’s operational life. Remember that consistent safety practices and proper maintenance transform routine ironing from a chore into an efficient process that protects both your clothing and your home.


