
Steam irons can transform your laundry routine, but many users struggle with proper technique. Whether your clothes emerge with stubborn creases or your iron leaks water, mastering steam iron operation solves common frustration. This guide reveals exactly how to leverage steam power for professional results at home – no dry cleaning bills required. You’ll learn precise temperature settings for delicate silks, the right water level to prevent sputtering, and time-saving techniques that cut ironing time in half.
Filling Your Steam Iron Correctly
Improper water filling causes most steam iron malfunctions, from weak steam output to water leakage on fabrics. Using the wrong water type or overfilling creates mineral buildup that clogs steam vents within weeks.
Choosing the Right Water Type
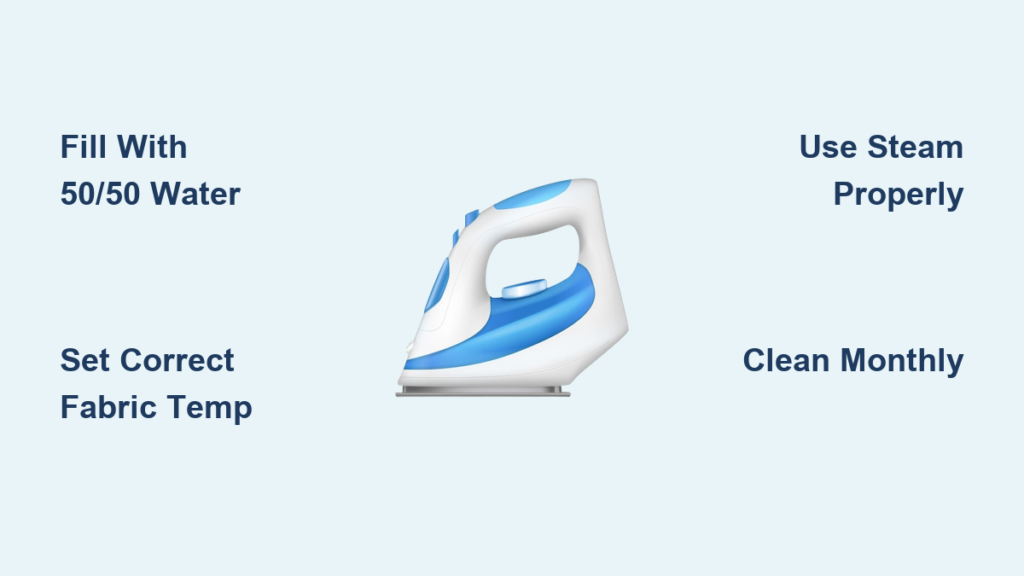
Tap water contains minerals that accumulate inside your iron’s heating chamber. Distilled water prevents scaling but lacks minerals needed for optimal steam production in some models. A 50/50 mix of distilled and tap water provides the ideal balance for most modern steam irons. Never use bottled spring water or softened water, which accelerate mineral deposits.
Proper Filling Procedure
- Unplug your iron and place it vertically on its heel rest
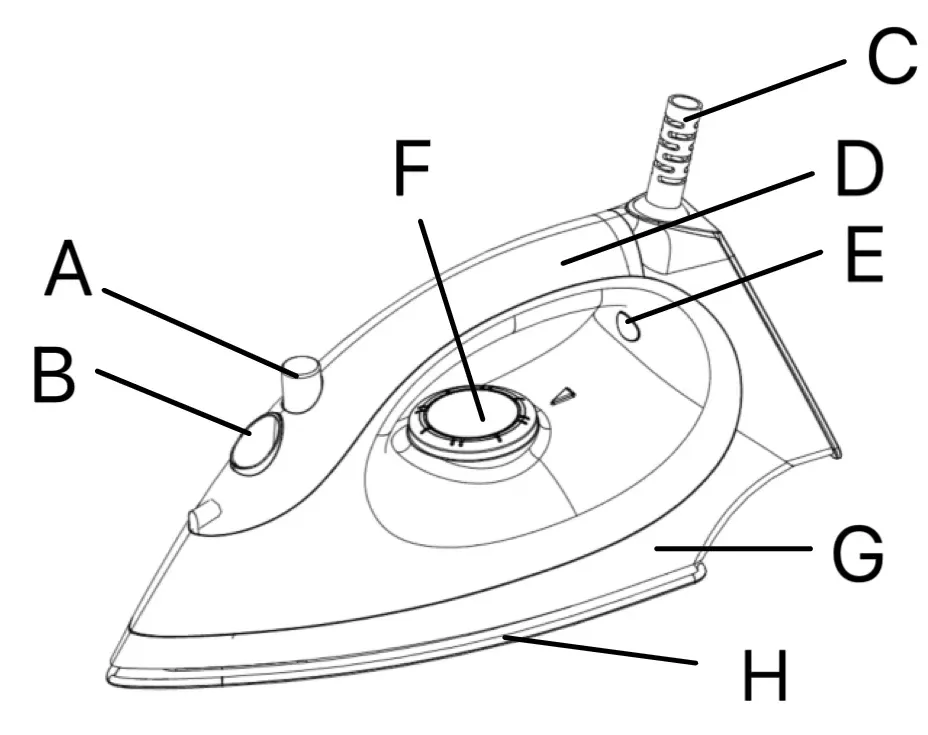
- Open the water reservoir cap (usually located near the handle base)
- Hold the iron at a 45-degree angle over the sink
- Pour water slowly until reaching the “MAX” line – never overfill
- Wipe any spilled water from the soleplate before plugging in
- Allow 30 seconds for air bubbles to escape before use
Pro Tip: Fill your iron after each use while it’s still warm. Residual heat helps evaporate moisture that could cause corrosion when stored.
Setting Correct Temperature for Different Fabrics
Using the wrong heat setting damages fabrics or fails to remove wrinkles. The temperature dial corresponds to fabric types, not numerical values, making proper selection confusing for beginners.
Decoding the Fabric Symbol Chart
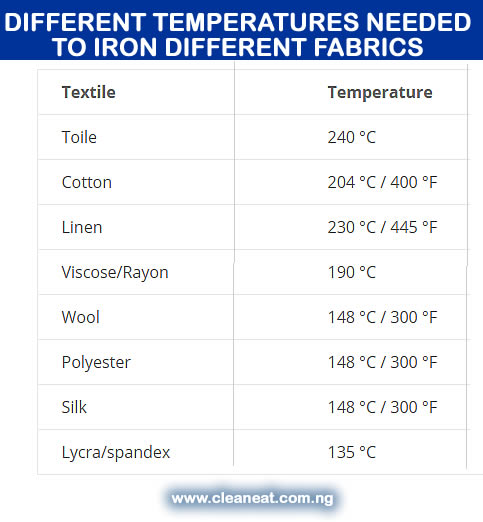
Most steam irons feature symbols instead of numbers:
– Dot symbol: Synthetics (polyester, nylon) – low heat (275°F/135°C)
– Two dots: Wool and silk – medium heat (300°F/148°C)
– Three dots: Cotton and linen – high heat (400°F/204°C)
– Steam icon: Activates steam function at appropriate temperature
Special Considerations for Delicate Fabrics
Silk requires extra precautions beyond just temperature selection. Always iron silk inside out with a pressing cloth between the fabric and soleplate. For stubborn silk wrinkles, use the spray function instead of direct steam to prevent water spots. Test heat settings on an inconspicuous area first – some “silk” blends tolerate higher temperatures than pure silk.
Warning: Never use steam on waxed jackets, plastic-coated fabrics, or memory foam items. The moisture permanently damages these materials.
Activating Steam Functions Properly
Many users press the steam button repeatedly when weak steam appears, worsening the problem. Understanding when and how to engage steam functions prevents water drips and inconsistent performance.
Horizontal Steam Ironing Technique
- Select appropriate fabric setting and allow iron to heat fully (light turns off)
- Position iron flat on fabric with soleplate fully contacting surface
- Press and hold steam button while moving iron forward steadily
- Maintain consistent speed – too slow causes water spots, too fast leaves wrinkles
- For heavy wrinkles, make two overlapping passes with steam activated
Vertical Steaming for Hanging Garments
Perfect for quick touch-ups on suits or curtains:
1. Hang garment on sturdy hanger
2. Set iron to highest steam setting (usually cotton)
3. Hold iron 1-2 inches from fabric surface
4. Press steam burst button in short 2-second intervals
5. Use downward motions from shoulders to hem
6. Gently pull fabric taut with free hand for best results
Pro Tip: For stubborn pleats, place a damp cloth over the fabric and iron directly over it. The added moisture penetrates deeper without risking water spots.
Preventing Common Steam Iron Problems
Most steam iron issues stem from improper maintenance rather than equipment failure. Addressing these problems immediately prevents permanent damage to both your iron and clothing.
Fixing Water Leaks During Ironing
Water dripping from the soleplate indicates:
– Iron not fully heated before steam activation
– Water reservoir overfilled beyond MAX line
– Clogged steam vents restricting proper vaporization
Solution: Unplug iron and let it heat for 5 more minutes. Empty excess water if overfilled. For clogged vents, run a 50/50 vinegar-water solution through the steam function into a sink (never on fabric).
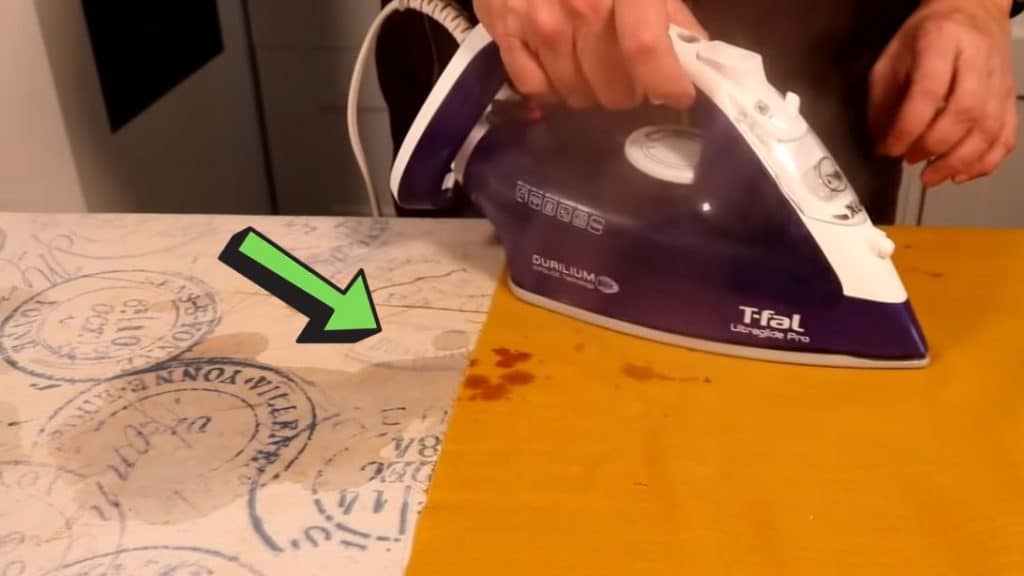
Eliminating Brown Stains on Fabrics
Brown residue transfers to clothes when:
– Using tap water with high mineral content
– Iron hasn’t been cleaned in over 3 months
– Overheating synthetic fabrics causes scorching
Solution: Clean your iron using manufacturer’s descaling instructions. Always use distilled water mixture. For existing stains, rub affected area with white vinegar before rewashing.
Cleaning and Maintaining Your Steam Iron
Neglecting maintenance reduces steam power by 40% within six months of regular use. Proper care extends your iron’s lifespan and ensures consistent performance.
Monthly Deep Cleaning Routine
- Fill reservoir with equal parts white vinegar and water
- Heat iron to maximum cotton setting
- Hold over sink and press steam button for 30 seconds
- Wipe soleplate with soft cloth while warm (not hot)
- Empty remaining solution and rinse reservoir twice with clean water
- Run plain water through steam function to flush vinegar residue
Storage Best Practices
Store your iron correctly to prevent internal damage:
– Always empty water reservoir after use
– Stand iron vertically with cord loosely wrapped
– Never store while still warm – allow 2 hours cooling time
– Keep in dry location away from humidity sources
Warning: Never immerse your steam iron in water for cleaning. Electrical components cannot be submerged.
Troubleshooting Steam Iron Issues
When problems occur, systematic diagnosis saves time and prevents unnecessary replacements. Most issues have simple solutions that take less than 10 minutes to fix.
No Steam Despite Proper Settings
Check these common causes in order:
– Water reservoir empty or not properly seated
– Temperature too low for steam activation (must reach 275°F+)
– Steam vents clogged with mineral deposits
– Anti-calc indicator light illuminated requiring cleaning
Quick Fix: Fill with distilled water mixture, set to cotton setting, and wait 3 minutes for full heat before testing steam.
Iron Won’t Heat Up Properly
Electrical issues often mimic mechanical failure:
– Faulty wall outlet (test with another appliance)
– Tripped circuit breaker in home electrical panel
– Damaged power cord with internal wire break
– Thermal fuse blown from overheating
Diagnostic Step: Plug iron into a different outlet known to work. If still unresponsive, contact manufacturer for repair options.
Professional Ironing Techniques for Perfect Results
Master these advanced methods to achieve dry-cleaner quality at home. These techniques save time while delivering superior results on challenging fabrics.
The Cross-Hatch Method for Stubborn Wrinkles
- Iron garment in one direction using steam
- Rotate fabric 90 degrees and repeat the process
- Finish with downward strokes following garment seams
- Use steam burst button for particularly stubborn creases
Collar and Cuff Perfection Technique
- Unbutton all shirt buttons before ironing
- Lay collar flat with points aligned
- Iron from outer edge toward center seam
- For cuffs, open and lay flat before ironing both sides
- Flip garment and repeat process on reverse side
Pro Tip: Lightly spray water on cotton collars before ironing for crisp results without excessive steam.
Final Ironing Checklist Before Storage
Complete these steps after every ironing session to ensure peak performance next time:
- Empty all remaining water from reservoir
- Wipe soleplate with damp microfiber cloth
- Set temperature dial to “OFF” position
- Wrap cord loosely around designated grooves
- Store in upright position away from direct sunlight
- Check anti-calc indicator for next cleaning reminder
Implementing these steam iron techniques transforms tedious chore into efficient routine. You’ll notice immediate improvement in fabric appearance while extending garment lifespan through proper care. The key is consistent maintenance combined with fabric-specific techniques – no expensive equipment required. For best results, clean your iron monthly and always match heat settings to fabric types. Your clothes will maintain professional appearance wash after wash when you master these essential steam iron methods.


