
Your straightening iron sits on the bathroom counter, promising sleek, smooth hair but often delivering damaged, frizzy results instead. If you’ve ever wondered why your straightening sessions leave hair brittle or why your style doesn’t last through the day, you’re not alone. Millions struggle with this versatile tool that can transform your look in minutes when used correctly. Learning how to use a straightening iron properly makes the difference between salon-quality results and damaged, frazzled hair. This guide reveals the exact techniques professional stylists use to achieve smooth, shiny hair while actually protecting it from heat damage.
Before plugging in your iron, understand that heat styling is a delicate balance between transformation and preservation. The temperature you choose, how you prepare your hair, and even the direction you glide the plates all impact your final look and your hair’s long-term health. Many people jump straight to styling without proper preparation, only to wonder why their results fall flat or why their hair feels like straw afterward. By following these techniques, you’ll achieve better results while actually protecting your hair from preventable damage.
Choose the Right Temperature for Your Hair Type
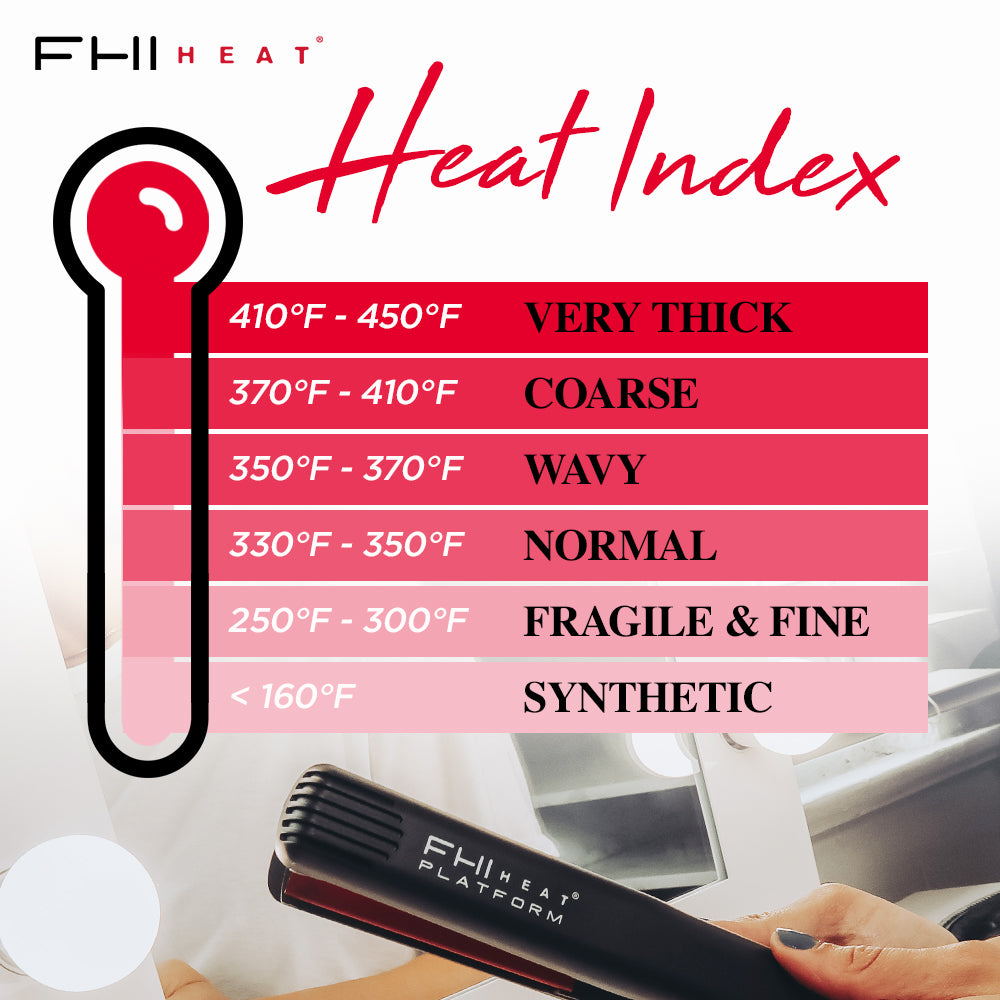
Fine hair straightens perfectly at 250-300°F—never go higher. This hair type is most vulnerable to heat damage and straightens effectively at lower temperatures. Start at 250°F and only increase if needed. Cranking the heat higher creates visible damage like split ends and breakage that no conditioner can fix.
Medium hair needs 300-350°F for optimal results. This temperature range provides enough heat to break hydrogen bonds while remaining safe for regular styling. If your medium hair isn’t straightening at 300°F, work with smaller sections rather than increasing heat. Multiple gentle passes cause less damage than one aggressive pass at high temperature.
Thick or coarse hair requires 350-400°F but needs extra protection. While this hair type can withstand higher temperatures, never exceed 400°F regardless of texture—temperatures above this threshold cause rapid protein degradation. Apply extra heat protectant and make fewer passes to minimize damage. If your hair still won’t straighten, check your section size—thick subsections are the most common reason for uneven results.
When to Lower Your Temperature
Color-treated or chemically processed hair should never exceed 300°F, regardless of natural texture. The compromised structure of treated hair makes it vulnerable to heat damage at lower temperatures than healthy hair. When in doubt, always err on the side of lower temperatures. Keep a mental note of which temperature works best for your hair’s current condition, adjusting seasonally as humidity and your hair’s health change.
Create Perfect Sections for Even Results

Section your hair into one-inch horizontal layers starting from the crown. Create a horizontal part across the crown, making a section roughly one inch deep. Clip the remaining hair out of the way using duckbill clips. Within this top section, create a vertical part down the center, dividing it into two equal halves. Continue working downward, creating one-inch horizontal sections until all hair is clipped.
Why Pencil-Thin Sections Matter
Each subsection should be no wider than your iron’s plates and no thicker than a pencil. This dimension ensures heat penetrates to the inner layers without requiring multiple passes. If you find yourself making more than two passes over any section, the subsection is too thick—remove the iron, create smaller sections, and try again. Thick subsections might seem faster, but the multiple passes they require actually cost you time while damaging your hair more than smaller, deliberate sections.
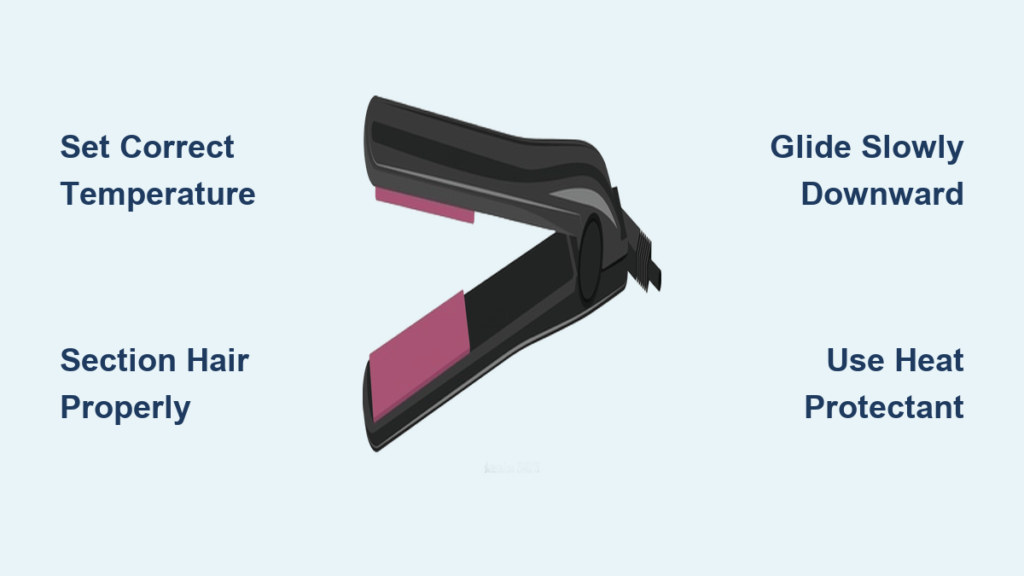
Master the Correct Straightening Motion
Position the iron one inch from roots with plates facing downward. Hold the iron with the top plate above your hair section and the bottom plate beneath it. The hinge should rest near your scalp with the handle pointing upward and outward. Position approximately one inch away from roots to avoid burning your scalp and creating a visible line between straightened and natural hair.
The One-to-Two-Second Glide Technique
Close the plates firmly but gently around each subsection, applying enough pressure to flatten the hair without crushing it. Hold the ends taut between your fingers and the iron, then draw the iron downward in one smooth, continuous motion. The optimal gliding speed is one to two seconds per pass—slow enough for heat to alter the hair’s structure, fast enough to avoid excessive heat buildup. For very straight results, one pass per section typically suffices. Thick hair may need a second pass; if so, slightly rotate the iron to smooth from a different direction.
Fix Common Straightening Problems Immediately

Frizz after straightening? Your protectant was insufficient or hair wasn’t dry. Apply a small amount of anti-frizz serum to affected areas and make a single quick pass with the iron at your normal temperature. Humidity is a major contributor to post-straightening frizz—if you live in a humid climate, look for products containing humidity-blocking silicones. Persistent frizz might indicate your plate material isn’t ideal; tourmaline plates excel at reducing frizz due to high ion output.
When Hair Breaks During Straightening
Hair snapping requires immediate action: reduce your temperature by at least fifty degrees, ensure you’re using heat protectant, and examine your plates for rough spots or damage. Consider spacing styling sessions further apart while your hair recovers. Never straighten wet or damp hair—the steam creates uneven heating that can make hair bubble or blister. Ensure hair is completely dry before applying heat, allowing two minutes for internal layers to cool after blow drying.
Protect Your Hair from Irreversible Damage
Heat damage cannot be reversed—only grown out and cut away. It manifests as dry, brittle hair that breaks easily, split ends appearing shortly after styling, color changes in treated hair, and a rough, straw-like texture. The cumulative effect of heat styling compounds over time, meaning even sessions that appear harmless gradually weaken your hair shaft.
Essential Damage Prevention Techniques
Limit straightening to two or three times per week and always use heat protectant. Apply a quarter-sized amount to damp hair, focusing on mid-lengths and ends where damage accumulates. Work it through with a wide-tooth comb for complete coverage, then wait one to two minutes for it to air dry before applying heat. Allow your hair to cool completely before touching or brushing—the hair’s structure resets as it cools, and premature manipulation disrupts the straightened pattern.
Maintain Your Straightening Iron for Optimal Performance
Clean plates weekly with isopropyl alcohol to prevent residue buildup. Allow the iron to cool completely before cleaning. Moisten a cotton pad with alcohol and gently wipe the plates in a back-and-forth motion. For stubborn residue, let alcohol sit for thirty seconds before wiping clean. Avoid abrasive tools that can scratch the plate surface.
Proper Storage Extends Your Iron’s Life
Store your iron properly to prevent damage. Always allow it to cool completely before putting it away—storing a hot tool damages internal heating elements. Wrap the cord loosely around the base rather than tightly, which prevents internal wire damage. Store in a cool, dry location away from direct sunlight. Use the heat-resistant carrying pouch if provided—this protects during storage and makes travel convenient. Replace your iron when you notice uneven heating, visible plate damage, or inconsistent temperature control—most quality irons last three to five years.
Perfect Straightening Checklist
Follow these five steps for flawless results every time:
- Prep correctly: Shampoo with sulfate-free formula, towel dry with microfiber, apply heat protectant to damp hair
- Set appropriate temperature: Fine hair (250-300°F), medium (300-350°F), thick (350-400°F), color-treated (<300°F)
- Section methodically: Create one-inch horizontal layers, then pencil-thin subsections
- Style properly: Position one inch from roots, glide slowly in one continuous motion
- Cool completely: Allow hair to cool before touching or brushing
By following these steps consistently, you’ll achieve smooth, straight styles while maintaining healthy, beautiful hair. Remember that heat styling is a form of hair manipulation that requires respect for your hair’s natural structure. Prioritize heat protection, temperature control, and technique quality over speed or extreme results, and your hair will thank you with lasting health and shine.


