
Tired of baggy pant legs dragging on the floor or curtains that pool awkwardly at your windows? Iron-on hem tape offers a brilliant solution for achieving professional-looking hems without sewing skills or specialized equipment. This adhesive-based hemming product creates lasting bonds between fabric layers through a simple heat-activated process, transforming frustrating fabric problems into quick fixes you can complete in minutes. Home decorators use it to adjust curtain lengths instantly, clothing owners fix ill-fitting trousers without expensive tailoring, and DIY enthusiasts tackle fabric projects with confidence—no needle required. In this guide, you’ll discover exactly how to use iron-on hem tape effectively for pants, curtains, and other fabric items, avoiding common pitfalls that lead to failed hems and wasted time.
The beauty of iron-on hem tape lies in its simplicity and accessibility. Unlike traditional hemming that requires threading needles, selecting appropriate stitches, and developing steady hand skills, this no-sew alternative works through a straightforward heat-activated bonding mechanism. The adhesive creates strong connections with fabric fibers that withstand regular wear and washing when applied correctly. Whether you’re a complete beginner or an experienced crafter looking for time-saving techniques, understanding the proper application process ensures your alterations look professional and last through countless wears. Before diving into the step-by-step process, it’s important to recognize that success depends entirely on following the correct technique—rushing through steps or skipping preparation leads to hems that peel, bubble, or fail after just one wash.
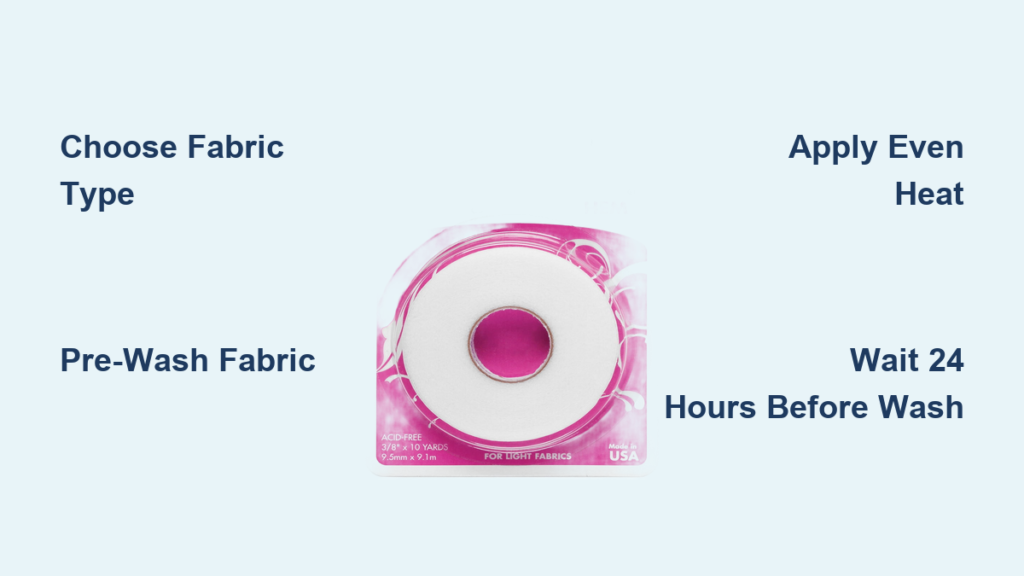
Select Your Iron-On Hem Tape for Specific Fabric Projects

Choosing the right iron-on hem tape for your project makes the difference between a lasting bond and a frustrating failure. Not all tapes work equally well on every fabric type, so matching your tape to your material ensures optimal adhesion and durability.
Iron-on hem tape comes in various formulations designed for specific fabric weights and compositions. For lightweight materials like cotton curtains or thin dress pants, select a delicate-grade tape that won’t create visible bumps or stiffness. Heavier fabrics such as denim or upholstery require stronger adhesive formulations that can penetrate thicker fibers. The Amazon Live demonstration by Matt Donley emphasized that using tape specifically designed for your fabric type significantly improves results—standard tapes work well on most cotton and polyester blends, but specialty fabrics may need specialized products.
When purchasing iron-on hem tape, consider your project scale and fabric characteristics. Most tapes come in rolls of varying widths (typically 1/4 to 1 inch), with wider tapes providing stronger bonds for heavier fabrics. Check packaging for any specific fabric compatibility notes, as some tapes perform better on natural fibers while others excel with synthetics. Quality matters considerably—cheaper tapes often contain inconsistent adhesive distribution that creates weak spots in your hem. For best results, invest in a reputable brand that clearly states its compatibility with your specific fabric type, as demonstrated in professional tutorials.
Prepare Your Fabric for Optimal Adhesion
Proper fabric preparation creates the foundation for successful iron-on hem tape application. Taking time to clean and position your fabric correctly ensures the adhesive bonds effectively rather than failing after your first wash.
Begin by washing and drying your fabric item if it hasn’t been cleaned recently. The Amazon Live demonstration highlighted that residual oils, finishes, and debris on fabrics interfere with adhesive bonding, causing hems to peel prematurely. Allow the fabric to cool completely after drying before proceeding, as residual heat affects tape performance. For curtains or items that have already been hung, wipe them down with a damp cloth and ensure they’re completely dry before applying tape.
Next, determine exactly where you want the new hemline to fall. Try on pants to mark the ideal length with straight pins horizontally across the fabric, or hold curtains against your window to identify the perfect drop length. This precise measurement prevents uneven hems that look amateurish. For pants with excessively long legs, trim excess fabric before taping, leaving about one inch beyond your desired hemline for folding under. This excess creates the bulk that the tape secures, preventing visible edges while maintaining a clean internal bond between fabric layers.
Apply Heat Correctly for Permanent Bonding
The heat application step determines whether your hem holds permanently or fails after a few washes. Understanding proper heat techniques ensures strong adhesive bonding every time, as demonstrated in professional tutorials.
Position your iron over the taped section using firm, even pressure. Hold the iron in place for sufficient time to activate the adhesive—sliding the iron back and forth displaces the tape before bonding occurs. For larger hems, work in sections rather than attempting to cover the entire hem at once. After pressing each section, lift the iron straight up and allow the area to cool before moving the fabric. This cooling period allows the adhesive to set fully before stress is applied.
The Amazon Live demonstration emphasized that applying heat consistently across the entire hemline creates uniform bonding. Pay extra attention to corners and curved areas, as these spots experience more stress during wear and washing. For curved hems like those on A-line skirts, use shorter pieces of tape arranged along the curve rather than one continuous strip, which can bunch or create gaps. Once both sides have been pressed and cooled, run your fingers along the hemline to check for any loose spots that need additional heat application.
Avoid Common Iron-On Hem Tape Failures
Even experienced crafters encounter hem tape failures when they overlook critical details. Understanding these common pitfalls helps you achieve professional results on your first attempt.
One frequent mistake involves insufficient heat during application. If your iron isn’t hot enough or you don’t hold it in place long enough, the adhesive only partially melts and creates a weak bond that fails after one or two washes. Another error occurs when fabric layers aren’t perfectly aligned before heating. Any shifting during application creates gaps or wrinkles in the finished hem. Using plenty of pins to secure layers prevents this issue, as emphasized in the Amazon Live demonstration.
Applying tape to dirty or dusty fabric ranks among the most common causes of hem failure. Oils from skin, fabric finishes, and embedded debris all prevent proper adhesive contact with fabric fibers. Always clean fabrics before hemming, and avoid handling the taped surfaces excessively. Similarly, moving or disturbing the hem before it fully cools breaks the bond as the adhesive resets. Wait several minutes before wearing or moving the item, and wait 24 hours before washing to ensure maximum bond strength.
When Iron-On Hem Tape Outperforms Traditional Sewing
Understanding when iron-on hem tape provides the best solution helps you make informed decisions for your projects. While tape offers convenience, certain situations favor traditional sewing methods.
Iron-on hem tape excels for quick fixes, temporary alterations, and projects involving fabrics that are difficult to sew. Synthetic fabrics like polyester and nylon can pucker or melt under machine needles if not handled carefully, making tape a safer choice for these materials. Users without sewing skills achieve better-looking results with tape than attempting hand-stitched hems, and the time investment is significantly less. Home decorators particularly benefit from using tape for curtain adjustments, as demonstrated in the Amazon Live session, where immediate results were achieved without measuring stitches or threading needles.
However, sewing provides superior durability for hems that will experience frequent stress or heavy use. Jean hems, jacket cuffs, and items that undergo frequent washing benefit from stitched reinforcement. Similarly, hem tape may not work well on fabrics with heavy textures or extreme weights. In these cases, traditional hemming delivers better long-term results despite the additional time and skill required.
Care for Your Iron-On Hem Tape Projects
Proper care extends the life of your iron-on hem tape projects significantly. While modern hem tapes create permanent bonds when applied correctly, washing and drying practices affect longevity.
Wait at least 24 hours after application before washing your newly hemmed item. This waiting period allows the adhesive to cure fully and achieve maximum bond strength. When you do wash, use warm water on a gentle cycle rather than hot water, which can stress the adhesive bond. Turn items inside out before washing to reduce friction on the hemmed edge. For the first several washes, consider using a laundry bag for extra protection, particularly for items that will undergo significant agitation.
Avoid high-heat drying when possible. The sustained heat of a dryer can weaken adhesive bonds over time. Air drying or using low-heat settings preserves your hem’s integrity longer. If you must use a dryer, remove items while still slightly damp and allow them to air dry flat or hang to finish drying. Inspect hems periodically after washing to catch any lifting edges before they become major repairs. Small lifting spots can often be repaired with additional heat application before they progress.
Iron-on hem tape transforms fabric alterations from specialized skills into accessible DIY projects when you understand how to use it correctly. By selecting the right tape for your fabric, preparing surfaces properly, applying consistent heat, and caring for your finished project appropriately, you’ll achieve professional-looking results that last. Whether you’re hemming pants that arrived too long, adjusting curtain lengths for the perfect fit, or creating no-sew fabric crafts, this versatile adhesive solution saves time and eliminates sewing barriers. Remember that success depends on following the complete process—skipping preparation steps or rushing the heat application leads to disappointing results. With proper technique, your iron-on hem tape projects will maintain their appearance through countless wears and washes, proving that sometimes the simplest solutions deliver the most professional outcomes.


