
Nothing ruins a perfect sear on your favorite steak like discovering your beloved Lodge cast iron skillet has developed rust spots after improper cleaning. Knowing how to wash Lodge cast iron properly separates those who enjoy decades of cooking with their heirloom-quality skillets from those who constantly battle rust and stickiness. Despite common myths claiming “never use soap” or “never get it wet,” modern Lodge cast iron responds beautifully to proper cleaning techniques that maintain its natural non-stick surface. The truth is simple: regular, gentle cleaning actually preserves your seasoning better than neglect ever could. In this guide, you’ll discover exactly how to clean your Lodge cast iron without damaging its precious seasoning layer, avoid the most common cleaning mistakes that ruin pans, and keep your skillet performing like new for generations.
Whether you’ve just purchased your first Lodge skillet or have inherited a family heirloom, understanding the right cleaning techniques will save you time, money, and frustration. Many owners make the mistake of treating cast iron like regular cookware, using harsh soaps or scrubbing vigorously, which damages the seasoning. Others avoid cleaning their pans altogether, believing that any washing removes the “seasoning.” The truth lies in a balanced approach: regular, gentle cleaning removes food residue without harming the protective layer, while periodic deep cleaning and re-seasoning keeps your cookware performing at its best. By following these proven methods, you’ll maintain a naturally non-stick surface that only gets better with age.
Gather Your Cleaning Supplies Before Washing
Before washing your Lodge cast iron, having the right tools on hand makes the process much easier and protects your pan’s seasoning. Lodge recommends using basic household items rather than harsh chemicals or abrasive tools that can damage the cooking surface.
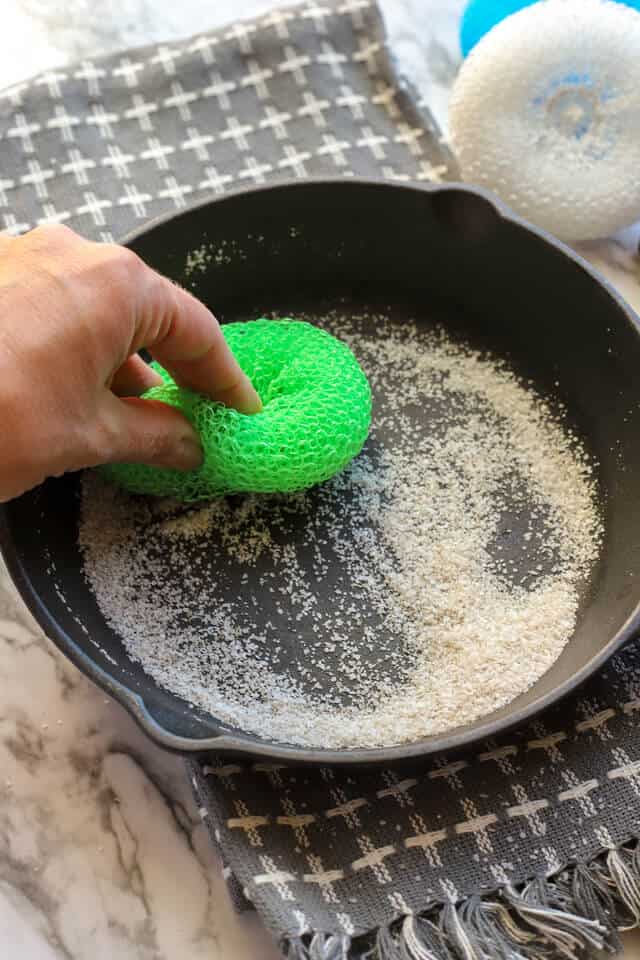
The essential supplies include a stiff nylon brush or dedicated cast iron cleaner, hot water, and a clean dishcloth or paper towels. Avoid steel wool or abrasive scrubbers, as these scratch the seasoning and create rough spots where food can stick. For stubborn residue, coarse kosher salt acts as a gentle abrasive that lifts food without damaging the surface. Some cooks keep a small container of salt specifically for cast iron cleaning, using it as needed rather than relying on soap.
Mild dish soap is safe for cast iron, despite common myths suggesting otherwise. Modern dish soaps are gentle enough that they won’t strip your seasoning when used occasionally. However, harsh detergents or degreasers should be avoided, as they can break down the polymerized oil layer that makes your pan non-stick. If you prefer a soap-free approach, hot water and mechanical scrubbing work remarkably well for most cleaning tasks. Having these supplies ready before you start cooking prevents delay, which is important since cast iron should be cleaned while still warm but not hot enough to cause burns.
Perform a Quick Rinse After Every Use
For most cooking sessions, a quick rinse immediately after use keeps your Lodge cast iron clean without disturbing the seasoning. This method works best when you’ve cooked relatively non-greasy foods or when food residue hasn’t had time to dry and bond to the surface.
While the pan is still warm—about 10 to 15 minutes after removing it from the heat—run hot water over the cooking surface. Use a stiff brush or nylon scrubber to gently agitate any food particles, working in a circular motion following the texture of the cast iron. The heat helps loosen residue, making it easier to remove without excessive scrubbing. For light residue, this rinse takes less than a minute and requires minimal effort. Avoid letting the pan soak, even in warm water, as prolonged exposure to moisture promotes rust formation.
After rinsing, immediately dry the pan thoroughly with a clean towel. This step is critical—water left on the surface can cause flash rust within hours, especially in humid environments. Wipe until the pan feels completely dry to the touch, then place it on a warm burner for a minute or two to evaporate any remaining moisture. This brief heating also helps the seasoning set and creates a slightly oily protective layer. For daily use, this quick rinse and dry takes only a few minutes but prevents the buildup that requires more intensive cleaning later.
Why Waiting to Clean Causes Problems
Delaying cleaning allows food residue to harden, making removal more difficult and requiring more aggressive scrubbing that damages seasoning. The ideal window for cleaning is when the pan has cooled enough to handle safely but is still warm from cooking—typically 10-15 minutes after use. At this temperature, food particles lift away easily with minimal effort. If you wait until the pan is completely cold, you’ll likely need to use more water, more scrubbing, and potentially more soap to remove stuck-on bits, all of which stress the seasoning layer. Set a timer on your phone if necessary—cleaning while warm is the single most important factor in maintaining your Lodge cast iron’s performance.
Remove Stubborn Residue Without Damaging Seasoning
When food has dried onto the surface or you’ve cooked greasy foods that left stubborn residue, a deeper cleaning becomes necessary. This process removes built-up gunk while preserving the underlying seasoning, and it can be done every few weeks or as needed depending on your cooking habits.
Begin by heating the pan on low heat for two to three minutes to warm the metal, which helps loosen bonded residue. Add a small amount of hot water and use your stiff brush to scrub vigorously, focusing on problem areas. For particularly stubborn spots, sprinkle a tablespoon of coarse kosher salt onto the surface and scrub with a damp brush. The salt acts as a natural abrasive that lifts residue without scratching the seasoning, and it can be rinsed away completely without leaving any residue behind. The salt method works surprisingly well for baked-on foods and carbonized oil buildup.
When to Use Baking Soda Paste for Tough Jobs
For extremely stubborn residue that won’t budge with salt alone, create a paste using baking soda and water. Apply the paste to affected areas and let it sit for 10-15 minutes before scrubbing. This gentle alkaline solution helps break down acidic or oily residue without damaging the seasoning. The baking soda paste works particularly well on:
- Burnt-on tomato sauces
- Carbonized sugar from caramel
- Stuck-on cheese
- Overheated oil spots
After treatment, rinse thoroughly with hot water and dry immediately to prevent rust. The baking soda method provides extra cleaning power without the risk of damaging your seasoning that comes with harsh abrasives.
Avoid These 5 Common Lodge Cast Iron Cleaning Mistakes

Many well-intentioned cast iron owners inadvertently damage their pans through common cleaning errors. Understanding these mistakes helps you avoid them and maintain your Lodge’s seasoning for years to come.
Never soak your cast iron in water, even for short periods. While a brief rinse is fine, extended submersion allows water to penetrate the metal’s pores and initiates rust formation. This is especially true for Lodge’s pre-seasoned pans, which have a lighter initial seasoning layer that requires extra protection during the first few months of use. Similarly, never place your cast iron in the dishwasher, as the prolonged moisture and harsh detergents will strip seasoning and cause rust. Hand washing is the only appropriate method for cast iron cookware.
Avoid using excessive soap or harsh cleaners, which can degrade seasoning over time. While a small amount of mild dish soap occasionally won’t ruin your pan, regular use of strong detergents breaks down the polymerized oil layer that makes cast iron non-stick. Also resist the urge to scrub with steel wool or abrasive pads, as these create micro-scratches that collect food and ruin the smooth cooking surface. Finally, don’t clean cast iron when it’s ice-cold, as thermal shock from cold water on hot metal can cause cracking, though this is rare with Lodge’s durable construction. Waiting until the pan is warm but comfortable to touch (about 10 minutes after cooking) provides the ideal cleaning temperature.
Dry Your Lodge Cast Iron Immediately After Washing
Drying your Lodge cast iron properly is just as important as the washing itself, and rushing this step leads to rust that requires significant effort to remove. Water is the enemy of bare cast iron, and even small amounts left on the surface can cause oxidation within hours.
After rinsing, immediately towel-dry the pan thoroughly, wiping in all directions to catch moisture in seams and around the handle. Feel the surface with your hand to ensure no damp spots remain, paying special attention to the inner cooking surface where water pools. Once towel-dried, place the pan on a burner set to medium-low heat for one to two minutes. This gentle heat evaporates any remaining moisture that the towel missed and warms the metal enough to accept the protective oil layer.
The brief heating also serves another purpose: it slightly expands the metal’s pores, allowing the protective oil to penetrate more deeply. After the pan is warm, add a small amount of neutral oil—vegetable oil, canola oil, or Lodge’s own seasoning oil—and use a paper towel to spread a thin, even layer across the entire cooking surface. This light oiling replaces any seasoning that may have been removed during cleaning and creates a protective barrier against moisture and air. The pan is now ready for storage, with its seasoning intact and protected.
Restore Damaged Seasoning With Proper Oiling
The seasoning on your Lodge cast iron is a natural non-stick layer developed through repeated use and proper care. Over time, this layer can thin in areas or become damaged, requiring restoration to maintain optimal cooking performance. Regular maintenance keeps seasoning strong, while periodic deep restoration addresses areas that have worn thin.
After each washing, apply a thin layer of oil to maintain the existing seasoning. Use just enough oil to lightly coat the surface—too much creates a sticky residue that turns rancid over time. Work the oil into the surface with a paper towel, then buff gently until no visible oil remains. This process, called “curing,” polymerizes the oil into a hard, protective layer that improves with each application. For pans that see daily use, this light oiling after every few uses maintains seasoning effectively.
For pans with visibly thin or damaged seasoning, a more intensive restoration process helps rebuild the protective layer. Heat the clean, dry pan on low heat for five minutes to ensure it’s completely dry. Apply a thin layer of oil using a paper towel, making sure to wipe away excess until the surface appears nearly dry. Place the pan upside down in a 400-degree oven for one hour, allowing the oil to polymerize into a hard, non-stick coating. This process can be repeated several times to build up a robust seasoning layer. Lodge recommends this oven method for restoring neglected pans or for maintaining pre-seasoned cookware during its first year of use.
Store Your Lodge Cast Iron for Long-Term Protection
Proper storage prevents moisture accumulation and protects your seasoning between uses. Cast iron requires breathing room, so the storage method you choose matters more than you might expect.
Store your Lodge skillet in a cool, dry location with adequate air circulation. A cabinet with good ventilation works well, though some kitchens are humid enough that a dedicated cast iron rack or hook provides better airflow. Never stack cast iron pans directly on top of one another without protection, as the friction damages seasoning and scratches the cooking surface. If stacking is unavoidable, place a paper towel or cloth between pans to protect the cooking surfaces.
The cooking surface should be clean and lightly oiled before storage, creating a protective barrier against humidity and air. Some cooks store their pans with a paper towel inside to absorb any moisture that might develop, changing the paper towel regularly in humid environments. Avoid storing cast iron in the refrigerator, as temperature fluctuations and humidity promote condensation and rust. Similarly, don’t cover pans with airtight lids, which trap moisture and accelerate seasoning degradation. With proper storage, your Lodge cast iron remains ready for use at any time, with its seasoning intact and protected.
Final Thoughts
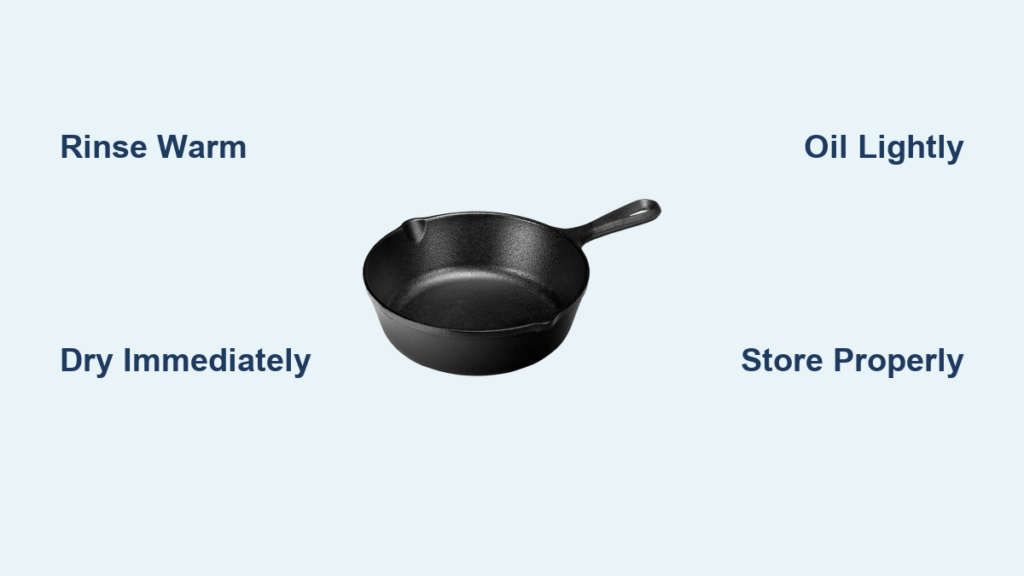
Learning how to wash Lodge cast iron properly transforms what many consider a chore into a simple routine that enhances your cookware’s performance. The key principles remain consistent across all cast iron care: clean promptly, dry immediately, oil lightly, and store properly. These four steps, performed regularly, maintain your seasoning and prevent the rust and damage that plague neglected pans.
Your Lodge cast iron is an investment that pays dividends with every meal prepared. Unlike non-stick pans that require replacement every few years, properly maintained cast iron improves with age, developing a natural non-stick surface that generations have relied upon. The minimal time spent on proper cleaning—usually just a few minutes after each use—ensures your skillet serves your family for a lifetime and beyond. Trust the process, avoid common mistakes, and your Lodge cast iron will reward you with exceptional cooking performance that simply cannot be replicated by modern alternatives.


