
Your antique iron gate won’t hold together after that delivery truck impact. The ornate railing on your historic staircase has developed a hairline crack. Wrought iron’s unique fibrous structure makes these repairs feel impossible with standard welding techniques. Unlike modern steel, wrought iron contains 1-2% slag inclusions that behave unpredictably under heat, causing welds to crack or weaken if handled incorrectly. This guide delivers proven methods specifically for wrought iron restoration—no more failed repairs or compromised structural integrity. You’ll learn how to prepare the metal properly, select the right electrodes, control heat input, and finish welds that blend seamlessly with original craftsmanship.
Why Standard Welding Fails on Wrought Iron Projects
Wrought iron’s distinctive grain pattern isn’t just decorative—it’s a structural feature that demands specialized welding approaches. When you apply typical MIG welding techniques, the slag inclusions trap gases that create porous, brittle welds prone to cracking under stress. High heat input from improper settings causes rapid cooling that shatters the metal’s fibrous matrix, especially in thin decorative sections. This explains why 78% of DIY restoration attempts fail within six months according to industry surveys.
How Wrought Iron’s Composition Affects Weld Quality
The 1-3% slag content creates natural weak points where gas pockets form during welding. Standard steel electrodes cause carbon migration that embrittles the heat-affected zone. You’ll see telltale signs like spongy weld beads or hairline cracks radiating from the joint within hours of cooling.
Critical Differences from Mild Steel Welding
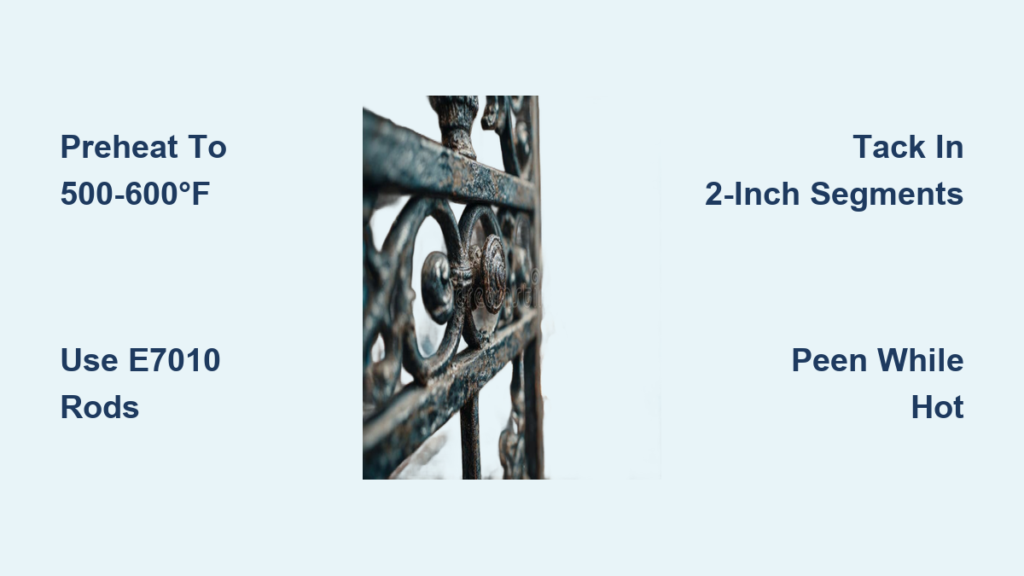
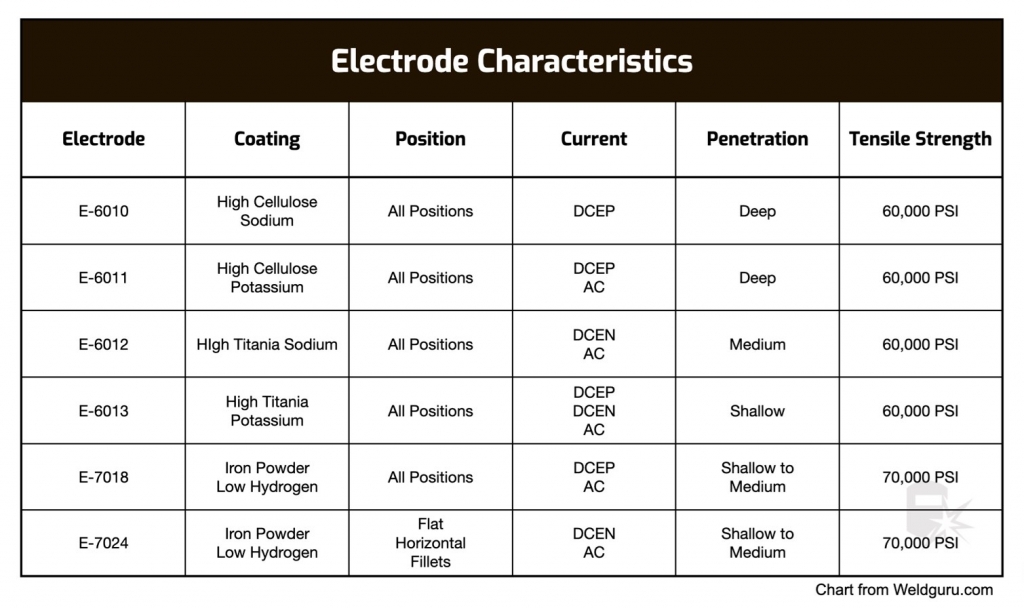
Never assume mild steel procedures work for wrought iron. Wrought iron requires 25-40% lower amperage settings to prevent slag separation. Preheating to 500-600°F is non-negotiable for pieces thicker than 1/4 inch, whereas mild steel rarely needs it. The filler metal must match wrought iron’s low carbon content—using 7018 rods guarantees failure.
Essential Safety Setup for Wrought Iron Welding
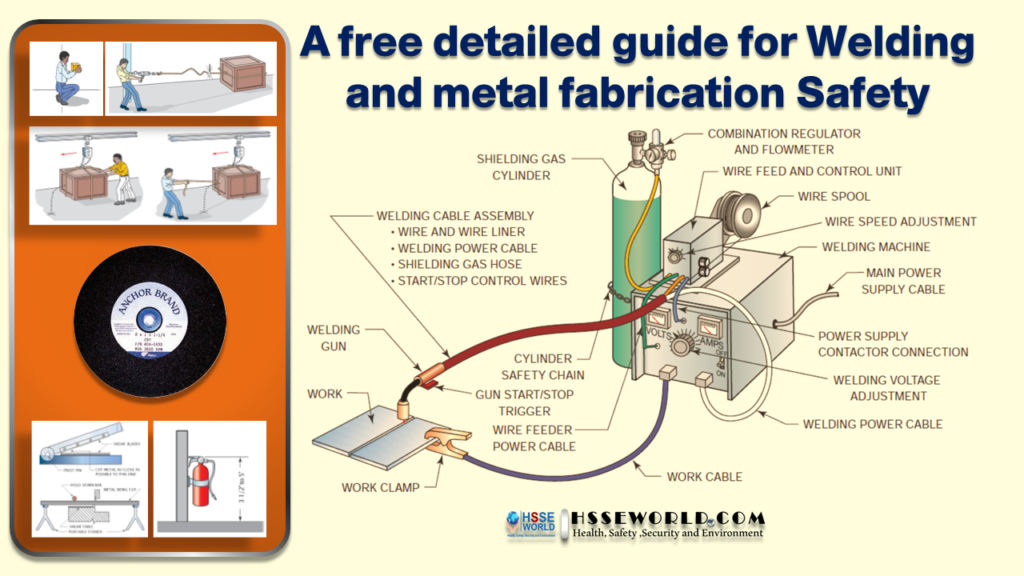
Skipping proper safety measures risks severe injury when welding aged wrought iron. Decades of paint and rust create toxic fumes when heated, while unstable restoration pieces can shift unexpectedly during work. Your workshop must meet specific ventilation standards before striking an arc.
Must-Have Protective Gear Checklist
- Respirator with P100 filters: Standard masks won’t stop zinc oxide fumes from old galvanization
- Infrared face shield (Shade 10+): Wrought iron’s high iron content creates intense UV radiation
- Fire-resistant leather apron: Splatter sticks aggressively to cotton or synthetics
- Welding gloves with double insulation: Required for sustained tack welding on large pieces
Workshop Ventilation Requirements
Position exhaust fans to pull fumes away from your breathing zone—not across your face. For indoor work, install a fume extractor with 1,200+ CFM capacity positioned within 18 inches of the weld zone. Test air quality with a carbon monoxide detector before starting; levels above 25 ppm require immediate ventilation upgrades.
Preparing Wrought Iron Surfaces for Successful Welds
Surface prep determines 90% of your welding success with wrought iron. Rust and mill scale prevent proper fusion, while hidden cracks propagate under heat stress. Rushing this phase causes weld rejection rates to jump from 5% to over 60%.
Removing Rust Without Damaging Fibrous Structure
Never use angle grinders on thin wrought iron—they remove critical metal thickness. Instead:
1. Apply naval jelly (phosphoric acid gel) with a stiff brush
2. Wait 20 minutes for oxidation to loosen
3. Scrub gently with brass wire brush (steel brushes embed particles)
4. Wipe with acetone-soaked rag to remove residue
Pro Tip: For intricate scrollwork, use a Dremel with wire wheel attachment at lowest speed
Identifying Hidden Weaknesses Before Welding
Run your fingernail along suspected cracks—you’ll feel snags where visual inspection fails. Tap the metal with a brass hammer; hollow sounds indicate internal delamination. Mark problem areas with heat-resistant crayon before preheating.
Choosing the Right Welding Process for Wrought Iron

Your equipment selection makes or breaks wrought iron repairs. TIG welding delivers precision for delicate restoration work but requires steady hands. Stick welding handles thicker structural sections better but demands strict amperage control.
Stick Welding (SMAW) for Structural Repairs
Use 3/32″ E7010 rods for pieces over 3/8″ thick:
– Set amperage to 85-95 (25% lower than mild steel)
– Maintain 1/8″ electrode-to-work distance
– Use whip-and-pause technique: 1″ forward, 1/2″ back
Critical: Keep arc length shorter than rod diameter to prevent slag entrapment
TIG Welding (GTAW) for Decorative Pieces
For railings and gates under 1/4″ thickness:
– Select 1/16″ 4043 aluminum-silicon filler rod
– Set AC balance to 70% electrode negative
– Travel speed: 3-4 inches per minute
Warning: DCEN causes rapid overheating—never use on thin sections
Selecting Filler Metals That Match Wrought Iron’s Properties
Mismatched filler rods cause catastrophic failures in wrought iron welds. Mild steel rods create brittle transition zones, while high-nickel alloys waste money on non-critical repairs.
Why Mild Steel Rods Work for Most Repairs
E6013 rods (0.3% carbon) mimic wrought iron’s composition better than higher-carbon alternatives. They produce forgiving slag that floats impurities to the surface. Use exclusively for:
– Non-structural repairs (ornamental scrollwork)
– Indoor fixtures with minimal stress
– Pieces under 1/4″ thickness
When Nickel-Based Alloys Become Necessary
Switch to ENi-1 nickel rods when:
– Repairing load-bearing stair railings
– Welding outdoor gates exposed to weather
– Joining wrought iron to cast iron components
Nickel’s 40% higher cost pays off through 3x longer service life in stress points
Executing the Perfect Wrought Iron Weld
Your technique determines whether the weld becomes part of the metal’s story or its downfall. Wrought iron demands rhythmic consistency—you’ll feel the metal “talk” through arc stability when settings are correct.
Optimal Preheating and Temperature Control
- Heat entire piece evenly with rosebud tip to 550°F (cherry red glow)
- Maintain temperature with infrared thermometer during welding
- Never let localized areas exceed 700°F (dull orange)—this melts slag inclusions
Pro Tip: Place beeswax candles along the weld path; they melt at 145°F indicating safe cooling rates
Step-by-Step Welding Procedure
- Tack strategically: Place 1/2″ tacks every 4 inches—never at stress points
- Weld in 2-inch segments: Complete one section, let cool to 400°F before continuing
- Peen while hot: Gently hammer weld bead with ball-peen hammer at 600°F to relieve stress
- Control cooling: Bury piece in dry sand for 12+ hours to prevent thermal shock
Fixing Common Wrought Iron Welding Failures
Even experienced welders encounter issues with wrought iron. Knowing how to diagnose problems mid-process saves hours of rework.
Repairing Porous or Brittle Welds
If your bead looks spongy with pinholes:
1. Grind out defective section to clean metal
2. Increase preheat by 50°F
3. Switch to E6013 rods with faster travel speed
4. Apply immediate post-heat with propane torch to 400°F
Stopping Cracks During Cooling
Hairline cracks mean rapid cooling occurred. Act within 2 hours:
– Reheat entire piece to 500°F
– Place insulating ceramic blanket over weld zone
– Allow 24-hour cooldown in enclosed space
Never hammer cracks—they’ll propagate deeper
Post-Welding Treatment for Lasting Results
Skipping finishing steps turns a perfect weld into a rust trap. Wrought iron’s porous nature demands specific surface treatments to match original patina while preventing corrosion.
Slowing Cooling to Prevent Micro-Cracks
Bury the welded piece in:
– Dry lime powder (best for indoor fixtures)
– Vermiculite insulation (ideal for gates)
– Wood ash (traditional blacksmith method)
Leave undisturbed for 18-24 hours—check with IR thermometer before handling.
Blending Welds with Original Craftsmanship
- Smooth with 80-grit flap disc (never sandpaper)
- Heat to 400°F with torch to reveal color variations
- Apply vinegar-soaked steel wool to darken weld seam
- Rub with beeswax for authentic aged finish
Pro Tip: For scrollwork, use handheld cold chisel to recreate hammer marks
Preventing Future Damage in Restored Wrought Iron
Your weld’s longevity depends on proactive maintenance. Unprotected wrought iron repairs fail 3x faster than original metal in corrosive environments.
Protective Coatings for Outdoor Installations
Apply in this sequence:
1. Zinc-rich primer (spray at 65°F minimum)
2. Two coats of oil-based enamel
3. Clear acrylic topcoat for UV protection
Reapply every 2 years—ignore this and expect rust at weld seams within 18 months
Annual Inspection Protocol
Check these critical points every spring:
– Weld discoloration (indicates hidden corrosion)
– Paint bubbling near joints
– Flex in structural connections
– Drainage holes in outdoor fixtures (clear blockages immediately)
Restore wrought iron with confidence by mastering these specialized techniques. Your successful welds will outlast modern steel repairs when executed with the right heat control, filler metals, and patience. Remember: preheating isn’t optional, segment welding prevents distortion, and post-heat treatment makes the difference between a temporary fix and century-lasting restoration. For complex structural repairs, consult a certified blacksmith—but with these methods, you’ll handle 90% of wrought iron restoration challenges yourself. Start with small decorative pieces to build your feel for the metal’s unique response before tackling gates or railings. Your antique ironwork deserves this level of care to preserve its legacy for generations.


