
Adding a patch to your favorite hat transforms plain headwear into personalized style without sewing skills. Whether you’re customizing a baseball cap with your favorite logo, adding team spirit to a beanie, or repairing damaged embroidery, iron-on patches provide the quickest solution. Many people struggle with patches that peel after washing or fabrics that scorch during application—problems easily avoided with the right technique. This guide reveals exactly how to iron a patch onto a hat securely while protecting delicate materials, with specific temperature settings for cotton, polyester, and wool fabrics. You’ll learn professional tricks for curved surfaces, troubleshooting tips for common mistakes, and how to make your patch last through countless wears and washes.
Choosing the Right Patch and Hat Combination
Selecting compatible materials makes or breaks your iron-on patch project. Not all patches adhere equally well to different hat fabrics, and mismatched combinations lead to peeling patches or damaged headwear.
Optimal Patch Types for Headwear
Embroidered patches with heat-activated adhesive backings work best for most hats, bonding securely to cotton and polyester blends. For curved baseball caps, choose smaller designs under 2 inches that conform smoothly to the rounded surface without bubbling. PVC patches withstand heavy wear but require higher temperatures that may damage delicate fabrics. Twill patches create that classic sports look but need firm pressure to bond properly to structured caps. Avoid thick, rigid patches on flexible beanies—they’ll crack during normal wear as the knit fabric stretches.
Hat Fabric Heat Tolerance Guide
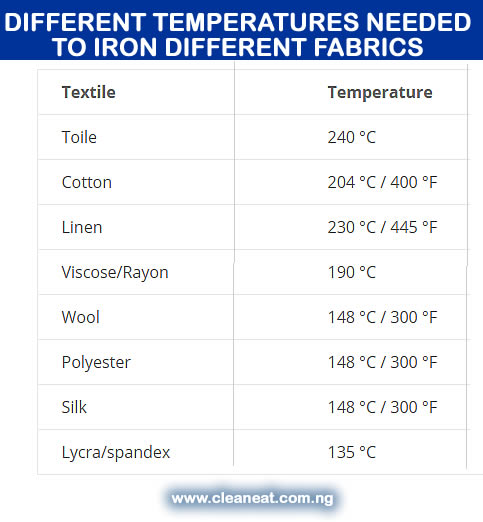
Cotton baseball caps tolerate the highest temperatures (385-400°F), making them ideal for beginners attempting to iron a patch onto hat material for the first time. Polyester blends require caution—set your iron to medium heat (300-340°F) to prevent shiny spots or melting. Wool beanies need the gentlest approach with medium-low heat (280-300°F) and a protective pressing cloth. Test heat settings on an inconspicuous area first, especially with vintage hats where fabrics may have weakened over time. Structured caps with foam stiffeners present unique challenges since the multiple layers heat unevenly—focus application on the fabric crown rather than stiffened areas.
Essential Setup for Successful Patch Application
Proper workspace preparation prevents common disasters like melted patches, distorted hat shapes, or accidental burns that ruin your project before it begins.
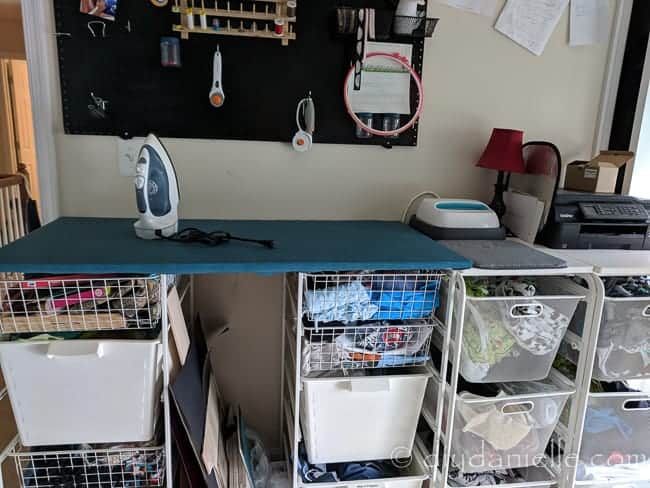
Creating Your Pressing Station
Lay a clean cotton towel on a hard, flat surface—this absorbs excess heat while providing firm resistance when you apply pressure. Never use synthetic fabrics as your base layer; they can melt under high temperatures. Position a rolled towel or foam block inside the hat to maintain its shape during pressing, especially crucial for structured baseball caps. Keep tweezers nearby for precise patch positioning and a timer within view to prevent overheating. Ensure your iron has reached the correct temperature before starting—cold spots cause uneven adhesion.
Required Tools Checklist
Beyond your iron, gather these essentials: a pressing cloth (100% cotton works best), washable fabric marker for alignment marks, and parchment paper as an alternative pressing surface for delicate fabrics. For curved hats, wrap a tennis ball in cotton fabric to create a rounded pressing form that matches the hat’s contour. Keep a spray bottle of water nearby to quickly cool overheated areas if needed, but avoid steam during application as moisture interferes with adhesive activation. Always unplug your iron when not actively pressing to prevent accidental burns.
Precise Temperature Settings for Different Hats
Getting the heat right separates successful patch applications from ruined headwear—this critical step determines whether your patch bonds securely or damages the fabric.
Material-Specific Heat Guidelines
For cotton baseball caps, set your iron to the cotton setting (385-400°F) and apply firm pressure for 20-30 seconds. Polyester blends require the synthetic setting (300-340°F) with shorter 15-second intervals—you’ll know the adhesive activated when the patch feels permanently bonded. Wool beanies need the wool setting (280-300°F) with a double layer of pressing cloth protection. If using a travel iron with limited settings, choose medium-high for cotton hats and medium for synthetics. Always test temperature on a hidden area first—look for shiny spots indicating excessive heat on polyester.
Dry Heat vs. Steam Considerations
Never use steam when attempting to iron a patch onto hat material—moisture creates steam pockets that prevent proper adhesive bonding. Empty your iron’s water reservoir completely before starting. Dry heat transfers more effectively through the patch backing to activate the adhesive. If your iron lacks a dry setting, place a folded paper towel inside the reservoir to absorb moisture. For stubborn patches that won’t adhere, slightly increase temperature rather than extending time—prolonged heat exposure damages hat fibers more than brief high-heat applications.
Mastering the Iron-On Patch Technique
Following this precise sequence ensures maximum adhesion while protecting your hat from common application mistakes that cause peeling or distortion.
Pre-Application Preparation Steps
Clean the application area with a dry cloth to remove oils and dust that prevent bonding. Position your patch exactly where desired, then secure it with temporary fabric glue dots (not regular glue) that wash out after application. For curved baseball caps, make alignment marks with a washable marker through the patch edges before removal. Stuff the hat crown with tissue paper to create a firm pressing surface that prevents fabric shifting during application. Double-check patch orientation—repositioning after initial heat application usually fails.
Correct Ironing Technique
Cover the patch with your pressing cloth, then apply firm, downward pressure without sliding the iron. Hold in place for the full recommended time—moving too soon creates weak spots. For curved surfaces, use circular motions with constant pressure rather than stationary pressing. Lift the iron straight up after each interval rather than sliding it sideways, which shifts the patch. Apply heat to edges first where peeling commonly occurs, then work inward. After the initial application, flip the hat and press from the inside for structured caps to reinforce the bond through multiple fabric layers.
Critical Cooling Process
Allow the patched area to cool completely (3-5 minutes) before handling—this curing time lets the adhesive fully set. Rushing this step causes the patch to lift as the adhesive remains pliable. During cooling, lay the hat flat with the patched area facing up to prevent distortion. For polyester hats, apply heat a second time after cooling for maximum durability—reheat for half the original time with slightly less pressure. Never test adhesion by peeling at corners during cooling; wait until fully set before checking the bond.
Fixing Common Patch Application Problems

Even experienced crafters encounter issues—knowing how to address these problems saves hats from failed patch projects.
Rescuing Poorly Adhered Patches
If edges lift after cooling, reapply heat with increased pressure using a folded pressing cloth for extra force. For stubborn corners, place a small coin over the lifting area during reheating to concentrate pressure. On thick hat materials, extend application time by 5-second intervals until the patch bonds securely. If the patch still won’t adhere, the adhesive may be incompatible with the fabric—switch to fabric glue or hand-sewing for permanent attachment.
Repairing Heat Damage
Shiny spots on polyester indicate excessive heat—buff gently with a soft cloth and vinegar solution to reduce visibility. For minor melting, carefully trim affected fibers with sharp embroidery scissors. If the patch scorched the hat fabric, you’ll need to cover the damaged area with a slightly larger patch. Prevention works best: always use lower temperatures than you think necessary and build up heat gradually during testing.
Correcting Positioning Errors
If you catch misalignment immediately (within 10 seconds of application), lift the patch corner with tweezers and reposition before the adhesive sets. For partially bonded patches, reheat thoroughly then slide into place using a smooth tool like a credit card under the pressing cloth. Severe misalignment requires complete removal—reheat until the patch lifts easily, clean residual adhesive with rubbing alcohol, then restart the application process.
Long-Term Patch Care and Maintenance
Your work continues after application—proper care ensures your ironed patch stays secure through regular wear and washing.
Washing Instructions for Patched Hats
Wait 48 hours after application before washing to allow full adhesive curing. Hand wash patched hats in cold water with mild detergent, avoiding vigorous scrubbing near the patch. If machine washing, turn the hat inside out and use the gentle cycle with cold water. Never use bleach or harsh detergents that break down adhesive bonds. Air dry hats away from direct sunlight—heat from dryers causes premature peeling.
Reinforcement for High-Stress Areas
Add 3-4 small hand stitches at patch corners for hats that see heavy use or frequent washing. Use matching thread color and tiny stitches that won’t show through the patch. Apply a thin line of fabric sealant around the patch perimeter after washing to prevent edge lifting. Avoid placing patches across seams or high-flex areas where constant movement stresses the bond.
When Ironing Isn’t the Best Option
Some hat materials simply won’t accept iron-on patches—know when to switch techniques for permanent results.
Sewing as a Reliable Alternative
For wool beanies, vintage hats, or any heat-sensitive materials, hand-sewing provides the most secure attachment. Use a sharp needle and heavy-duty thread, making small whipstitches around the patch edge. Knot threads securely on the inside and hide ends within hat seams. Sewing works better than ironing for large patches that won’t conform to curved surfaces.
Fabric Glue Application Method
Apply thin, even layers of permanent fabric adhesive to both the patch backing and hat surface. Press firmly for 60 seconds, then allow 24 hours for full curing before wearing. Choose glue specifically formulated for patches—it remains flexible after drying to withstand hat movement. This method works well for hats that can’t tolerate any heat exposure.
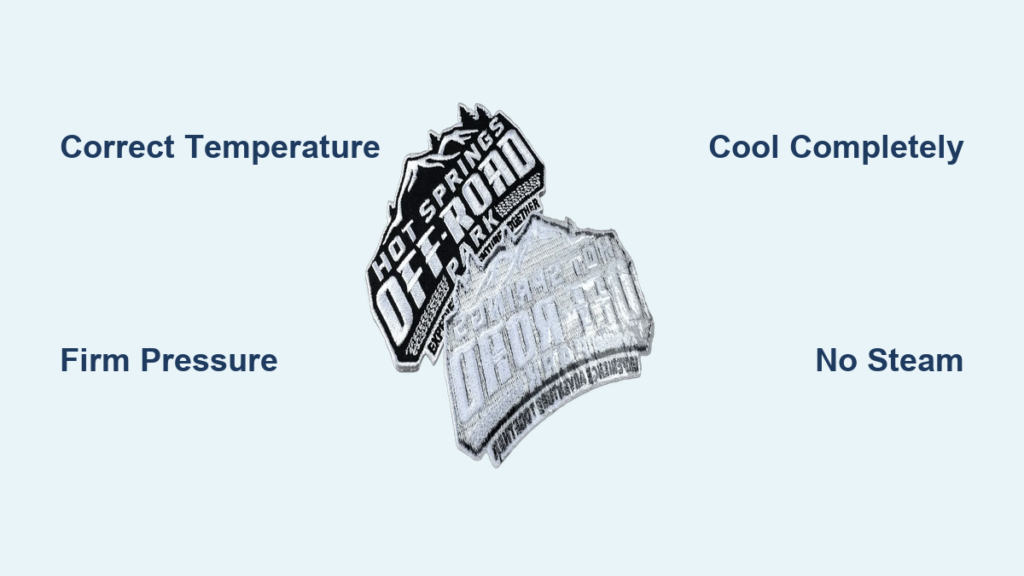
Properly ironed patches transform ordinary hats into unique statements that last. Remember the critical trio: correct heat for your specific hat material, firm consistent pressure during application, and complete cooling before handling. Test your technique on scrap fabric first, especially with delicate or vintage headwear. When in doubt about whether you can successfully iron a patch onto hat material, start with lower heat and build up—damage from too much heat is permanent, while insufficient heat can be corrected with additional applications. With these techniques, your customized hats will showcase your style securely through countless wears and washes.


